
Fibre Glass: What It Is and How to Choose a Repair
Choose a fibre glass repair by damage depth, not appearance. Check laminate, core, resin and finish compatibility before buying materials or starting work.
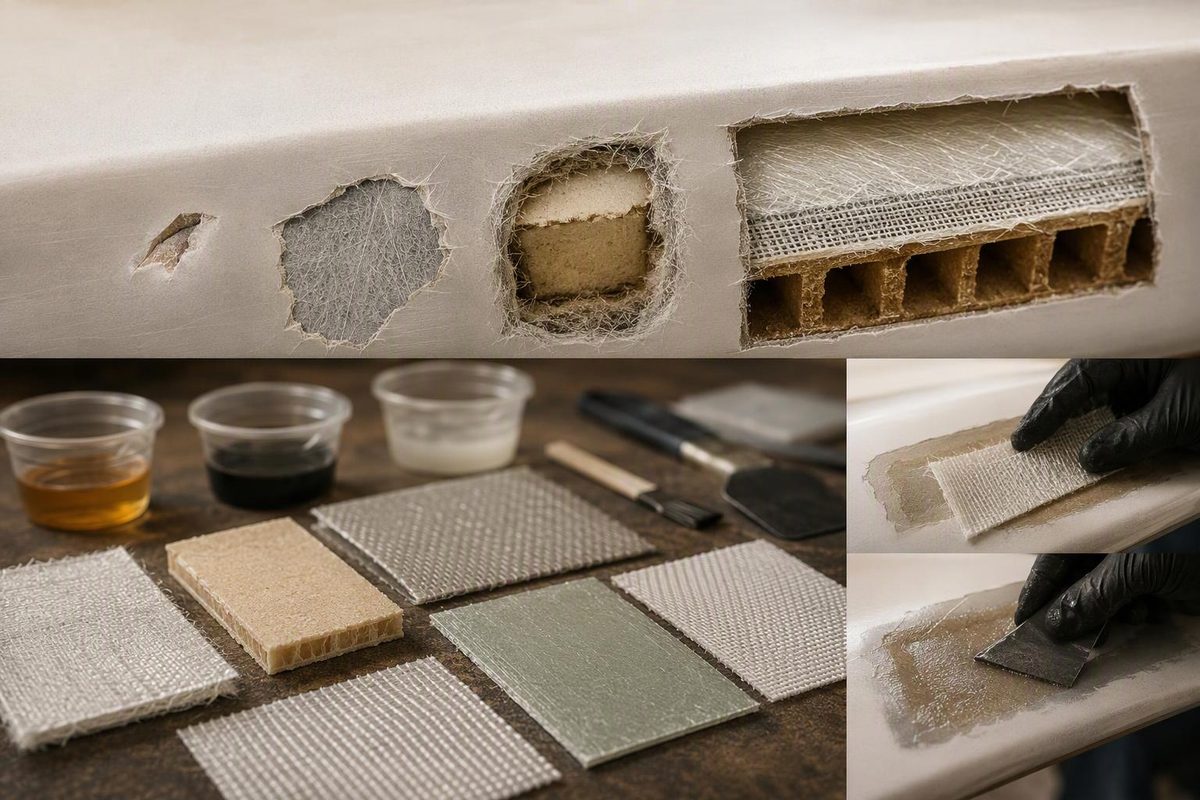
Fibre glass—usually written “fibreglass” or “fiberglass”—means either the glass fibres themselves or the composite made by combining them with resin. For repairs, choose materials by the damaged layer: a finish-only chip needs cosmetic work, broken reinforcing fibres need a laminate repair, and damaged core or separated skins need more than a surface patch. Resin, cloth and gelcoat do different jobs.
A glossy surface does not establish what lies beneath it. Confirm the part’s construction and damage depth before buying a boat, deck, tub or shower repair kit.
Select what you know about the part and damage; use the result to choose your next step.
Find Your Repair Route
Confirm Construction and Damage Depth
Do not choose a repair kit yet. Check manufacturer or model information, inspect the damaged layers and examine the back if accessible.
If this may be load-bearing and damage extent, core condition or reinforcement is uncertain, stop and arrange a qualified assessment.
What Each Route Means
Finish only: choose a compatible cosmetic repair after confirming sound laminate. Reinforcement damage: specify a laminate repair before restoring the finish. Soft areas or separated skins: assess the core and bond, rather than covering the surface. These routes do not diagnose hidden damage or specify a layup.
Sources: WEST SYSTEM Fiberglass Boat Repair & Maintenance manual; Epoxyworks, Fiberglass Tub and Shower Repair. Product compatibility must be checked separately.
Glass Fibres and Resin Form the Structural Laminate
A fiberglass laminate has two main ingredients: glass reinforcement and cured resin. The fibres carry most of the structural load; the resin holds them in position and helps transfer loads. Reinforcement may be woven cloth, chopped-strand mat or stitched fabrics with fibres arranged in particular directions. WEST SYSTEM’s boat-repair manual explains why continuity of the reinforced skins is essential to the structure.
A finished part may also have these layers:
| Layer | Function | Repair Implication |
|---|---|---|
| Gelcoat | Colour, gloss and protection | A patch does not restore broken fibres |
| Paint or another coating | Visible surface finish | Confirm the coating before choosing a finish |
| Core | Stiffness between reinforced skins | Check the core and skin-to-core bond |
On a gelcoated boat, gelcoat sits outside the reinforced laminate. The visible finish on another part is not necessarily gelcoat. A core may be lightweight material such as balsa or foam, bonded between reinforced skins to increase stiffness without a proportional increase in weight.
The WEST SYSTEM manual’s construction section describes gelcoat and core materials in boat laminates. Filling a surface chip does not reconnect broken reinforcing fibres or restore a failed skin-to-core bond. See the boat fiberglass hull construction guide for a closer look at solid and cored panels.
Damage Depth Determines the Repair Scope
Start with the manufacturer’s documentation or model information. A glossy white tub or shower should not be identified by appearance alone; confirm its construction before selecting a kit.
Inspect the damage without deliberately loading a suspect panel:
| What You Observe | What to Establish |
|---|---|
| A shallow chip or scratch | Is it confined to the finish, with sound laminate beneath? |
| A crack, exposed fibres or an impact mark | Does damage extend into the reinforcement or appear on the back? |
| A soft area, bulge or separated skin | Is the core or bond beneath the skin damaged? |
| A leaking or repeatedly cracking area | What underlying damage or movement must be corrected? |
If accessible, examine the back and nearby supports. WEST SYSTEM warns that impact damage can extend beyond the visible mark and affect adjoining structural members. A crack visible on the back indicates loss of load-carrying fibre continuity; its inspection guidance treats this as laminate damage, not a cosmetic defect.
Stop before patching a load-bearing hull, transom or deck if damage extent, core condition or the required reinforcement is uncertain. Arrange assessment by a qualified repairer. A small visible crack is not evidence of a small repair. For hull-specific warning signs, use the stress-crack triage guide.
Fiberglass tubs and showers also need this distinction: cracks may be shallow and cosmetic, or extend into the laminate and leak. Epoxyworks’ tub-and-shower guidance separates structural reinforcement from the later cosmetic work.
Resin, Reinforcement and Finish Must Be Compatible
“Fiberglass resin” is not a complete specification. Polyester, vinyl ester and epoxy are resin families used in composites; selection depends on fabric compatibility, service conditions and the intended part. Fibre Glast’s materials guide discusses these selection factors.
Check the actual product instructions for adhesion to the prepared substrate, including any previous repair. They must also establish compatibility with the reinforcement and planned finish, and suitability for the expected water, temperature and outdoor exposure.
Do not assume every fiberglass mat works with epoxy. For example, Fibre Glast’s 1½-ounce chopped-strand mat is specified for polyester or vinyl ester, not epoxy, because of its binder. Check the particular fabric rather than relying on its appearance. The cloth-versus-mat guide explains the practical differences.
For structural work, the repair plan must specify fibre direction, layer sequence and restored laminate thickness—not merely “add a few layers.”
Bond Preparation and Cure Control Are Product-Specific
For WEST SYSTEM epoxy, bonding surfaces must be clean, dry and sanded. Remove contamination before sanding so it is not ground into the surface, and remove unsound material rather than bonding over it. Follow the selected system’s preparation instructions; an aggressive solvent suitable for one substrate may not suit another. WEST SYSTEM’s preparation guidance also explains when cured epoxy needs blush removal before recoating.
Dry-fit reinforcement before mixing. During epoxy cloth application, check for wrinkles, trapped air and dry areas. Properly wetted glass cloth becomes transparent; white areas indicate dry fabric. Remove excess resin without squeezing the cloth dry. The manufacturer’s application instructions describe these checks.
Use the specified resin-to-hardener ratio and mixing method. Do not add extra epoxy hardener to speed the cure. Larger mixed batches can heat up rapidly and have shorter working time. Follow the product’s batch-size, temperature, recoat and cure limits, rather than a generic “leave overnight” rule. WEST SYSTEM’s mixing guidance explains both ratio control and heat buildup.
Dust and Chemical Vapours Require Different Protection
Before sanding or mixing, plan dust capture, ventilation, eye protection, protective clothing and chemical-compatible gloves. Use each product’s safety data sheet to check hazards and required protection.
Select respiratory protection for the actual hazard: a particulate filter for dust does not protect against chemical vapours. NIOSH identifies eye, skin and lung hazards from fibrous-glass exposure, while WEST SYSTEM’s safety guidance addresses epoxy contact, vapours and sanding dust.
Proceed only when you can identify the substrate, define the damaged layers, specify compatible materials and maintain the required cure conditions. Those checks support a repair plan; they do not replace a structural assessment.