
Composite Parts: Identify, Repair or Replace Fiberglass Components
Identify fiberglass composite parts, separate finish damage from laminate or core failure, and check repair compatibility and replacement specifications.
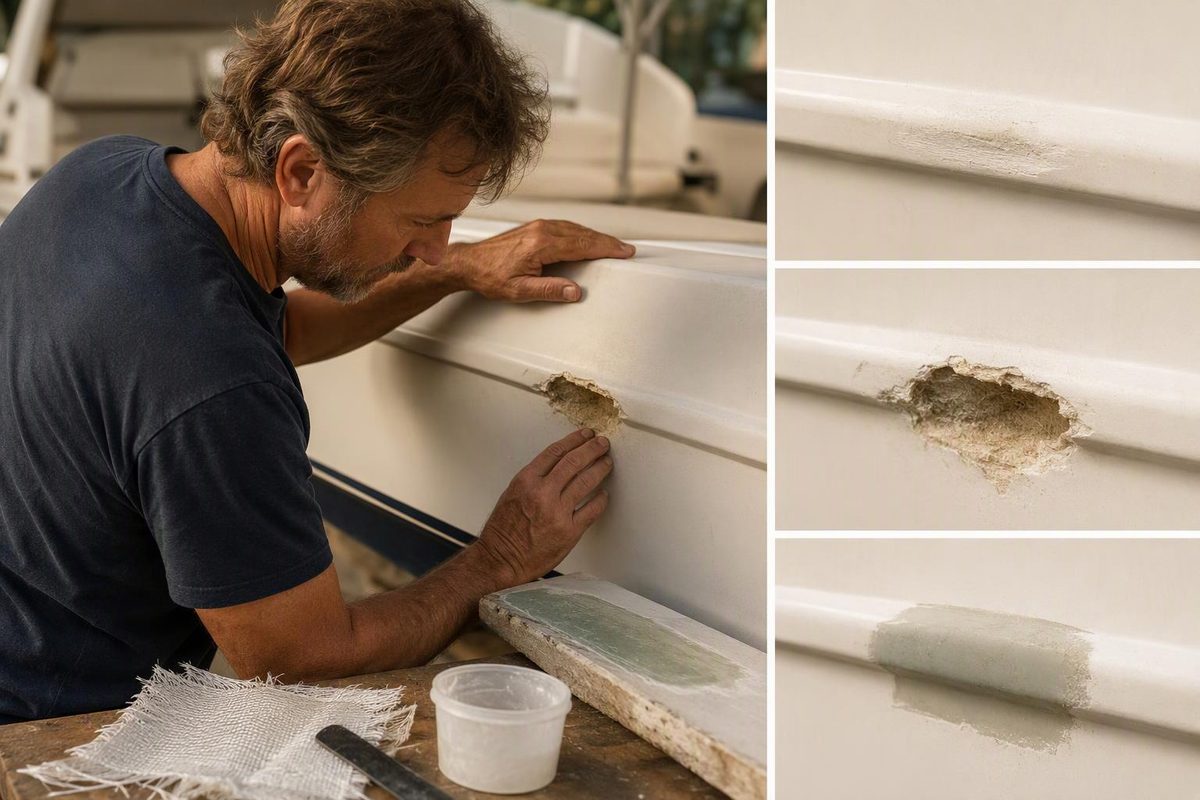
A fiberglass hatch, deck panel or molded cover is a composite part: reinforcing glass fibers held together by cured resin. Some parts also contain a lightweight core between two reinforced skins. The visible finish is only one layer of the assembly.
Before buying a replacement or opening a repair kit, establish three things: what the part is made from, what loads it carries, and which layers are damaged. A matching shape or a smooth patch does not establish structural equivalence.
1. Identify the construction—not just the surface
Fiber-reinforced composite parts can use glass, carbon or aramid reinforcement with different resin systems. Fiber arrangement and resin selection help determine their properties; “composite” alone is not a useful repair specification. Performance Composites’ design guide explains these material combinations and how fiber direction can be tailored to the loads.
For a fiberglass component, distinguish these layers and attachment areas:
| Layer or area | What it does | What to establish before repair |
|---|---|---|
| Gelcoat or paint | Provides the surface finish; gelcoat also helps protect the underlying laminate | Is damage confined to the coating? What finish system is present? |
| Fiber-and-resin laminate | Carries and distributes loads | Are fibers broken, or are layers separating? What reinforcement and resin were used? |
| Core, where fitted | Separates the skins to increase panel stiffness without a proportional weight increase | Is it crushed, deteriorated or detached from a skin? |
| Mounting and support areas | Connect the component to the surrounding assembly | Are fasteners, bonded joints and supports intact? |
WEST SYSTEM’s fiberglass boat repair manual describes solid and cored laminates and explains why skin continuity matters to load-carrying ability.
Look for a part number, manufacturer drawing or repair instructions. Photograph accessible edges, the underside and attachment points without cutting into sound material merely to identify it. Record dimensions and existing damage. If the resin or core remains unknown, ask the manufacturer rather than guessing from color.
2. Separate a finish repair from a structural repair
A scratch confirmed to be confined to gelcoat is a different job from a fracture through reinforcement. Likewise, an intact outer skin can conceal a crushed core. Fibre Glast’s repair guide distinguishes tears, punctures, crushed cores and delamination, and notes that damage can extend beyond what is visually apparent.
Use these as decision points:
- Finish-only damage: consider a cosmetic repair once the underlying laminate and support are confirmed sound.
- Broken fibers or separated laminate layers: plan a reinforced repair, not simply filling and painting the defect.
- Core damage or skin-to-core separation: assess the sandwich assembly; repairing the visible face alone does not address the failed interior.
- Damage near hinges, hardware or bonded supports: investigate the attachment and how loads pass into the surrounding part.
Stop point: keep a load-bearing part out of service when its integrity is uncertain. Hull damage, a weakened walking surface or an unstable attachment needs a part-specific assessment before cosmetic work. Crack length alone does not establish whether a repair is suitable for DIY work. For marine examples, see the boat fiberglass hull guide.
3. Check whether a repair can restore the part’s function
Repairing a cured composite creates a secondary bond to the existing structure. Surface preparation and adequate bonding area therefore matter. Fibre Glast recommends matching the original laminate’s thickness and reinforcement orientation where possible, and warns that an unnecessarily thick patch can introduce a local stiffness change. Its guide also puts manufacturer-specific repair instructions ahead of general procedures. Read the repair principles.
Before proceeding, confirm:
- The damaged material can be removed and the required bonding area reached.
- The part can be supported in its correct shape during cure.
- The reinforcement, resin and any replacement core have been specified.
- The preparation method, cure conditions and final inspection are defined.
Stop point: if the original structural layup is unknown and failure could cause injury or loss of the boat, obtain a qualified repair assessment rather than inventing a layer count.
4. Compare replacement parts by more than fit
For a replacement hatch, panel or cover, ask the supplier to confirm:
- Exact model, dimensions, curvature and mounting pattern.
- Intended use and allowable loads, particularly whether it is rated as a walking surface.
- Solid or sandwich construction, including core and attachment details.
- Suitability for the expected water, sunlight, heat or chemical exposure.
- Required supports, fasteners, bedding or bonding system.
These questions matter because fiberglass properties can be tailored through reinforcement direction, resin and sandwich construction—not simply overall thickness. Performance Composites describes that design flexibility.
Compare the installed replacement cost with the complete repair: assessment, materials, access, finishing, cure downtime and inspection. A cheaper patch is not a saving if it cannot reliably restore the required function.
5. Confirm resin, finish and cure before starting
Do not choose resin solely because the package says “fiberglass.” Check the selected system’s instructions for bonding to the existing substrate, reinforcement compatibility, mixing, working temperature and cure requirements. Use the fiberglass resin selection guide to organize those checks.
Plan the finish at the same time. WEST SYSTEM notes that some one-part polyurethane coatings may not cure properly over epoxy and recommends a test panel that duplicates the intended preparation, coatings and application conditions. Its manual also explains that epoxy continues curing after it becomes a sandable solid. Follow the selected system’s return-to-service requirements rather than relying on surface hardness alone.
Before grinding or mixing, read the resin and coating safety data sheets, arrange dust control and ventilation, and use protective equipment appropriate to the materials and task. WEST SYSTEM’s epoxy safety guidance emphasizes avoiding skin contact, vapors and sanding dust, especially from partially cured epoxy. Finish appearance, cure and structural acceptance are separate checks; complete all applicable checks before reinstalling or loading the part.