
Fiberglass Kayak: How to Choose, Inspect and Repair One
Learn how to assess a fiberglass kayak, inspect a used hull, and distinguish cosmetic gelcoat work from a structural laminate repair.
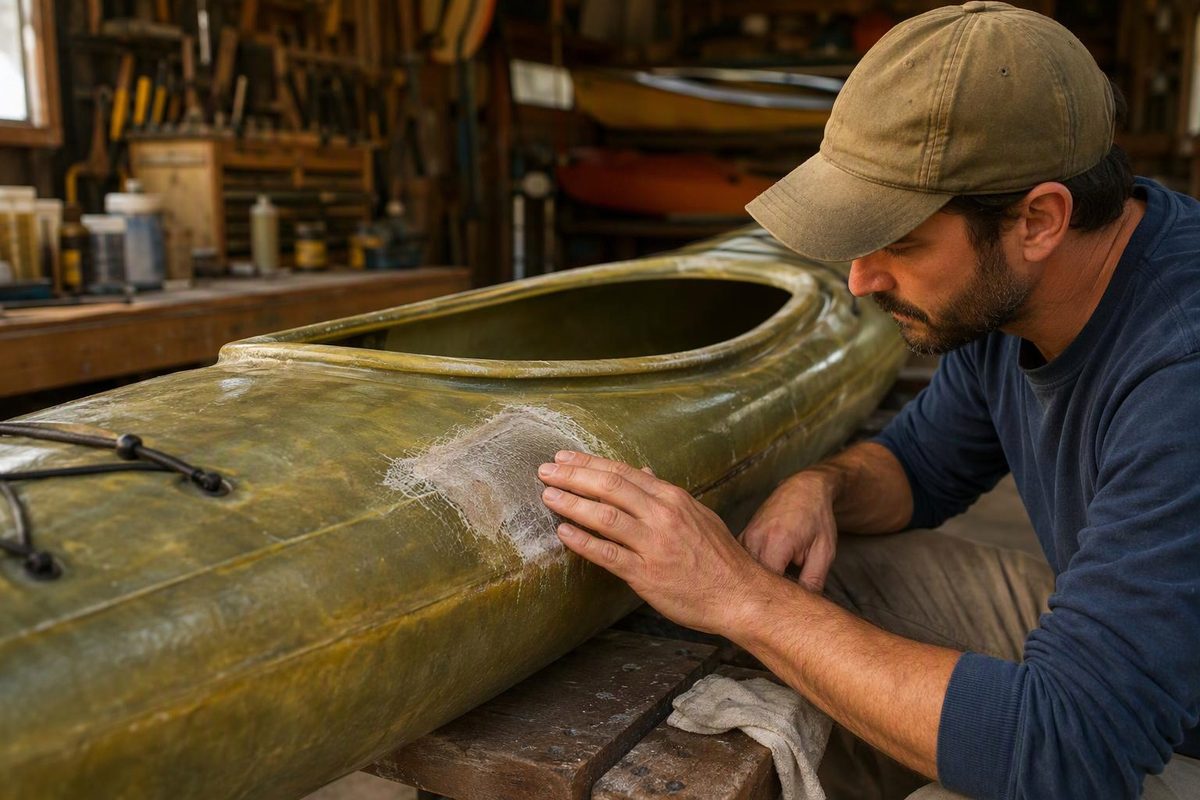
A fiberglass kayak is a molded composite boat, not a shell of glass alone. Glass-fiber reinforcement carries structural loads, while cured resin holds the fibers in position. On gelcoat-finished models, the pigmented outer layer supplies color and surface protection but little structural strength.
The hull and deck are normally molded separately and joined at a seam. Bulkheads, hatch rims, seats and deck fittings add more bonded or fastened joints to inspect. Local damage is often repairable, but the correct treatment depends on whether it stops at the finish or extends into the load-carrying laminate.
Understand the layup before comparing weight
A fiberglass layup may contain woven cloth, mat or stitched reinforcement with polyester, vinylester or epoxy resin. Some kayaks combine glass with aramid, carbon or other fibers. Ask the builder for the model’s actual construction rather than identifying it from one visible interior layer.
In one documented production method, NC Kayaks sprays gelcoat into the mold first, then adds fiberglass laminate; it describes the gelcoat as a thin outer shell that protects against UV and abrasion (NC Kayaks construction overview). That sequence is common, but it does not establish the resin, reinforcement or laminate schedule used by every manufacturer.
Weight is similarly model-specific. Current Designs lists its fiberglass kayaks at about 52–54 pounds, compared with just under 50 pounds for its aramid layup and about 45 pounds for Carbon Innegra, depending on model (Current Designs layup comparison). Use those as examples, not category-wide specifications. Compare the published weight of the exact kayak and check whether hatch covers, seats or other removable equipment are included.
Choose the kayak before the laminate
A lighter layup helps only if the kayak fits and suits the intended water. Before buying, check:
- Fit: Adjust the foot braces and sit in the kayak. The thigh braces should provide contact without painful pressure, and you must be able to exit freely.
- Use: A short recreational kayak and a compartmented touring kayak solve different problems. Compare dimensions, cockpit opening, deck height, stated capacity and intended conditions.
- Flotation and storage: Inspect the bulkheads, hatch rims and covers rather than assuming every enclosed space is watertight.
- Handling ashore: Confirm that you can lift the complete kayak onto its rack or move it with a suitable cart.
- Parts support: Ask whether replacement hatch covers, skeg or rudder parts, proprietary fittings and matching gelcoat remain available.
If possible, test-paddle the model. Check entry, exit, stability, turning, tracking and whether the cockpit contact points remain comfortable beyond the first few minutes.
Inspect a used fiberglass kayak
Begin with a clean, dry boat in good light. Remove loose equipment and inspect the exterior and every accessible interior surface.
1. Separate finish wear from laminate damage
Shallow gelcoat scratches and scuffs are generally cosmetic. More concerning signs include exposed or broken fibers, punctures, soft or unusually flexible areas, cracks visible from both sides, and white fractured zones around an impact.
Do not judge a defect only by length. A short crack crossing the hull-to-deck seam or surrounding a loaded fitting may matter more than a long surface scratch. WEST SYSTEM’s composite repair manual explains that fibers carry most structural loads and that continuity of the resin-and-fiber skins is critical to the structure (fiberglass boat repair manual).
2. Inspect from inside
Use a flashlight through the cockpit and hatches. Look for:
- fractured or whitened reinforcement;
- loose hull-to-deck seam tape;
- old patches with dry fibers, bubbles or lifted edges;
- soft areas or separation between skins and core, where a core is present;
- cracking around the seat, foot-brace fasteners and carry points;
- gaps or separation around bulkhead edges.
An exterior hairline may be confined to gelcoat, but a corresponding interior fracture shows that it extends deeper. See when fiberglass cracks may be structural for additional warning signs.
3. Check compartments and fittings
Inspect hatch covers for cracks, distortion and incomplete seating. Seaward’s composite-kayak manual recommends checking a bulkhead by briefly trapping air under the neoprene hatch cover; loss of pressure indicates a possible leak (Seaward composite kayak manual). Follow the kayak maker’s method where available.
For a water test, work on dry ground with the kayak supported. Eddyline’s guidance uses 3–5 gallons in one compartment at a time, then moves the boat carefully to bring water to a suspected seam or fitting (Eddyline kayak care and repair). Do not fill the whole kayak: the weight becomes difficult to control and may overload the supports.
Operate the skeg or rudder, inspect cables and lines, and check fasteners for looseness or signs that they have crushed the surrounding laminate.
Match the repair to the damaged layer
Shallow gelcoat damage
A scratch that has not reached the reinforcement usually needs no structural work. It can be polished, left alone or deepened deliberately for a cosmetic gelcoat repair. Sea Kayaking UK warns that smearing a very thin layer of gelcoat into a shallow scratch may simply crack away (gelcoat repair guidance).
For a chip confined to gelcoat:
- Obtain a compatible gelcoat, preferably matched by the kayak manufacturer.
- Remove loose edges and form a clean recess that can hold the repair.
- Clean and abrade as the gelcoat maker specifies.
- Measure gelcoat and catalyst at that product’s stated ratio.
- Allow a full cure, then fair, wet-sand progressively and polish.
Stop if preparation reveals broken, loose or discolored reinforcement. Gelcoat can restore the surface, but it cannot replace structural fibers.
Cracked or punctured laminate
A structural patch requires suitable reinforcement and laminating resin, not cosmetic filler alone. It must bond to sound laminate and transfer loads gradually beyond the damaged area. Curvature, original laminate thickness, access from one or both sides, and the presence of a core determine the patch design.
Ask the builder to identify the original resin and reinforcement when possible. Epoxy is commonly used for secondary repairs to cured polyester or vinylester laminates, but it must be a complete, documented resin-and-hardener system. Never mix epoxy resin with polyester MEKP catalyst. Keep the approved components together and follow their ratio, temperature and cure requirements; epoxy resin and hardener must remain a matched pair.
A typical sequence is:
- Dry and stabilize the kayak. Do not laminate over wet, contaminated or moving material.
- Remove damaged material. Work back to solid laminate and taper the edge as specified by the repair system or builder.
- Support the shape. A puncture may need a temporary backing form that follows the original hull contour.
- Cut reinforcement before mixing resin. Size and orient the layers to restore the removed laminate rather than merely cover the opening.
- Wet out and consolidate. Saturate the fibers without leaving dry areas, trapped air or a resin-heavy puddle.
- Complete the specified cure. Cure depends on product, hardener and temperature—not clock time alone.
- Fair and protect the repair. Apply a finish compatible with the fully cured laminate.
A kayak-specific composite repair example demonstrates surface preparation, backing a substantial hole, adding reinforcement and finishing after cure (Western Canoe Kayak repair guide). Treat its material choices as one repair example, not a universal schedule.
If epoxy is used, protect it from sunlight with an approved coating. WEST SYSTEM says polyester gelcoat can be used over its epoxy in some repair situations after correct preparation and recommends a test panel to confirm compatibility (WEST SYSTEM finish-coating guidance).
Also confirm that the resin can wet the chosen reinforcement. Conventional chopped-strand mat may rely on a styrene-soluble binder and therefore resist wet-out with epoxy; check reinforcement compatibility before buying.
Stop before a structural repair becomes guesswork
Keep the kayak off the water and consult its manufacturer or a composite repairer when damage:
- crosses the hull-to-deck seam, cockpit rim or bulkhead attachment;
- covers a broad soft or delaminated area;
- involves a cored panel or unfamiliar hybrid layup;
- distorts the hull shape;
- surrounds heavily loaded fittings;
- follows a hard impact but cannot be inspected from inside;
- has been repaired repeatedly or continues to move; or
- cannot be cured within the repair system’s environmental limits.
Control dust while cutting, sanding or grinding. NIOSH states that fibrous glass can harm the eyes, skin and lungs and recommends consulting labels and Safety Data Sheets and controlling exposure at the source (NIOSH fibrous-glass guidance). Follow the resin, solvent, coating and abrasive manufacturers’ requirements for ventilation and personal protective equipment.
A fair surface and close color match show finishing quality, not restored laminate strength. Resolve any uncertainty about structure, watertightness or cure before returning the kayak to service.