
Fiberglass Repair: Match the Patch to the Damage
Choose the right fiberglass repair by damage depth, substrate and resin compatibility, with a practical workflow and clear DIY stop points.
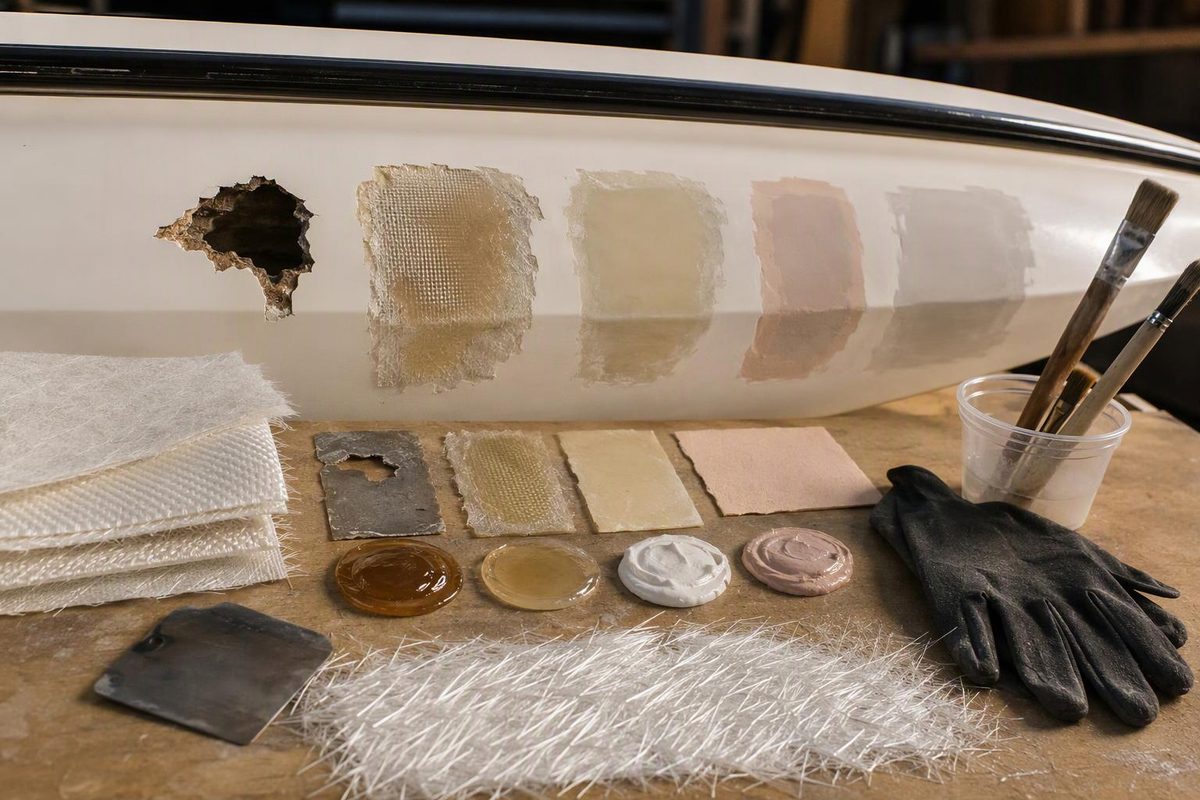
A fiberglass repair must replace what failed. A stable gelcoat chip may need only a finish repair. Broken glass fibers need reinforcement; damaged core or inadequate support needs attention beneath the surface. Filling everything with the same putty can hide the problem without restoring the part.
Use the sequence below to decide what to repair, what materials to buy and when to stop. It is a planning guide—not a structural repair specification for an unknown hull, deck or fixture.
1. Identify the surface and damage depth
First confirm what the part is made from. Check the manufacturer’s documentation and, where accessible, examine an unfinished edge or the back. Do not identify a bathtub’s bonding surface by color alone: an acrylic tub can also have fiberglass reinforcement behind its acrylic shell. Choose a system approved for the actual bonding surface. KOHLER’s explanation of tub construction.
For gelcoated fiberglass, separate these repair paths:
| What you find | Repair direction |
|---|---|
| Chip or scratch confined to the finish; underlying laminate is intact | Compatible gelcoat or finish repair |
| Gouge reaching reinforcement, split fibers or a crack visible on both sides | Assess and rebuild the damaged laminate with resin and glass reinforcement |
| Separated layers, a soft cored panel or crushed core | Diagnose and repair the underlying laminate/core system before finishing |
| Repeated cracking where the part moves or lacks support | Correct the movement or support problem as part of the repair |
Fiberglass fibers carry most of the loads in a boat laminate. WEST SYSTEM’s repair manual treats a crack visible on the back of a panel as a structural break, even if it is not an open hole. It also warns that impact damage can extend beyond the visible mark and affect adjoining frames or bulkheads. See the construction overview and Section 4.1.
Inspect both sides when possible. Look beyond the crack for loose material, changed shape, moisture and damaged attachments. Light tapping may reveal differences worth investigating, but do not use a reassuring sound as proof that a load-bearing part is safe.
For finish-only damage, follow the narrower gelcoat repair workflow.
2. Decide whether this is a DIY repair
Do not use crack length or hole diameter alone as a DIY cutoff. A small defect at a loaded attachment can require more careful assessment than a larger chip in a nonstructural cover.
A reasonable DIY starting point is a confirmed cosmetic defect on a stable surface, with known materials and instructions you can follow. Laminate repair adds the need to understand reinforcement, bonding area, backing and cure conditions.
Stop and seek a qualified repairer or, for a boat, a marine surveyor when:
- You cannot establish the depth or full extent of damage.
- A hull, transom, stringer, deck attachment or other load-bearing area is involved and you lack a repair specification.
- Core is wet, soft or crushed, or separated layers extend beyond the proposed patch.
- The part keeps moving, leaking or cracking after earlier repairs.
Keep a boat out of service when hull integrity is uncertain. WEST SYSTEM recommends professional advice when damage extent or hull soundness is in doubt; Fibre Glast likewise says part-specific manufacturer repair instructions take precedence over general guidance. WEST SYSTEM manual; Fibre Glast repair guide.
For tubs and shower pans, distinguish reinforcement from support. In its discussion of an acrylic tub crack, Multi-Tech Products identifies inadequate base support or movement as likely causes and explicitly separates restricting movement from adding structural strength. Do not assume a surface patch—or arbitrary expanding foam—solves both. Use the fixture manufacturer’s approved support method. Multi-Tech Products’ repair discussion.
3. Choose resin, reinforcement and finish together
Repairing cured fiberglass creates a secondary bond to an existing surface. Adhesion and preparation therefore matter, not just the resin’s cured hardness. Fibre Glast recommends matching the original laminate’s thickness and fiber orientation where possible rather than simply making the patch thicker. Composite repair principles.
Before buying a kit, confirm:
- Resin: Is it approved for bonding to this cured substrate and for the intended exposure? WEST SYSTEM provides preparation instructions for applying its epoxy to cured polyester laminate; that does not make every epoxy suitable for every plastic or coating. Substrate preparation guidance.
- Reinforcement: Does the fabric match the repair specification and resin compatibility requirements? A filler-only kit is not a substitute for a specified glass layup.
- Finish: Will the gelcoat, paint or fixture coating adhere and cure over the chosen resin and filler?
Finish compatibility can change the purchase. TotalBoat permits its gelcoat over fully cured epoxy prepared to its instructions for very small cosmetic repairs, but calls for an epoxy tie-coat primer on larger applications. It also says not to apply gelcoat directly over TotalFair. Treat those as product-specific instructions, not a universal rule about all epoxy. TotalBoat’s compatibility guidance.
Use the polyester-versus-epoxy guide for resin selection and the fiberglass boat repair-kit guide to check kit contents.
4. Prepare, laminate and cure in that order
Once the repair method is established:
- Set up safely. Control grinding dust at the source, provide ventilation and use eye protection, protective clothing and gloves compatible with the chemicals. Select respiratory protection for the actual dust or vapor hazard; a particulate filter is not vapor protection. Follow each product’s safety data sheet. WEST SYSTEM safety guidance.
- Clean before abrading. Remove wax, oil and other contamination without spreading it into the bonding surface. Use only substrate-compatible cleaners. For its epoxy, WEST SYSTEM calls for a clean, dry, sanded surface and advises against a routine solvent wipe when no solvent-removable contamination is present. Remove sanding dust before bonding. Surface preparation.
- Remove damaged material and prepare the specified bonding area. Support the original shape. Do not laminate over loose fibers or unsound material. For its fiberglass repair system, WEST SYSTEM specifies a minimum 12:1 bevel: a 1/8-inch laminate needs at least a 1½-inch bevel. This is an example, not a universal structural design; critical repairs may require different geometry. Bevel and thickness guidance.
- Pre-cut and dry-fit reinforcement. Arrange the layers in the order required by the chosen procedure, and prepare backing where needed to hold the wet patch’s contour.
- Measure and mix accurately. Use the specified resin/hardener or catalyst proportions. Do not add extra epoxy hardener to speed curing. Mix manageable batches: concentrated mixed epoxy can generate dangerous heat. Dispensing and mixing.
- Wet out and consolidate each layer. Work out trapped air and wrinkles without squeezing the fabric dry. With clear epoxy and glass cloth, properly wetted fibers become transparent; white dry areas need attention before the resin gels. Cloth application guidance.
5. Inspect before covering the repair
Follow the product’s temperature-dependent cure schedule, recoat window and return-to-service requirements. Sandable, ready to paint and ready for immersion are different milestones.
Before finishing, check for dry fibers, voids, lifting edges and an incorrect contour. Stop if defects remain; fairing compound should not conceal a faulty laminate. This visual check is not structural sign-off: critical repairs may require a specialist’s inspection or testing before returning to service. Fibre Glast’s inspection guidance.
Where epoxy amine blush is present, WEST SYSTEM specifies removal with clean water and an abrasive pad before subsequent preparation—not solvent alone. Cured-epoxy preparation.
Apply the compatible finish only after the underlying repair passes the appropriate inspection. A smooth, color-matched patch demonstrates finish quality; it does not, by itself, demonstrate restored structural strength.