
RV Delamination Repair Kit: How to Choose, Size, and Use One
An RV delamination repair kit can be practical when a localized, accessible section of sidewall has separated but the concealed backing remains dry, firm, and…
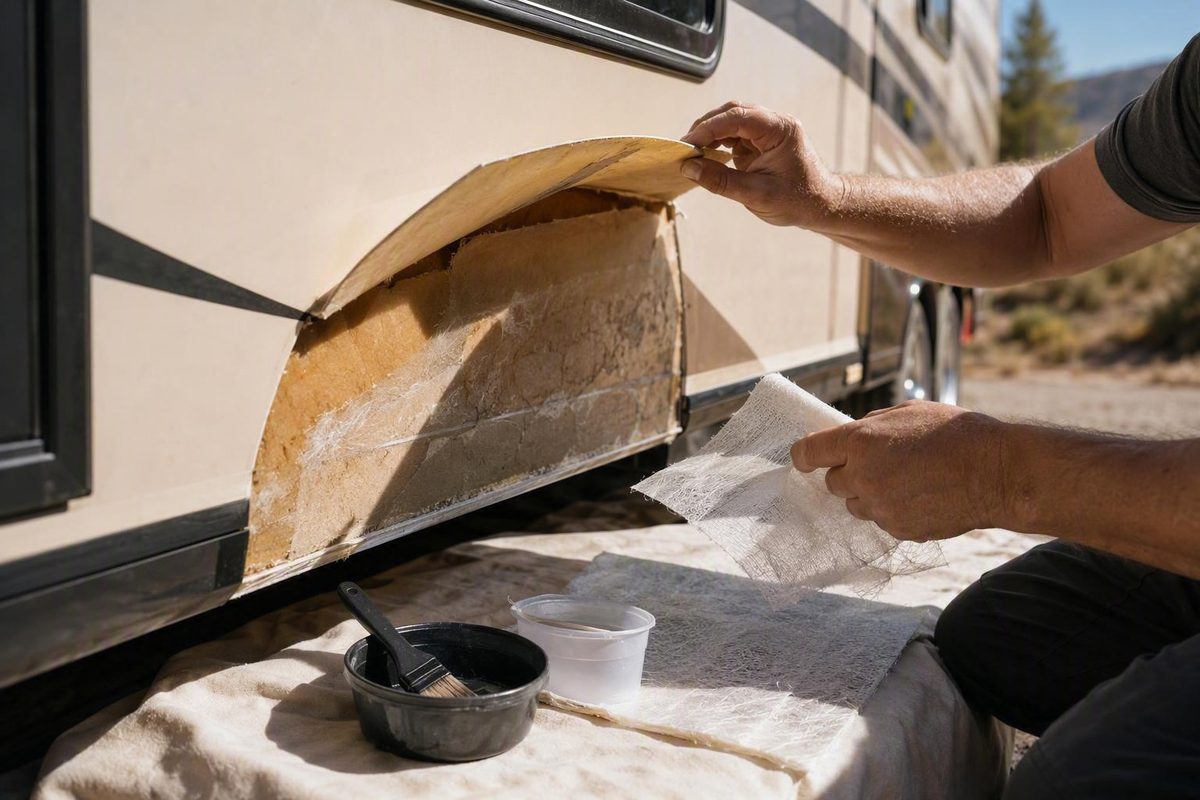
An RV delamination repair kit can be practical when a localized, accessible section of sidewall has separated but the concealed backing remains dry, firm, and reusable. It is not a substitute for removing rotten wood, drying wet insulation, correcting structural damage, or stopping an active leak.
Before buying a kit, establish four things:
- The source of water entry or other damage has been corrected.
- The separated layers are sound enough to rebond.
- The adhesive is documented as compatible with the actual wall assembly.
- You can deliver adhesive throughout the void and hold the wall uniformly flat while it cures.
Coverage and resin quantity matter, but they are secondary to those conditions. Deep gaps, porous backing, leakage, inaccessible pockets, and material left in applicators can make a nominally small repair consume more adhesive than expected. A much larger wall cannot safely be treated as a simple multiple of a small-kit repair.
What an RV delamination repair kit actually repairs
RV sidewall delamination is separation within a bonded wall assembly. Depending on the RV, that assembly may include an exterior fiberglass or Filon skin, thin plywood or luan, foam insulation, framing, and an interior decorative layer. When layers separate, the wall can lose some of the composite action intended by its laminated construction.
An injection-style RV delamination repair kit introduces a relatively low-viscosity bonding material into a closed or partly closed void. Syringes, flexible tubing, rigid injection pipes, or similar applicators carry the adhesive between layers. The skin and backing are then pressed together until the adhesive cures.
That is different from a fiberglass patch kit. A patch kit normally addresses missing or damaged surface material—a crack, puncture, hole, ground-out laminate, or removed section—using resin and often fiberglass reinforcement. A closed-wall delamination kit is intended to rebond layers that are still present and reusable. If damaged substrate must be cut away, the project has moved beyond injection alone and may require replacement core material, fiberglass work, and finish restoration. For more on that distinction, see this guide to fiberglass patch-kit contents and use.
Common warning signs include:
- Bubbles, blisters, or raised areas
- Waves, ripples, or distorted reflections
- An edge of siding that lifts or moves
- A soft or spongy area under light pressure
- A hollow sound when the panel is tapped
- Cracking, staining, or failed sealant near the affected area
These observations can help map a suspected separation, but they do not reveal the condition behind the skin. A bubble may cover clean, dry separation—or wet insulation, decayed luan, fragmented substrate, or a failed earlier repair. Typical fiberglass RV walls are layered assemblies, and visible waves, bubbles, sponginess, and hollow sounds do not by themselves establish that injection is appropriate (RV Life’s sidewall delamination overview).
Water intrusion is a common cause, particularly around roofs, windows, vents, doors, trim rails, and failed seams. It is not the only possible cause. Impact damage, adhesive breakdown, temperature movement, manufacturing problems, material degradation, and UV exposure may also contribute.
The useful distinction is therefore not simply “delaminated” versus “not delaminated.” It is:
- Separated but sound material, which may be injectable
- Damaged material, which must be exposed, removed, and replaced
- Uncertain concealed material, which should be assessed before adhesive is introduced
Decision guide: inject, open the wall, or call a professional
Injection is most plausible when the affected area is localized, the backing appears dry and firm, the separated layers have not disintegrated, and the void can be reached without blindly cutting into the wall. The skin must also return to an acceptable position during a dry clamping test.
Use this three-path framework before shopping.
| Finding | Most reasonable next path |
|---|---|
| Localized separation; apparently dry, firm backing; known construction; suitable access; uniform clamping is possible | Evaluate an injection kit |
| Moisture status, wall construction, void depth, or utility locations are uncertain | Obtain professional inspection or further assessment |
| Wet insulation, rotten luan, mold, fragmented backing, structural movement, widespread separation, or a failed previous repair | Open and rebuild the wall or obtain a reconstruction plan |
Path 1: Evaluate injection
A plausible candidate is a modest, clearly bounded area near removable trim, a window, a compartment frame, or another usable opening. Any backing visible through legitimate access should remain coherent rather than crumbling, compressing excessively, or shedding damaged material. The exterior skin should return to its intended position without extreme force.
Access and clamping are equally important. Being able to insert tubing at one edge does not establish that adhesive can reach every corner or isolated pocket. Likewise, a clamp pressing one small point is not equivalent to a broad pressure panel holding the entire treated section evenly.
Light pressure, tapping, or moisture readings may identify areas that deserve further investigation, but they cannot by themselves certify that concealed backing is dry, intact, and suitable for injection.
Path 2: Inspect before committing
Choose inspection rather than injection when you cannot establish:
- Whether the backing is wet
- Whether luan or plywood remains intact
- How many layers have separated
- Where framing, wiring, plumbing, or fixtures run
- Whether the visible bubble connects to a larger hidden void
- Whether an earlier repair has covered continuing damage
- Whether the skin can be pressed flat without distortion
Inspection through removable components may reveal concealed conditions. Non-destructive readings can help direct further investigation, but no reading or tap test alone proves that hidden substrate is sound. If the construction or proposed access route remains uncertain, consult an RV body-repair specialist rather than drilling exploratory holes.
Path 3: Open and rebuild
Stop planning an injection repair if you find:
- Soft, rotten, or badly delaminated luan
- Wet insulation or standing moisture
- Mold or persistently musty material
- Backing that crumbles or separates into fragments
- A large area unsupported by sound substrate
- Movement involving framing or structural joints
- Damage around a slide opening or another heavily loaded feature
- A previous injected repair that has failed
- No dependable way to plan access without risking concealed components
- No practical way to apply broad, controlled pressure
Adhesive can join suitable surfaces; it cannot recreate wood fibers or composite material that has lost its integrity. Injecting resin into rot may harden isolated material without restoring a continuous, dependable substrate.
Before either injection or reconstruction, locate and stop active water entry. Allow the assembly to dry, remove wet material when necessary, and replace damaged plywood or luan rather than bonding over it. That sequence is also described in a commercial repair guide covering leak correction, removal of wet material, substrate replacement, drying, rebonding, and finishing (Elite RV’s delamination repair sequence).
Do not use a universal square-foot threshold to choose between these paths. Area alone says nothing about moisture, gap thickness, wall design, substrate condition, access, absorption, hidden cavities, or clamping geometry. A small rotten section may demand reconstruction, while a larger but dry separation may warrant specialist assessment before a repair method is selected.
How to evaluate a kit before buying it
The available evidence does not provide neutral comparative bond-strength or long-term durability testing that establishes one product as the best RV delamination repair kit. Most specifications come from sellers and manufacturers, while much of the application evidence comes from individual DIY projects or commercial repair blogs.
This is therefore a suitability and planning guide with one well-documented product example—not a performance ranking of competing kits.
Buyer checklist
Ask the seller or manufacturer for the following before ordering:
- Adhesive chemistry: What type of resin or adhesive is supplied?
- Viscosity: Is it intended to travel through narrow closed-wall voids?
- Substrate compatibility: Which materials are explicitly documented?
- Existing-material compatibility: Can it contact factory adhesive, sealants, paint, or gelcoat?
- Foam compatibility: Is it approved for the precise foam in the wall?
- Working time: How much application time is available after mixing?
- Batch limits: What minimum and maximum batch sizes are allowed?
- Mixing method and ratio: Is the ratio measured by volume or weight?
- Application-temperature range: What ambient and substrate temperatures are required?
- Cure schedule: When may pressure be removed, and when is full cure reached?
- Flexibility and environmental resistance: Is the cured bond intended for vibration, heat cycling, and moisture exposure?
- Shelf life and storage: How old may the product be, and how must it be stored?
- Technical support: Will the supplier review photographs and a project plan?
- Warranty and returns: Are opened chemicals returnable, and what does any warranty actually cover?
- Documentation: Are current application instructions, a technical data sheet, and a Safety Data Sheet available?
The wall may contain fiberglass or Filon, luan or plywood, Azdel or another composite, foam insulation, factory laminating adhesive, sealants, paint, and gelcoat. “Works on RVs” is not a complete compatibility answer. Give the supplier the RV manufacturer, model, year, suspected wall construction, planned access method, and photographs, then ask for written confirmation covering the materials likely to contact the adhesive.
Composet sellers claim that the SLV system can rebond fiberglass, plywood or luan, Azdel, Styrofoam, and related RV wall materials. Those are vendor compatibility claims, not independent findings in the supplied evidence (Composet #12 manufacturer listing). Verify them against the current product documentation and the exact materials in your RV.
A product promoted for boat laminates, flooring, general composites, or construction bonding should not automatically be treated as interchangeable with a closed-wall RV adhesive. Products can differ in flow, working time, cure behavior, allowable gap, foam compatibility, flexibility, and surface-preparation requirements.
The selected product’s current instructions must control:
- Mix ratio and measuring method
- Permitted batch size
- Access-hole dimensions and layout
- Injection sequence
- Application temperature
- Working time
- Required pressure
- Clamping duration
- Cure conditions
Obtain the current technical data sheet, Safety Data Sheet, and application instructions before purchase. The supplied Composet product-page material does not establish its complete chemistry, numerical viscosity, application-temperature range, numerical pot life, ventilation requirements, cure schedule, storage limits, spill response, or disposal procedure #12kit. If the supplier cannot provide those details, treat that absence as a purchasing limitation rather than filling the gaps with instructions from another product.
Composet #12 kit contents, price, and qualified coverage
The Composet SLV #12 is the best-documented named closed-wall kit in the available material. That makes it useful as a concrete shopping example, not a proven best-performing option.
One manufacturer listing describes the following package:
- 1.2 quarts of Composet SLV bonding material
- Four 60 cc injection syringes
- Four feet of small-diameter tubing
- Two feet of large-diameter tubing
- One 12-inch rigid injection pipe
- Two calibrated mixing cups
- Four nitrile gloves
- Four mixing sticks
- Four composite shims
- One mixing or preparation trowel
- An instruction sheet
- A data sheet
- Project analysis and technical support
Those contents and support items are taken from the manufacturer’s supplied listing and should be reconfirmed before purchase because package contents can change.
Price snapshot
The supplied source material showed two different prices:
- The manufacturer listing displayed $155 plus shipping to the continental United States.
- The retailer listing displayed $162, with shipping calculated at checkout (RV Roof and Wall’s #12 product page).
These figures are source snapshots, not confirmation of current stock or checkout totals. Recheck price, availability, taxes, shipping, package contents, technical support, warranty terms, and return restrictions immediately before ordering. Confirm whether support comes from the manufacturer, retailer, or both, and whether project review is included or discretionary.
What “about 10 square feet” means
The seller describes the #12 as typically sufficient for one single-layer application of up to approximately 10 square feet while explicitly warning that actual coverage depends on project variables. The same seller ecosystem promotes approximate planning figures of 25 square feet for the #24 and 50 square feet for the Master kit; these are vendor estimates rather than guaranteed yields (Composet’s kit-size overview).
Square footage measures surface area, but adhesive consumption depends on the volume to be filled and losses along the way. Relevant variables include:
- Average void thickness
- More than one separated layer
- Porous, cracked, or damaged backing
- Channels around framing
- Adhesive escaping through seams or openings
- Irregular wall geometry
- Pockets that cannot be reached directly
- Resin left in cups, syringes, and tubing
- Overfilling or repeated passes
- Application technique
An 8-square-foot area is numerically below the seller’s approximate 10-square-foot figure, but that does not guarantee one #12 kit will complete the repair. A deep gap, absorbent backing, connected hidden void, or leakage into another cavity could consume the available material early.
Conversely, buying a larger kit does not make unsuitable damage injectable. More adhesive cannot correct wet insulation, rotten wood, inaccessible voids, or inadequate clamping.
A forum discussion about a roughly 120-square-foot wall included speculation that the job might use less than one gallon, but the estimate was expressly uncertain and dependent on distribution and clamping. It is not a dependable purchasing formula and should not be converted into gallons per square foot (iRV2 discussion of a large delaminated wall).
What the kit does not include: tools, bracing, safety gear, and total cost
Resin and syringes are only part of the project. Before comparing a kit price with a professional quote, inventory everything required to access, protect, clamp, reseal, and finish the wall.
Access tools
Possible access equipment includes:
- Screwdrivers and nut drivers
- Trim-removal tools
- Utility knife or scraper
- A drill and depth-control equipment if the product instructions and repair plan require holes
- Flashlight, inspection camera, or mirror
- Measuring tape and straightedge
- Markers and low-tack layout tape
- Containers for organized hardware storage
Removing a window, door, vent, rail, compartment frame, or trim strip can create useful access, but it also creates a resealing job. Photograph fasteners, shims, flange positions, and sealant locations during disassembly.
Do not drill until the wall construction and drilling depth have been established. Product-specific guidance may require a depth-controlled bit; for example, Chemique’s named Axil system specifies a bit with a depth gauge rather than uncontrolled drilling (Chemique’s Axil FloorFix instructions). If you cannot locate framing, wiring, plumbing, or the interior finish with sufficient confidence, do not create blind access holes.
Pressure-distribution materials
Likely extras include:
- Broad plywood cauls or pressure panels
- Straight lumber
- Scrap wood blocking
- Clamps
- Ratchet straps
- Wedges and additional shims
- Finish-protecting padding
- Stable supports or bracing points
Broad panels distribute pressure across an area instead of concentrating one clamp’s force at a small point. Build the system before mixing and verify that the wall returns to an acceptable plane under controlled pressure. A firsthand DIY project used plywood, lumber, scrap wood, clamps, wedges, shims, and other bracing materials and emphasized rehearsing the setup in advance (RV With Tito’s delamination project).
Surface and spill protection
Prepare:
- Masking tape
- Plastic sheeting
- Absorbent material
- Drip trays or disposable containers
- Protective film for adjacent graphics and paint
- Covers for lower compartments and openings
- Spare mixing supplies permitted by the manufacturer
Injected adhesive can emerge somewhere other than the intended access point. Protect lower compartments and adjacent finishes, and prepare containment before mixing rather than after a leak begins.
Resealing and reassembly supplies
Depending on the access route, you may need:
- Manufacturer-appropriate sealant
- Butyl tape where applicable
- Replacement trim screws or hardware
- Gaskets
- Bedding material
- Surface-compatible cleaning products
- Replacement clips, covers, or molding inserts
Do not reinstall an opening with the same failed sealing arrangement that allowed water into the wall. Rebonding and leak correction are separate parts of the repair.
Finishing materials
Plan for:
- Sandpaper or other abrasives
- Tools for removing cured squeeze-out
- Fillers approved for the finish system
- Primer
- Matched paint
- Clear coat
- Polishing materials
- Materials for closing visible access points
Finishing may be minor if access is concealed behind trim. It can become a substantial part of the project if resin reaches the visible skin or exterior holes must be closed.
Personal protective equipment
Gloves and eye protection are baseline precautions identified in RV repair guidance (Elite RV’s safety and repair guide). The selected adhesive’s current Safety Data Sheet must determine glove material, ventilation, respiratory protection, spill cleanup, storage, and disposal. Do not infer those controls from another brand’s instructions.
Total-cost worksheet
Complete this worksheet before deciding that DIY is cheaper:
| Cost category | Estimated cost | Confirmed? |
|---|---|---|
| Delamination kit | ||
| Shipping and taxes | ||
| Extra adhesive or second kit | ||
| Syringes, tubing, and mixing supplies | ||
| Clamps and straps | ||
| Plywood pressure panels | ||
| Lumber, blocking, wedges, and shims | ||
| Masking and plastic protection | ||
| PPE and ventilation supplies | ||
| Sealant, butyl tape, and gaskets | ||
| Replacement trim hardware | ||
| Sanding and surface preparation | ||
| Primer, paint, and clear coat | ||
| Moisture or professional inspection | ||
| Tool rental or purchase | ||
| Indoor workspace or weather protection | ||
| Contingency for an incomplete repair | ||
| Total |
One firsthand DIY account reported about $200 in basic materials and seven full days of work, excluding some existing tools, scrap wood, labor, and parts of the trim work. That experience illustrates possible scope; it is not a universal budget or schedule (RV With Tito’s reported cost and time).
DIY may reduce paid labor, but it is not automatically cheaper. Include tools, workspace, finishing, loss of RV use, and the possibility that an incomplete injection will complicate later reconstruction.
Plan the injection and clamping process before mixing
Treat the following as a planning sequence, not a universal application recipe. The selected adhesive’s current instructions take precedence wherever they specify preparation, mixing, access, injection, pressure, or cure conditions.
1. Correct the cause and dry the wall
Start only after the leak or other cause has been corrected, the assembly has dried, and the available evidence indicates that the concealed material may be suitable for rebonding.
If moisture continues to appear, stop. Do not use injected adhesive to conceal an unresolved water-entry problem.
2. Map the boundary
Use visual inspection, light pressure, and comparative tapping to map the apparent perimeter. Mark it with removable tape and inspect beyond the visible bubble because separation may extend under material that still looks normal.
Treat this as preliminary mapping, not proof of substrate condition. Note exterior openings, interior cabinetry, framing clues, electrical equipment, plumbing fixtures, and structural joints that could affect access or bracing.
3. Select a controlled access route
Possible access routes include:
- Removable trim
- Window or door openings
- Compartment frames
- Vents
- Existing penetrations
- A lifted edge
- Product-approved injection holes
Do not drill or insert a rigid pipe until the construction, required depth, and likely path are understood. If those factors cannot be established, professional assessment is safer than exploratory drilling.
4. Protect likely leak paths
Mask adjacent finishes, cover the ground, and protect compartments and surfaces below the repair. Consider where adhesive could travel if it passed through the intended void or emerged at a seam.
Place drip containers and compatible cleanup materials before mixing. Do not assume adhesive will remain within the visible boundary.
5. Rehearse adhesive delivery
Assemble the syringe, tubing, rigid pipe, adapters, and access components without adhesive. Confirm that the planned areas can be approached and that the applicator can be withdrawn or repositioned.
Plan the sequence in advance, but do not adopt a generic bottom-to-top pattern or hole grid unless the selected product’s instructions call for it.
6. Build the complete clamping system
Cut and position broad plywood cauls or pressure panels. Add padding where needed to protect paint or graphics. Set out the lumber, straps, clamps, supports, wedges, and shims.
Then tighten the entire system during a dry run.
The wall should return to an acceptable position under controlled, distributed pressure. If it remains high, twists, buckles, or requires extreme force, stop and investigate. Do not mix adhesive until the wall can be positioned without relying on improvised last-minute bracing.
7. Time the installation
Rehearse how long it takes to place every caul, clamp, brace, strap, and support. Compare that time with the documented working time under the expected application conditions.
Arrange components in installation order and assign tasks if more than one person will work. The process should not depend on finding or modifying a clamp after the adhesive has begun to cure.
8. Divide the work into manageable sections
Working in manageable sections and batches can reduce the practical risk of missed areas or delayed clamping. However, the manufacturer’s specified ratio, measuring method, minimum batch, maximum batch, and mixing procedure still control.
Do not alter the mix ratio to extend working time. Do not add an unapproved thinner. Do not assume one large batch will behave like several smaller batches.
9. Control fill rather than chasing a planned volume
Overfilling may send adhesive through openings or into unintended cavities, while poor distribution can leave unsupported pockets. Monitor the wall, nearby openings, and protected outlets throughout the application. Stop if adhesive appears somewhere the plan did not anticipate.
Product instructions vary substantially. Chemique’s Axil FloorFix guide, for example, specifies a 6-inch hole pattern, a 2:1 mix ratio by weight, wooden dowels, and a 24-hour cure for that named system. Those figures demonstrate why a generic tutorial should not prescribe a universal hole pattern, ratio, injection quantity, or cure time for another product.
Clamping, curing, finishing, and realistic results
Once adhesive is distributed, the wall must be pressed evenly and held under the conditions specified for the selected product. Adhesive choice cannot compensate for incomplete delivery or a skin that cannot be seated against usable backing.
Apply broad, controlled pressure
Broad pressure panels and distributed bracing are practical DIY approaches because they spread force across the repair rather than concentrating it at individual clamp points.
Increase pressure gradually while observing the surface from several angles. If the panel will not lie flat during the dry run or the bracing cannot be made stable and controlled, stop and reconsider whether injection is appropriate. Do not proceed with a clamping arrangement you cannot install and monitor safely.
Follow the selected cure schedule
Published examples are not interchangeable specifications. One firsthand RV project describes clamping treated sections for approximately 15 to 24 hours, while a separate commercial guide gives a general 24-to-48-hour range and still directs readers to follow the adhesive manufacturer’s instructions (Custom Way’s RV delamination guide).
Keep the repair dry and undisturbed for the period required by the selected product. Use the documented clamping and cure criteria rather than assuming that one visible bead of hardened resin proves the entire concealed bond is ready.
Inspect before declaring success
After the specified cure:
- Release pressure gradually.
- Watch for renewed movement.
- Compare the repaired area with surrounding material by sight, light pressure, and tapping.
- Look for missed pockets, distortion, or uneven areas.
- Inspect adjacent compartments and interior surfaces for escaped adhesive.
- Confirm that openings and trim mounting surfaces remain aligned.
Continued softness may indicate an unfilled pocket, damaged backing, incomplete cure, contamination, mixing error, or material that was never suitable for injection. Do not automatically add more adhesive until the cause is understood.
Close, reseal, and finish
Post-cure work may include:
- Trimming or filling access points
- Removing cured squeeze-out
- Sanding escaped resin
- Reinstalling windows, doors, vents, rails, and trim
- Replacing damaged fasteners or molding
- Applying appropriate bedding and sealant
- Repairing primer, paint, graphics, or clear coat
- Checking the resealed opening for renewed water entry
A mechanically rebonded wall may still show waves, bubbles, edge transitions, or uneven reflections. In one firsthand project, some bubbling and uneven areas remained; the author associated complete sidewall removal and rebuilding—not injection—with a like-new restoration.
Do not expect an injection kit to guarantee factory appearance, original lamination quality, or original structural strength. A realistic objective is a stable and acceptably flat repair in material that was sound enough to rebond.
Troubleshooting: stop before improvising
Blocked flow: Stop forcing the applicator. Check the product’s instructions and determine whether the tubing is kinked, the adhesive is thickening, the path is obstructed, or the access point does not communicate with the void.
Premature thickening: Do not add thinner or change the ratio. Stop using the batch and follow the product instructions for containment and disposal.
Unexpected adhesive leak: Stop injecting, contain the leak using product-compatible methods, and determine where the adhesive is traveling.
Wall will not lie flat during the dry run: Do not mix adhesive. Investigate the obstruction or obtain professional assessment.
Continued softness after cure: Do not assume another injection is the answer. Contact the product supplier or an RV wall-repair specialist when the cause is uncertain.
When rebuilding or professional repair is the better purchase
Opening the wall is the better route when damaged backing must be removed and replaced rather than merely rebonded. Access may come from the exterior or interior depending on wall construction, cabinetry, finish requirements, and the location of the damage.
Professional assessment is particularly prudent when there is:
- A very large affected area
- Wet or rotten substrate
- Mold or persistent odor
- Structural movement or damaged framing
- Uncertain wall construction
- Concealed utilities near proposed access points
- A failed previous repair
- Multiple separated layers
- Damage around slides or major openings
- No practical way to distribute pressure
- A finish requiring professional color or texture matching
A wall measuring roughly 15 by 8 feet covers about 120 square feet, but such a project should not be approached by multiplying a 10-square-foot kit process twelve times. A wall of that scale presents different questions about support, access, connected voids, moisture, repair sequencing, clamping geometry, and whether the original backing remains viable (Forest River Forums discussion of the 15-by-8-foot wall).
Compare the complete routes rather than resin price alone:
| Decision factor | Injection repair | Open-wall reconstruction |
|---|---|---|
| Best fit | Localized, dry separation with reusable layers | Wet, rotten, fragmented, widespread, or structurally involved damage |
| Access | Limited openings or controlled injection points | Exterior or interior layers removed |
| Material removal | Minimal if successful | Damaged backing and insulation can be removed |
| Clamping challenge | High because pressure must act across a closed assembly | New layers may be bonded with fuller access |
| Finish risk | Waves or uneven reflections may remain | More extensive refinishing, but better access to panel geometry |
| Hidden-damage visibility | Limited | Much better |
| Repeat-work risk | Higher if diagnosis or adhesive distribution is incomplete | Higher initial scope, but failed material can be replaced directly |
| Tool and labor demand | Moderate to high | High and often specialist-level |
| Buying focus | Compatibility, flow, working time, access, and bracing | Inspection, demolition scope, replacement materials, lamination, and finishing |
Consider the RV’s age and value, downtime, finish expectations, workspace, available skills, tool costs, and the consequences of an unsuccessful attempt. Before altering the wall, separately review any applicable manufacturer warranty, service contract, or insurance terms; do not assume what those documents cover.
When requesting a professional quote, ask whether it includes:
- Leak tracing and correction
- Moisture assessment
- Removal of rotten or contaminated material
- Replacement of substrate and insulation
- Structural or framing repair
- Exterior skin repair or replacement
- Paint, graphics, gelcoat, or clear-coat work
- Reinstallation and resealing of trim and openings
- Post-repair leak checks
- Photographs of concealed damage
- A written scope and warranty
Some professional providers may offer a warranty or guarantee, but coverage varies. Obtain the duration, exclusions, covered materials, and remedy in writing rather than assuming that every professional repair includes the same promise (Elite RV’s DIY-versus-professional discussion).
Prevention remains less invasive than either repair path. Regularly inspect roofs, wall seams, windows, doors, vents, lights, trim rails, gaskets, and sealants. Address loose trim and failed seals before moisture reaches the laminate. After a repair, continue monitoring both the original entry point and the repaired wall for staining, movement, or renewed sealant failure.
Frequently asked questions
Can an RV delamination repair kit fix water-damaged or rotten luan?
Not if the luan has lost its integrity. Adhesive may wet or harden portions of damaged wood, but it cannot recreate a continuous, sound sheet of substrate. Soft, swollen, crumbling, moldy, or fragmented luan generally must be exposed and replaced.
If water entered the wall but accessible material still appears firm, stop the leak and dry the assembly before deciding whether injection is appropriate. When the concealed condition cannot be established, professional inspection is preferable to sealing questionable material inside the wall.
How many square feet will one RV delamination repair kit cover?
There is no universal coverage figure. For one documented example, the Composet #12 is seller-rated for a typical single-layer application of up to approximately 10 square feet, with an express warning that actual coverage depends on multiple variables (RV Roof and Wall’s qualified coverage statement).
Start with the selected kit’s stated quantity and qualified coverage, then account for void depth, multiple separated layers, porosity, leakage, inaccessible pockets, material retained in applicators, and waste. An area below the advertised figure may still require more than one kit.
What normally comes in an RV delamination repair kit?
An injection-style kit may combine a two-part bonding material with syringes, flexible tubing, a rigid injection pipe, mixing cups, stir sticks, gloves, shims, a preparation tool, and instructions.
Contents vary. Some products provide only adhesive and basic application supplies; others include several tubing sizes, calibrated cups, a data sheet, project analysis, or technical support. Clamps, broad pressure panels, lumber, masking materials, resealing supplies, eye protection, and finishing products are commonly separate purchases.
How long must an RV wall remain clamped after injection?
Use the selected adhesive manufacturer’s current instructions. Named examples vary: one firsthand RV project reports 15 to 24 hours, while the Axil FloorFix instructions specify 24 hours for that particular system (Chemique’s product-specific cure instruction).
Those figures are not universal. Adhesive chemistry, application conditions, batch size, and substrate conditions may differ. Keep the wall dry and undisturbed for the documented period and do not substitute another product’s schedule.
Can I substitute marine epoxy, polyester, or a generic two-part adhesive?
Not without confirming compatibility and application requirements for the complete RV wall assembly. A product that bonds fiberglass in an open boat repair may not have the flow, foam compatibility, allowable gap, flexibility, working time, or cure behavior required inside a closed RV wall.
Before substituting, obtain written technical confirmation covering the exterior skin, luan or plywood, composite board, foam, existing adhesive, sealants, paint, and gelcoat the product may contact. Also verify the application temperature, surface preparation, measuring method, batch limits, pressure requirements, and cure schedule. Labels such as “marine,” “epoxy,” “polyester,” or “two-part” do not establish interchangeability.
The right purchase is not automatically the largest or cheapest kit. First establish that water entry has stopped, the concealed layers are dry and intact, the adhesive is documented for the actual materials, and the repair can be reached and clamped uniformly. Treat seller coverage as a planning estimate, budget for everything outside the box, and complete a full dry run before mixing. If the backing is wet, rotten, structurally compromised, or too extensive to assess and brace safely, skip injection and obtain a reconstruction plan.