
Fiberglass Boat Repair Kits Vary by Damage Type
Cracks or holes involving fiberglass fibers need resin and reinforcement, not a cosmetic coating. Prepared size, water exposure and finish narrow the choice.
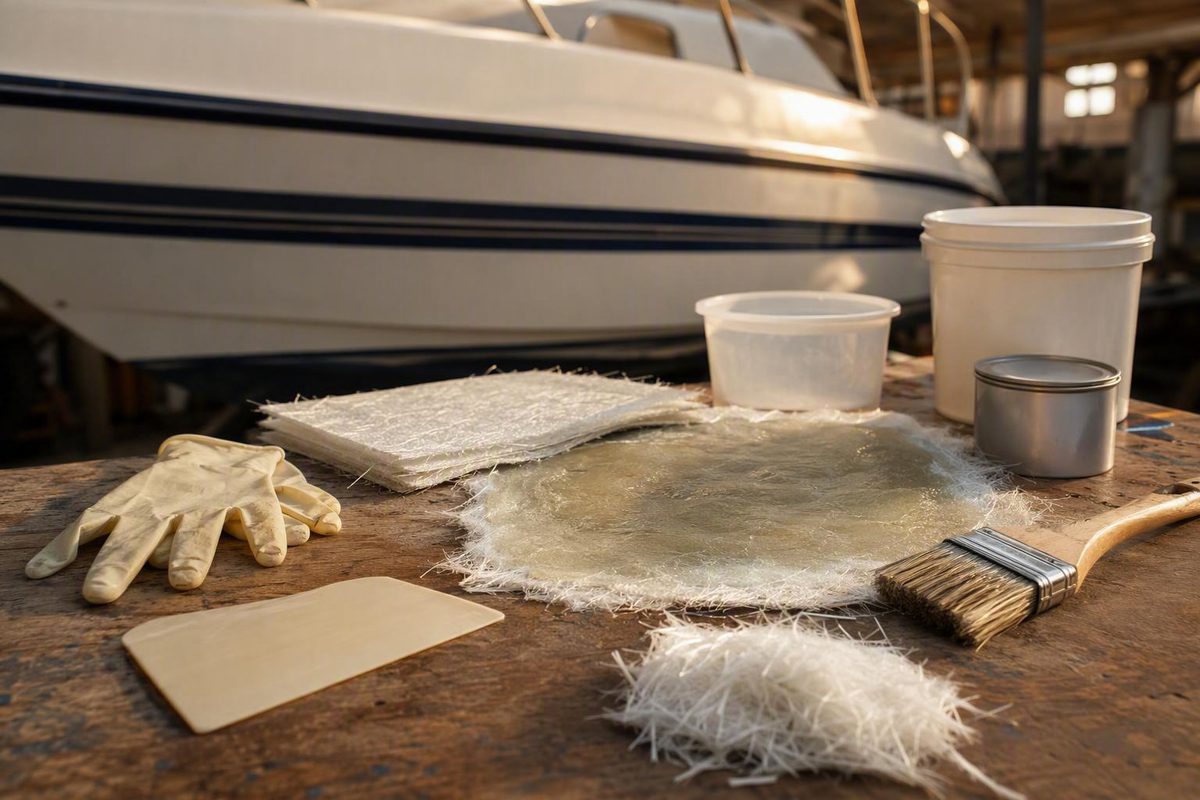
By Nick | Updated August 10, 2026
A repair kit for a fiberglass boat should be chosen by the damaged layer, prepared repair dimensions, location, existing laminate, water exposure, and intended finish—not by price or an “all-in-one” label.
That distinction matters because a fiberglass boat is a system. Gelcoat provides the visible exterior finish. Beneath it, fiberglass reinforcement held in a cured resin matrix carries structural loads. A surface compound may conceal a chip or shallow gouge, but it cannot replace reinforcement that has been cut, crushed, or torn away.
Before comparing brands, determine whether you are fixing:
- A cosmetic gelcoat defect
- A fillable surface void
- A crack or hole through the laminate
- Delamination or cored-panel damage
- A load-bearing or safety-critical structure
Only then can you sensibly compare gelcoat, putty, epoxy, polyester, vinyl ester, cloth, mat, biaxial fabric, fillers, tools, and finishing products.
Start by identifying what is actually damaged
Begin with a simple damage-to-kit decision tree:
- Scratch, nick, chip, or shallow gouge with sound laminate underneath: Evaluate a gelcoat repair kit, color-match kit, or compatible surface patch compound.
- Deeper void with no broken structural fibers: An appropriate filler or putty may work, followed by fairing and a compatible finish.
- Crack, puncture, or hole involving fiberglass fibers: Look for a resin-and-reinforcement system rather than a cosmetic coating alone.
- Delamination, a soft panel, or suspected core damage: Stop and establish the full extent of the problem before buying a compact kit.
- Damage in a keel, transom, stringer, bulkhead, through-hull area, chainplate support, engine bed, or another important load path: Obtain qualified assessment unless you have an approved repair specification and the expertise to follow it.
Gelcoat damage or laminate damage?
Gelcoat is normally the smooth, colored outer finish. The laminate beneath it contains the load-carrying fiberglass reinforcement. A scratch may remain entirely within the gelcoat; a deeper impact can fracture both the finish and the fibers below it.
Clean the area as directed for the existing surface and inspect it in good light. These signs do not reveal the complete condition of hidden laminate or core, so use them as triggers for further inspection—not proof that nearby structure is sound.
A surface crack also deserves a cause, not merely a covering.
Record the repair dimensions and environment
Before shopping, write down:
- Maximum visible length and width
- Estimated depth
- Hole diameter, if applicable
- Laminate thickness, if known
- Whether fibers are exposed, cut, crushed, or missing
- Whether the panel is solid fiberglass or cored
- Whether the damage is accessible from one or both sides
- Whether it is above the waterline, intermittently wet, or immersed
- Whether the area carries hardware or transfers load
- Whether an earlier repair lies underneath
- The desired final color, texture, and gloss
The visible opening is not necessarily the finished repair area. Removing unsound material and creating the specified bevel or scarf can make the prepared area substantially larger.
Warning signs that exceed a simple kit purchase
Pause the project if you find:
- Laminate that feels soft or moves under light pressure
- Water or discolored liquid emerging from a cored panel
- A broad visibly separated area
- Widespread cracking rather than one bounded defect
- A major puncture, crushed laminate, or distorted hull shape
- Damage around a keel, transom, stringer, bulkhead, through-hull, high-load fitting, or engine support
- A repair for which the original laminate schedule cannot be identified
- Evidence that an earlier patch has detached or concealed continuing damage
Packaged kits are principally positioned for localized work, although their limits vary. As one bounded example, WEST SYSTEM specifies that its 105-K kit can repair holes up to 1 inch in diameter in solid laminate no more than 1/4 inch thick, with smaller holes in thicker laminate. The manufacturer characterizes it as a small, quick-repair kit rather than a universal structural system (WEST SYSTEM 105-K specifications).
Do not turn that specification into a universal DIY threshold. An opening in a lightly loaded interior panel is not equivalent to the same opening in a transom or keel. Structural function, hidden impact damage, laminate design, access, moisture, and the selected product’s instructions all matter.
Choose the repair-kit category before comparing brands
The phrase “fiberglass repair kit” covers products that perform substantially different jobs. Sort candidates into four paths before considering convenience or price.
| Kit path | Intended use | Typical contents | Main limitation | Likely finishing needs |
|---|---|---|---|---|
| Gelcoat or color-match kit | Cosmetic nicks, scratches, chips, and shallow gouges over sound laminate | Gelcoat or patch paste, hardener where required, pigments, applicators, mixing tools | Does not automatically replace damaged reinforcement | Sanding, color blending, polishing, and gloss matching |
| Pre-colored, no-mix surface compound | Minor surface defects within the product’s documented scope | Ready-to-apply colored compound, tube applicator, shaping aid | Promotional strength or waterproofing claims do not establish structural capacity | Leveling, polishing, and possible color adjustment |
| Putty or filler system | Filling suitable voids, bonding, rebuilding edges, or fairing | Resin-based putty or separate resin and filler | Filler is not automatically a substitute for fiberglass fibers | Fairing, sanding, primer, gelcoat, or paint |
| Resin-and-reinforcement kit | Laminate cracks, small holes, missing fiberglass, and selected repairs within documented limits | Resin, matched hardener or catalyst, reinforcement, fillers, and application tools | May omit preparation supplies, PPE, backing, and final coatings | Fairing plus a compatible gelcoat, primer, barrier coat, or paint |
Path one: gelcoat and color-match kits
Choose this category when the defect is confined to the finish and the laminate underneath remains sound. Typical candidates include minor deck nicks, shallow hull scratches, and small gouges that do not expose or sever reinforcement.
Color matching may require more work than the package suggests. When practical, evaluate the cured color rather than relying on the wet mixture.
Custom-color and glitter-flake products can help reproduce specialized finishes, but they do not change the structural requirement underneath.
Path two: pre-colored, no-mix compounds
A ready-to-use surface compound can be convenient for a minor chip because it avoids measuring resin and hardener. It may also reduce the tools needed for a small appearance repair.
Treat descriptions such as waterproof, permanent, UV-resistant, flexible, or exceptionally strong as product claims. They do not independently establish that the compound can restore fractured laminate. Confirm the documented defect type, permitted depth, substrate, wet-service restrictions, cure conditions, and finishing requirements.
If fibers are broken or the panel moves, ease of application should not override the need for reinforcement or further inspection.
Path three: putties and fillers
Putties can fill suitable gaps, bond parts, rebuild a corner, form a fillet, or support a fair surface. Their intended roles vary. Some are formulated for adhesive or structural tasks; others are designed primarily to spread and sand easily.
The key question is not merely whether the material cures hard.
Path four: resin with fiberglass reinforcement
This is the relevant category when the defect extends into the laminate. Depending on the product’s documented scope, it may suit:
- Cracks involving reinforcement
- Small holes or punctures
- Areas of missing laminate
- Selected blister repairs
- Limited delamination repairs
- Reinforcement associated with an approved hardware repair
The required resin, reinforcement, repair geometry, and layer schedule depend on the existing construction and load. A kit containing “fiberglass” is not necessarily sufficient unless the supplied fabric type, weight, and dimensions fit the prepared repair.
For a broader introduction to package contents and general use, see Fiberglass Guide’s primer on fiberglass patch kits.
Epoxy, polyester, or vinyl ester: match the resin to the whole repair system
Resin chemistry affects secondary bonding, working time, moisture performance, reinforcement choice, and finishing. Select it as part of a complete system rather than in isolation.
| Factor | Epoxy | Polyester | Vinyl ester |
|---|---|---|---|
| Secondary bonding to cured fiberglass | Commonly selected for strong secondary bonding to properly prepared cured laminate | Generally described as less effective than epoxy for secondary bonding to cured laminate | Product-specific performance must be established |
| Typical cost positioning | Commonly costs more than polyester | Frequently selected as the lower-cost option | Varies by formulation and package |
| Working time | Depends on hardener, temperature, and batch size | Depends on formulation, catalyst ratio, and temperature | Depends on formulation, catalyst ratio, and temperature |
| Moisture-prone repairs | Commonly selected where adhesion and moisture exposure are priorities | Used broadly, but not automatically preferred for every immersed repair | Marketed for improved moisture resistance over standard polyester and for selected blister or underwater work |
| Traditional gelcoat workflow | May require specified preparation, primer, or tie-coat | Commonly used in traditional polyester-and-gelcoat workflows | Compatibility must be established for the selected finish |
| Reinforcement | Use product-approved fabric or mat | Commonly used with cloth, mat, or roving | Used with specified marine reinforcement systems |
Epoxy is generally more expensive than polyester or vinyl ester, but cost alone does not determine suitability; reinforcement, preparation, and laminate construction also affect performance (Practical Sailor’s resin and laminate discussion).
Epoxy
Epoxy is commonly selected for secondary bonding to properly prepared cured fiberglass. It is often used for structural bonding, core work, and moisture-prone repairs where adhesion is a priority. That does not make every epoxy suitable for every hull, reinforcement, temperature, or finish.
One manufacturer-affiliated comparison tested repairs in a particular polyester/fiberglass laminate. The epoxy-repaired specimens reached 81.7% of the original laminate’s tensile strength, while the polyester-repaired specimens reached 70.5%. Both used a reported 12:1 bevel and the same fiberglass. Those results apply to the tested laminate, resin pair, preparation, and specimen geometry; they do not establish universal epoxy superiority (Epoxyworks repair comparison).
Polyester
Polyester is widely used in fiberglass construction and repair. It is frequently selected for lower-cost general work and can fit a traditional polyester-resin and gelcoat workflow.
A repair to old, cured laminate is a secondary bond rather than the same process as original lamination. Surface preparation, the selected formulation, reinforcement, exposure, and finish compatibility therefore matter.
Polyester systems commonly use MEKP catalyst. The catalyst ratio, permitted temperature range, batch size, and cure conditions must come from the selected manufacturer. Do not change the catalyst quantity using an unrelated chart or generic online advice.
Vinyl ester
Vinyl ester is commonly positioned as an option for work requiring better moisture resistance than standard polyester. Suppliers market it for selected blister, corrosion, and underwater applications.
That positioning does not mean every vinyl-ester kit is approved for continuous immersion. Confirm secondary-bond requirements, catalyst instructions, reinforcement compatibility, finish sequence, full cure, and return-to-water timing for the particular system.
Do not evaluate resin without the laminate
Resin alone does not determine impact performance. Reinforcement architecture and laminate skin thickness can materially affect point-load damage. In summarized panel tests, increasing the number of cloth layers reduced controlled-impact damage, and epoxy’s advantage was most meaningful as part of a fiber-reinforced laminate rather than as unreinforced resin.
The practical conclusion is simple: resin choice cannot compensate for insufficient reinforcement, poor fiber orientation, inadequate overlap, or failure to remove unsound material.
Verify disputed compatibility questions
Do not assume that polyester gelcoat always can—or never can—be applied over cured epoxy. Compatibility may depend on the epoxy, cure state, surface preparation, contamination control, primer or tie-coat, and gelcoat formulation.
Obtain written guidance for the complete sequence:
- Existing laminate or previous repair
- New resin and matched hardener or catalyst
- Reinforcement
- Structural filler
- Fairing compound
- Primer, barrier coat, or tie-coat
- Gelcoat or paint
- Expected immersion conditions
Never transfer a mix ratio, catalyst amount, pot life, temperature limit, or cure schedule from one system to another—even when both products are described as marine resin.
Understand the fiberglass and fillers that rebuild the damaged area
Resin binds fibers and transfers load between them, but resin alone generally does not replace reinforcement lost from a laminate crack or hole. Rebuilding requires the appropriate glass architecture as well as a compatible resin.
Cloth and glass tape
It can be cut into progressively sized patches and laid over a prepared repair area.
Check:
- Fabric weight
- Roll or sheet width
- Supplied length
- Fiber type
- Suitability for the selected resin
- Whether the dimensions cover the full prepared bevel
A small piece of cloth may cover the visible opening but not the larger area created after damaged laminate is removed.
Chopped-strand mat
Compatibility depends on the mat’s binder and the resin system, so the documentation must support the exact combination.
Do not automatically substitute mat for specified woven or directional reinforcement. Random fibers and continuous oriented fibers perform differently.
Biaxial fabric
It is often selected for structural layups where directional reinforcement and efficient thickness are important.
The phrase “biaxial fiberglass included” remains incomplete. Verify the fabric style, weight, dimensions, orientation, and resin compatibility. For example, one listed vinyl-ester kit combines resin and MEKP catalyst with one yard of 1708 biaxial fiberglass, while other packages in the same collection contain different cloth or mat (Fiberglass Warehouse repair-kit examples).
Structural filler versus fairing filler
These products are not interchangeable merely because both thicken resin.
- Structural or adhesive filler is used to create an adhesive consistency, bridge suitable gaps, form specified bonds, or fill appropriate voids.
- Fairing filler is used to create a surface that is easier to shape and sand before finishing.
For example, WEST SYSTEM identifies 406 colloidal silica as an adhesive filler for structural bonding, gap bridging, and void filling. It describes 410 Microlight as a lower-density fairing filler intended to be easier to shape and sand.
Do not use an easy-sanding fairing blend where the repair specification calls for a structural adhesive mixture. Conversely, using a hard structural filler for all cosmetic fairing may create unnecessary sanding work.
Why a bevel is used
A reported repair test used a 12:1 bevel, meaning the slope extended 12 units horizontally for each unit of laminate thickness. That is an illustration of the tested preparation—not a universal schedule for every boat or structure.
Estimate materials from the prepared repair, not the original chip or opening. Verify:
- Required bevel or scarf dimensions
- Largest reinforcement patch
- Fabric type and weight
- Number and orientation of layers
- Resin required to wet out the reinforcement
- Reasonable waste and mixing losses
- Backing requirements
As a concrete package example, the WEST SYSTEM 105-K lists eight 0.56-fluid-ounce resin-and-hardener packets, one 15-by-15-inch piece of 12-ounce glass fabric, 1 ounce each of structural and fairing filler, three cups, two brushes, a mixing stick, a syringe, three pairs of gloves, and illustrated instructions. The same manufacturer page links to instructions, safety information, an SDS, technical data, product-selection guidance, and technical support, although those resources do not necessarily answer every project-specific compatibility or immersion question (WEST SYSTEM 105-K contents and documentation).
No universal online formula can prescribe reinforcement weight, orientation, layer count, or bevel geometry for an unknown hull. If you cannot establish the original laminate or an approved repair schedule, escalate the repair rather than guessing.
Check what the package includes—and what complete really leaves out
Evaluate kit completeness in five categories: preparation, reinforcement, application, safety, and finishing.
1. Preparation
Check whether you already have:
- A product-approved cleaner or decontamination method
- Abrasives in the specified grits
- Masking tape and protective film
- Cutting, routing, or grinding tools
- Dust extraction or collection equipment
- Drying materials
- Clean rags or wipes
- Adequate lighting and inspection access
Do not assume that a generic solvent is approved. Follow the resin and coating manufacturers’ surface-preparation instructions.
2. Repair and reinforcement materials
A reinforced repair may require:
- Correct resin
- Matched hardener or catalyst
- Enough compatible cloth, tape, mat, or biaxial fabric
- Structural or adhesive filler
- Fairing filler
- Backing plate, release film, or temporary support
- Peel ply or another specified process material
- Additional resin for realistic wet-out and mixing losses
Confirm that every reactive component belongs to an approved system. Similar packaging or chemistry names do not establish interchangeability.
3. Mixing and application tools
Possible requirements include:
- Graduated mixing cups
- Stir sticks
- Brushes
- Spreaders
- Syringes
- Consolidation rollers
- Scissors or shears
- Approved pumps, scales, or other metering equipment
- Multiple containers for staged batches
A roller can help consolidate some laminates, but it is not automatically needed for every small repair. Use the tools appropriate to the specified reinforcement and geometry.
4. Safety equipment
Some reviewed kits included disposable gloves but omitted other protective equipment. Before purchase, read the current instructions and Safety Data Sheet for the actual resin, catalyst, solvent, filler, and coating. Determine the required:
- Chemical-resistant gloves
- Eye or face protection
- Protective clothing
- Ventilation
- Respiratory protection
- Fiberglass-dust controls
- Fire and ignition controls
- Spill procedures
- Storage conditions
- Waste-handling process
A pair of general-purpose gloves does not make a package safety-complete.
5. Fairing and finishing
The package may omit:
- Fairing compound
- Additional abrasives
- Primer or tie-coat
- Barrier coating
- Gelcoat and hardener
- Color pigment
- Glitter flake
- Paint
- Polishing compound
- UV-protective finish
- Texture-matching materials
A resin-and-cloth kit should not be assumed to provide a color-matched, polished, UV-ready, or immersion-ready final surface.
A useful package contrast
One presenter’s inspection of an Evercoat marine kit found 8 ounces of resin, 0.25 ounces of hardener, 3 square feet of cloth, a spreader, and instructions, but no sandpaper, cleaner, brush, or gloves. That was a package inspection for several small holes—not a controlled test of cured strength, durability, or water resistance (Evercoat package inspection).
“Complete” should therefore mean complete for your documented workflow, not merely that the package contains resin and a piece of cloth.
Use a pre-purchase worksheet to compare shortlisted kits
Complete the first worksheet once for the boat and the second for every product under consideration.
Damage worksheet
- Damage category: Cosmetic / fillable void / laminate crack / hole / blister / delamination / suspected core damage
- Visible length: ____
- Visible width or diameter: ____
- Estimated depth: ____
- Prepared repair dimensions: ____
- Laminate thickness: ____
- Solid or cored panel: ____
- Location on boat: ____
- Load-bearing or hardware-adjacent: Yes / No / Uncertain
- Water exposure: Above water / splash / intermittently wet / immersed
- Existing substrate or resin: ____
- Known previous repair: ____
- Access: One side / both sides
- Temperature during application and cure: ____
- Moisture condition: Dry / uncertain / wet
- Desired color and gloss: ____
- Planned final coating: ____
Product worksheet
- Resin chemistry: ____
- Matched hardener or catalyst included: ____
- Documented defect types: ____
- Maximum repair dimensions: ____
- Coverage or material quantity: ____
- Reinforcement type and weight: ____
- Reinforcement dimensions: ____
- Compatible structural filler: ____
- Compatible fairing filler: ____
- Pot life at expected temperature: ____
- Application-temperature range: ____
- Recoat window: ____
- Sanding readiness: ____
- Full-cure time: ____
- Polishing time: ____
- Immersion or return-to-water interval: ____
- Compatible primer, barrier coat, gelcoat, or paint: ____
- Current instructions available: Yes / No
- Technical data sheet available: Yes / No
- Safety Data Sheet available: Yes / No
- Technical support available: Yes / No
Several reviewed seller pages did not provide enough coverage information to rank products responsibly. If no repair-size limit is published, obtain enough technical information to determine whether the package contains sufficient resin and reinforcement for the prepared geometry.
Separate every timing milestone
Do not treat the shortest time printed on a product page as the completion time. Ask separately about:
- Pot life
- Initial set
- Recoat window
- Sanding readiness
- Light handling or light use
- Full cure
- Polishing
- Coating
- Immersion or return to water
One pre-colored patch product illustrates the problem: its seller guidance refers to one hour before light use, a 24-hour full cure, 24–48 hours of strength development, polishing after 48 hours, and keeping wet-area repairs under clear tape for 14 days. Those statements address different milestones, so “sets in one hour” cannot be interpreted as “ready for immersion” (MagicEzy application and cure guidance).
Treat documentation as part of the product
Current instructions, technical data, an SDS, explicit limitations, and access to technical support reduce uncertainty. A vague package may be inexpensive but difficult to evaluate if it omits coverage, application conditions, structural limits, immersion restrictions, or finish compatibility.
The word marine does not establish continuous-immersion approval or suitability for a load-bearing structure. Likewise, waterproof is not a laminate schedule, and permanent is not a substitute for documented service limits.
Do not rank kits when essential facts are missing. Ask the manufacturer or retailer for written clarification before ordering.
Plan the entire repair before opening the resin
A safe overview can define the sequence, but it cannot provide a universal structural laminate schedule.
- Inspect and define the damage.
- Determine whether the work is cosmetic, reinforced, cored, or load-bearing.
- Remove loose, contaminated, crushed, or otherwise unsound material as specified.
- Establish the required bevel, scarf, recess, or backing geometry.
- Sand, clean, and dry according to the selected system.
- Cut and dry-fit every reinforcement layer.
- Arrange tools, application materials, ventilation, and PPE.
- Measure and mix exactly as directed.
- Wet out and consolidate the reinforcement without disturbing its orientation.
- Allow it to cure under the approved environmental conditions.
- Inspect, fair, and sand as required.
- Apply the compatible primer, barrier coat, gelcoat, paint, or other finish.
- Wait for the documented return-to-water milestone.
Preparation and mixing are part of the repair
Adhesion depends on reaching sound, properly prepared material.
Accurate proportioning and thorough mixing are also essential. Incorrect resin-to-hardener or catalyst proportions can cause soft cure, excessive reaction speed, overheating, brittleness, or poor adhesion. Measure and mix according to the selected manufacturer’s instructions rather than altering proportions to change working time (resin mixing and cure guidance).
Cut the glass, label the layers, prepare the backing, mask the area, and arrange tools before mixing.
Deep work may need staged applications
Maximum application thickness, recoat timing, sanding requirements, and batch limits must come from the selected instructions.
Do not improvise batch size, cooling methods, or application thickness beyond the documented process.
Separate structure from appearance
The laminate repair may be complete before the surface looks finished. Later operations may include:
- Structural inspection
- Fairing
- Block sanding
- Pin-hole filling
- Primer or tie-coat
- Barrier coating
- Gelcoat or paint
- Color or glitter-flake matching
- Texture reproduction
- Gloss restoration
- Polishing
- UV-protective finishing
A visually smooth repair is not necessarily structurally restored, and a structurally sound patch may still require environmental and cosmetic protection.
Do not launch merely because the patch feels hard. Return-to-water timing must follow the full-cure and immersion guidance for the resin, filler, primer, barrier coat, and finish used as a system.
This workflow is not an engineering laminate schedule and cannot rule out hidden core or load-path damage. When the structure is uncertain, inspection comes before materials.
Compare total project cost, safety requirements, and future use
The package price is only one part of the project cost. Add everything required to reach a finished repair:
- Abrasives
- Approved cleaner
- Masking materials
- Brushes, rollers, cups, and spreaders
- Cutting or grinding consumables
- Dust collection
- PPE
- Additional reinforcement
- Structural and fairing fillers
- Backing materials
- Primer, tie-coat, or barrier coat
- Gelcoat or paint
- Pigment, texture, or glitter flake
- Polishing supplies
- Waste-handling materials
Displayed prices, stock status, ratings, and shipping offers are temporary snapshots. Customer ratings and package reviews also do not establish cured strength, water resistance, durability, or structural suitability.
When a compact kit makes sense
A one-job kit is reasonable when:
- The damage is understood and localized
- The prepared repair fits the documented limits
- The package contains enough resin and reinforcement
- The resin, reinforcement, fillers, and finish are compatible
- You can obtain all omitted preparation and safety supplies
- The repair is within your skills and the product’s instructions
Pre-proportioned packets can reduce measuring decisions for occasional work. They can also restrict batch size and total material, so verify the required layup before relying on them.
When a reusable repair box makes sense
For repeated maintenance, it may be more practical to assemble a reusable inventory containing:
- Matched resin and hardener
- Approved pumps or metering tools
- Structural and fairing fillers
- Cloth, tape, or biaxial reinforcement
- Brushes and appropriate rollers
- Spreaders and syringes
- Scissors
- Mixing cups and sticks
- Required PPE
- Cleanup and waste-handling materials
This approach offers flexibility but creates responsibilities for labeling, storage, shelf life, contamination control, and inventory. Keep catalysts, hardeners, solvents, and resin systems clearly separated. Do not combine remnants merely because the containers or chemistry names look similar.
Emergency supplies are not automatically permanent-repair supplies
An onboard kit can be useful for temporary containment or a small repair within its documented scope. Portability, resealable packaging, and fast cure do not prove that it can restore a load-bearing structure or remain permanently immersed.
Define the objective before use:
- Stop water entry temporarily
- Protect exposed laminate until haul-out
- Restore a cosmetic surface
- Complete a permanent structural repair
Those are different jobs with different requirements.
Safety check
Read the current product instructions and Safety Data Sheet before opening any resin, hardener, catalyst, solvent, filler, or coating. Select skin, eye, respiratory, ventilation, dust, fire, storage, and spill controls for the actual products and working conditions.
Repeated epoxy exposure can cause allergic reactions in some users, so avoid direct skin contact and follow the applicable SDS (Practical Sailor’s epoxy safety caution).
Polyester systems commonly use MEKP, which requires product-specific chemical and fire precautions. Never improvise catalyst quantities or handling procedures; follow the manufacturer’s current instructions and SDS (polyester and MEKP handling overview).
Stop and escalate when:
- The laminate design or required layer schedule is unknown
- A core is wet, rotten, crushed, or detached
- Delamination extends beyond a clearly bounded area
- The hull is distorted
- A hole or impact exceeds the kit’s documented limits
- Damage involves a keel, transom, stringer, bulkhead, through-hull, engine support, or another safety-critical structure
- The repair requires controlling structural alignment or hull shape
- You cannot confirm compatibility or immersion approval
- You cannot provide the required ventilation, PPE, dust control, or cure conditions
Frequently asked questions
Can epoxy be used to repair a fiberglass boat originally made with polyester resin?
Often, yes. Epoxy is commonly selected for secondary bonding to properly prepared, cured polyester/fiberglass laminate. The substrate must be sound, dry, clean, and prepared according to the selected epoxy manufacturer’s instructions.
That does not resolve the entire workflow. Confirm compatibility with the reinforcement, structural and fairing fillers, primer or tie-coat, gelcoat or paint, and expected water exposure. Contamination, wet core, weak old laminate, or an unidentified previous repair can change the answer.
Does a fiberglass boat repair kit include gelcoat or a color-matched finish?
Not necessarily. Gelcoat and color-match kits are primarily intended for finish defects, while resin-and-reinforcement kits may stop after rebuilding and fairing the laminate. A package containing epoxy, cloth, and fillers should not be assumed to include gelcoat, pigment, paint, or polishing products.
Read the contents list rather than relying on the word “complete.” If appearance matters, establish the final coating, color-matching process, gloss, texture, and compatibility before starting.
Can a fiberglass repair kit be used below the waterline?
Only when the complete system is documented for that exposure. Suitability can depend on secondary bonding, reinforcement, full cure, fairing material, primer, barrier coat, finish, and the required immersion interval.
Epoxy and some vinyl-ester systems are commonly selected for moisture-prone work, but that does not make every kit suitable for continuous immersion. A generic marine, waterproof, or underwater label should not replace written manufacturer guidance.
How large a hole can a packaged fiberglass boat repair kit fix?
There is no universal limit. It depends on material quantity, reinforcement dimensions, laminate thickness, prepared geometry, access, location, and structural function.
One manufacturer specifies holes up to 1 inch in diameter in solid laminate up to 1/4 inch thick for its compact kit, with smaller holes in thicker laminate. That limit applies only to that product and does not establish a general rule for other kits or safety-critical locations.
When is fiberglass boat damage too serious for a DIY repair kit?
Seek qualified assessment when the laminate is soft or distorted, the core is wet or crushed, delamination is extensive, cracking is widespread, or the required laminate schedule is unknown. The same applies to major punctures and damage involving a keel, transom, stringer, bulkhead, through-hull, engine support, or another important load path.
Defect diameter alone is not decisive. Hidden damage, structural function, moisture, access, earlier repairs, and the ability to reproduce the original load-carrying laminate all affect whether DIY work is appropriate.
Final buying rule
Use five checks before ordering a repair kit for a fiberglass boat:
- Identify the damaged layer: finish, filler, laminate, bond, or core.
- Confirm that the prepared repair—not merely the visible defect—fits the kit’s documented limits.
- Verify compatibility from the existing substrate through resin, reinforcement, fillers, and final finish.
- Budget for omitted preparation, application, safety, and coating supplies.
- Obtain the current instructions, technical data, SDS, and immersion guidance.
A compact kit is appropriate only when the damage is understood and bounded. Soft core, widespread delamination, uncertain laminate construction, or damage in a load-bearing structure should be assessed before materials are purchased.