
Composite Manufacturing: Choosing a Fiberglass Process
Compare fiberglass manufacturing methods, distinguish vacuum bagging from infusion, and plan a small layup without confusing fabrication with structural repair.
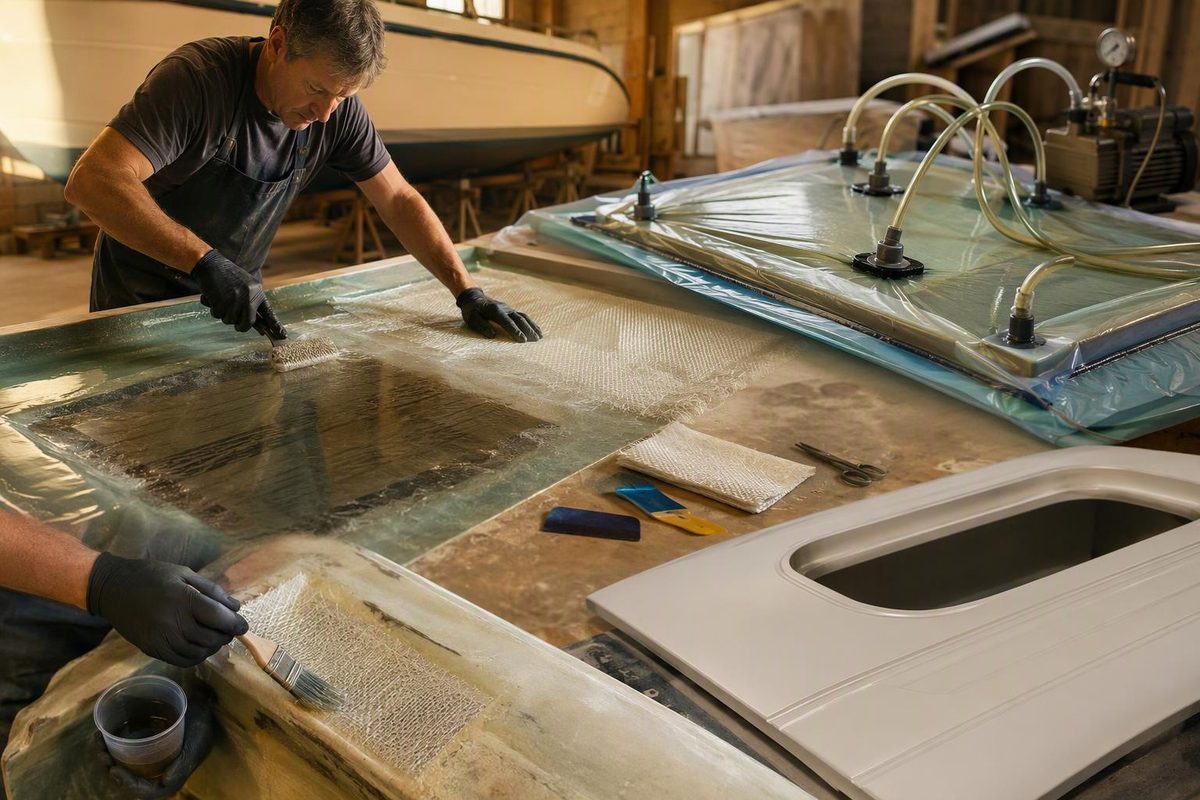
For a first small, noncritical fiberglass part, hand layup is a practical starting point. Vacuum bagging adds distributed clamping pressure; vacuum infusion changes how resin enters the reinforcement. Factory processes such as compression molding and pultrusion serve different production needs—not simply a better version of the same DIY job. The MatEd composite manufacturing module describes hand layup as the simplest method.
This guide focuses on glass-fiber-reinforced resin composites used in boat parts, panels and household fixtures, rather than the whole field of composite manufacturing.
What the manufacturing process must achieve
A fiberglass laminate combines glass reinforcement with a resin matrix. The fibers carry most of the structural loads; the resin holds them in position and helps transfer loads. Some panels also have a lightweight core between reinforced skins to increase stiffness without a proportional weight increase. Gelcoat is a surface finish, not a replacement for those load-carrying skins. WEST SYSTEM’s fiberglass construction manual explains these roles.
The manufacturing method determines how reinforcement is positioned, resin is introduced, air is removed and the part is held during cure. It does not replace a laminate design: fiber direction, layer sequence, core selection and bonding details still matter.
Compare the main fiberglass manufacturing methods
| Method | What happens | Where it fits—and its main constraint |
|---|---|---|
| Open-mold hand layup | Glass layers are placed on a mold and wetted with resin; brushes and rollers help consolidate them and remove trapped air. | Small runs, custom parts and accessible repairs. Quality depends heavily on wet-out, placement and working within the resin’s usable time. |
| Spray-up | A chopper gun deposits short glass strands and resin into an open mold; the material is then rolled. | Production of shaped shells, including tub and shower components. Short chopped fibers do not provide the same directional reinforcement as continuous fabrics. |
| Vacuum-bagged wet layup | Reinforcement is wetted first, then sealed under a bag and clamped by atmospheric pressure. | Panels, core bonding and selected repairs where distributed pressure is useful. Adds equipment, consumables and time-sensitive bag setup. |
| Vacuum infusion | Reinforcement is arranged dry and sealed under a bag; a pressure difference drives resin through it. | Larger molded parts and repeat production. Requires a vacuum-tight setup and a planned resin-flow path. |
| Resin transfer molding (RTM) | Resin is injected into dry reinforcement inside a closed mold. | Repeat parts needing controlled geometry and molded surfaces on both sides. Tooling and clamping requirements make it a production investment. |
| Compression molding | A resin-and-reinforcement charge is pressed in matched molds, commonly with heat. | Repeated production of shaped components. Requires suitable tooling and press equipment. |
| Pultrusion | Continuous reinforcement is pulled through resin and a shaped, heated die. | Long profiles with constant cross-sections, such as channels, rods and tubes—not arbitrary curved shells. |
| Filament winding | Resin-wetted fibers are wound in controlled patterns around a mandrel. | Pipes, tanks and other hollow, generally round-form parts. Geometry and winding direction constrain the design. |
These process descriptions and applications are covered in the MatEd teaching module and Explore Composites’ manufacturing-method guide. Treat them as process families, not guarantees of strength or finish quality. Hand layup can also be followed by vacuum bagging; it is not limited to open molding.
To narrow the choice for a new part, list its dimensions and shape, required quantity, weight target, surface-finish requirements and tooling budget. A one-off panel and a production run of two-sided molded components need different setups. For outsourced production, ask potential fabricators to review the process choice before finalizing the design, as Explore Composites recommends.
Vacuum bagging is not vacuum infusion
The useful distinction is when the resin goes in:
- Wet layup, then bag: you apply the resin before the bag provides clamping pressure.
- Dry layup, then infuse: you seal the dry reinforcement first and introduce resin through feed lines.
Vacuum bagging can improve consolidation and control excess resin, but excessive resin removal can leave a resin-starved laminate. See the WEST SYSTEM vacuum-bagging manual for the clamping principle and Explore Composites’ process guide for the risk of removing too much resin.
Infusion adds another challenge: the resin must reach the entire reinforcement before it gels. Select a resin system intended for infusion and establish the flow and cure behavior with trial panels. Explore Composites’ infusion guide explains these checks. Neither method automatically produces a sound part.
Five checks before a small layup
1. Separate a new part from a repair
A new molded part is built on tooling intended to release it. A repair must bond to an existing substrate. Bonding onto a cured laminate is a secondary bond, so the original factory resin choice alone does not establish the right repair system.
Also separate finish damage from laminate damage. Cracks extending into reinforcing fabric, or damaged and detached core material, require more than cosmetic filling. WEST SYSTEM’s repair manual distinguishes these repair depths and explains secondary bonding.
Stop point: if hull integrity, a transom, a stringer or another load-bearing assembly is uncertain, obtain a qualified assessment and repair specification before choosing a layup method. Start with the boat fiberglass hull guide for construction and damage context.
2. Specify compatible materials before buying
Write down the substrate, resin system, reinforcement type and direction, core if used, and final coating. Do not choose resin by the word “fiberglass” on the container alone.
Compatibility is product-specific. For example, TotalBoat’s Polyester Laminating Resin lists prepared cured polyester surfaces as acceptable, but excludes epoxy substrates and unknown composites. That restriction belongs to that product—not every resin sold for fiberglass. Check its technical data, and use the resin-selection guide to organize the decision.
3. Prepare and dry-fit before mixing
For bonding, follow the selected system’s cleaning, drying and abrasion instructions. WEST SYSTEM calls for clean, dry, sanded surfaces and cleaning contamination before sanding so it is not worked into the surface. Its surface-preparation instructions also distinguish cured epoxy from polyester laminates.
For a new molded part, prepare the mold with a release system compatible with the resin and any in-mold coating; do not treat it like a bonding surface. WEST SYSTEM’s construction manual describes release-agent application before gelcoat and reinforcement.
Cut and label reinforcement, confirm fiber direction, and rehearse the placement sequence. If bagging, prepare the consumables and plumbing before wetting the glass.
4. Control the mix and inspect during wet-out
Use the specified resin-to-hardener ratio or catalyst range. Do not change an epoxy mix ratio to accelerate cure. Large masses of mixed epoxy can build dangerous heat, so plan manageable batches and suitable containers. WEST SYSTEM’s mixing instructions explain both issues.
While the resin remains workable, check for unwetted glass, trapped air, displaced plies and fabric spanning a corner rather than contacting the surface. More resin is not a substitute for properly positioned reinforcement.
5. Plan cure, protection and acceptance
Record the batch, mix, temperature and cure conditions. Use the product’s requirements for demolding, recoating and return to service rather than judging by touch alone.
Arrange ventilation and exposure controls before starting. For epoxy work, WEST SYSTEM recommends gloves, eye protection and protective clothing, with respiratory protection appropriate to vapors or sanding dust; the actual product SDS should guide the setup. Read its exposure-prevention guidance.
A good-looking surface is not proof of a sound structural laminate. For a noncritical trial part, inspect cure, coverage and visible defects. For a load-bearing repair, use the acceptance criteria in the repair specification—not a successful test panel or a glossy finish.