
Fiber Installation: Applying Fiberglass Cloth With Epoxy
A practical fiberglass cloth installation sequence: check the substrate, dry-fit reinforcement, mix epoxy, wet out, inspect and finish.
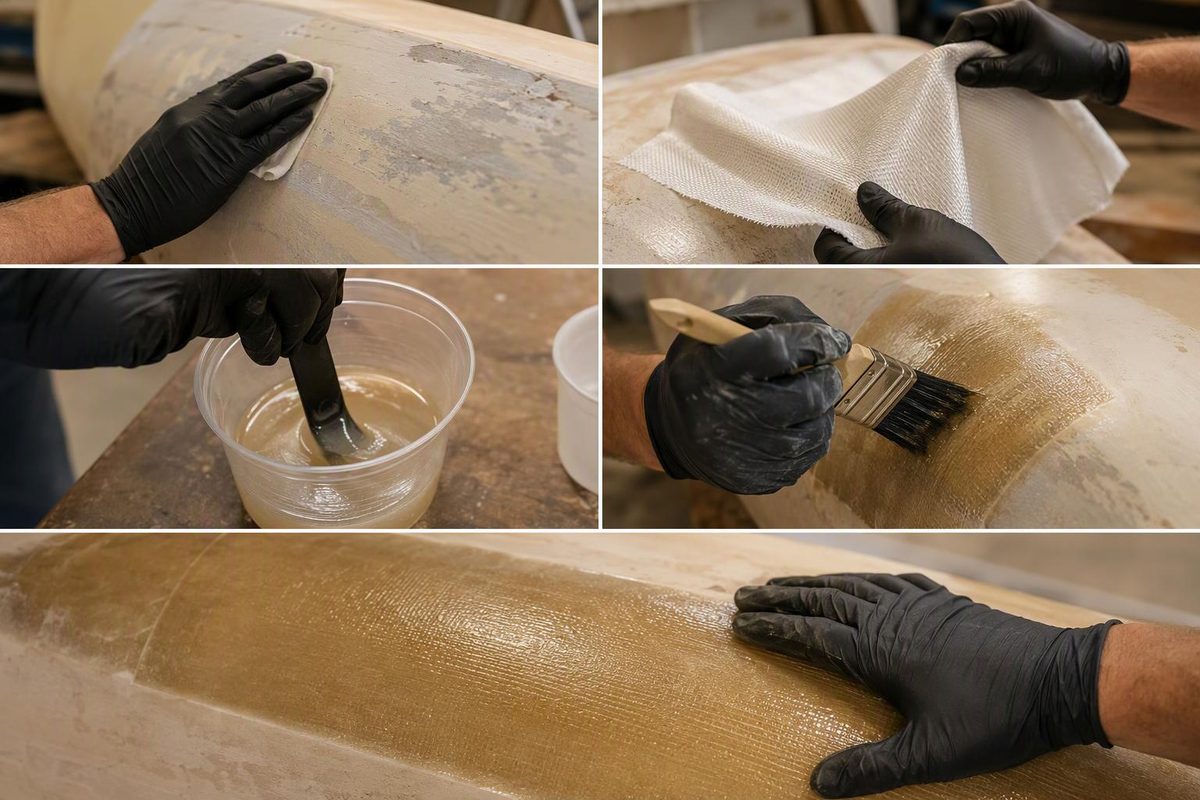
This guide covers fiberglass cloth installation—not insulation or fiber-optic cable. The sequence is for woven fiberglass cloth applied with laminating epoxy to a sound, prepared surface. It explains application, not the engineering of a load-bearing repair, and follows WEST SYSTEM’s dry-method instructions. Other epoxy systems may have different preparation and cure requirements.
1. Decide whether reinforcement is needed
A finish-only scratch does not automatically need cloth. Broken laminate fibers require a different repair from a cosmetic defect: fiberglass carries loads, while resin holds and supports the fibers. A patch over damaged material does not by itself restore the underlying structure. WEST SYSTEM’s boat repair manual explains that distinction.
Before buying materials, check:
- Substrate: Are you bonding to cured fiberglass, wood, or a plastic surface? An acrylic-faced fixture should not be treated automatically as bare fiberglass; epoxy adhesion to plastics varies.
- Damage extent: Is the problem confined to the finish, or are there broken fibers, separated layers, or damaged core beneath it?
- Function: Does the area carry hull, deck, hardware, or other significant loads?
Stop before laminating if the supporting material is wet, soft, crushed, or separating, or if a crack moves and its cause is unresolved. The boat repair manual calls for reaching sound material and addressing flexing or core damage, rather than merely covering it.
For a structural repair, obtain a repair schedule specifying the prepared geometry, reinforcement, fiber direction and layer count. Fibre Glast recommends matching the original laminate’s thickness and orientation where possible; simply adding a thicker patch can introduce unwanted stiffness changes. Its repair guidance gives manufacturer-specific instructions priority.
2. Match the materials and set up safely
Use a resin/hardener combination intended for laminating, with reinforcement documented as compatible. This procedure is for woven cloth; do not assume chopped-strand mat or mat-backed fabric behaves identically. Compare cloth, mat and their uses before substituting materials.
Gather cloth, sharp scissors, approved measuring equipment, suitable mixing containers and sticks, a plastic spreader, and a brush or foam roller. Cut the reinforcement before mixing resin.
Provide ventilation, protect eyes and skin, and control sanding dust. Select gloves and respiratory protection according to the product safety data sheets and the task; a particulate filter is not protection against solvent vapors. Never clean epoxy from skin with solvent. WEST SYSTEM’s safety guidance covers exposure controls for application and sanding.
3. Prepare the surface, then dry-fit the cloth
For an epoxy bond, the surface must be clean, dry and appropriately abraded. Remove wax, grease or release-agent contamination before sanding so it is not worked into the substrate. Use a cleaner suitable for both the contamination and the substrate. Remove unsound coatings and sanding dust.
For its epoxy on cured polyester laminate, WEST SYSTEM specifies sanding with 80-grit paper to a dull finish. Treat that as a system-specific instruction—not a universal specification for every resin or substrate. Its guidance also recommends an adhesion test for uncertain plastics. See its surface-preparation requirements.
Lay the cloth in place without resin. Check that it lies against curves and corners without wrinkles or bridging—spanning a recess instead of contacting it. For a repair, follow the prescribed patch dimensions and overlaps rather than copying a general sheathing allowance.
4. Mix a manageable batch
Measure the exact ratio specified for your resin and approved hardener, using the stated weight or volume method. Do not change that ratio to gain working time. Stir thoroughly, scraping the cup’s sides and bottom.
Select a hardener suited to the job’s temperature and the working time you need. Mix only what you can apply while the epoxy remains workable. Epoxy retains heat in a deep mixing cup, accelerating cure; spreading a thoroughly mixed batch into a shallow tray helps dissipate that heat. Large confined masses can become dangerously hot. WEST SYSTEM’s mixing instructions explain metering and heat control; its cure guidance explains temperature and hardener selection.
5. Wet out and remove excess resin
For the dry method, position cloth on the prepared dry surface, apply mixed epoxy near its center, and gently spread it toward the edges. Use a brush or roller on vertical surfaces.
With ordinary woven glass cloth, properly wetted fabric becomes transparent; white areas indicate incomplete wet-out. Check again over porous substrates, which can absorb resin from the cloth.
Use the spreader at a low angle to remove surplus resin without creating dry spots. The target is evenly wetted cloth with its texture still visible—not a shiny pool in which the fabric floats. Lift and reposition wrinkles while the epoxy remains workable; avoid excessive working that introduces tiny bubbles. These checks follow WEST SYSTEM’s cloth-application procedure.
Stop manipulating the laminate when the resin gels. Gelling epoxy is no longer workable. A defect discovered then needs assessment after cure, not more brushing. The manufacturer’s cure-stage guidance distinguishes working time from initial and later cure.
6. Inspect, cure and finish
Before gel, inspect for white strands, trapped air, lifted edges and cloth bridging. Correct them while the resin is still workable. After cure, assess remaining defects before fairing or coating; filler is not a substitute for sound reinforcement. See how fiberglass voids differ by location and function.
Apply weave-filling coats within the epoxy system’s recoat window. If it has cured beyond that window, follow its cleaning and abrasion instructions; where amine blush is present, WEST SYSTEM calls for water washing before sanding. Build enough coating above the cloth to finish without sanding through the reinforcement. Surface preparation governs subsequent bonding and coating.
Choose the finish before starting. Outdoor epoxy needs suitable sunlight protection, and an immersed repair needs a coating approved for that exposure. Gelcoat over epoxy requires compatible products and the specified cure and preparation—not an assumed direct application. Follow the finish manufacturer’s requirements.
Before loading or immersing the repair, satisfy the resin and coating manufacturers’ applicable cure requirements at the actual curing temperature. A hard surface alone is not permission to return it to service: epoxy continues developing strength after reaching a sandable solid state.