
Air Bubbles in Fiberglass: Risk and Repair by Type
A confirmed pinhole in a nonstructural finish may be a surface issue. A similarly sized void in load-carrying reinforcement may need closer assessment.
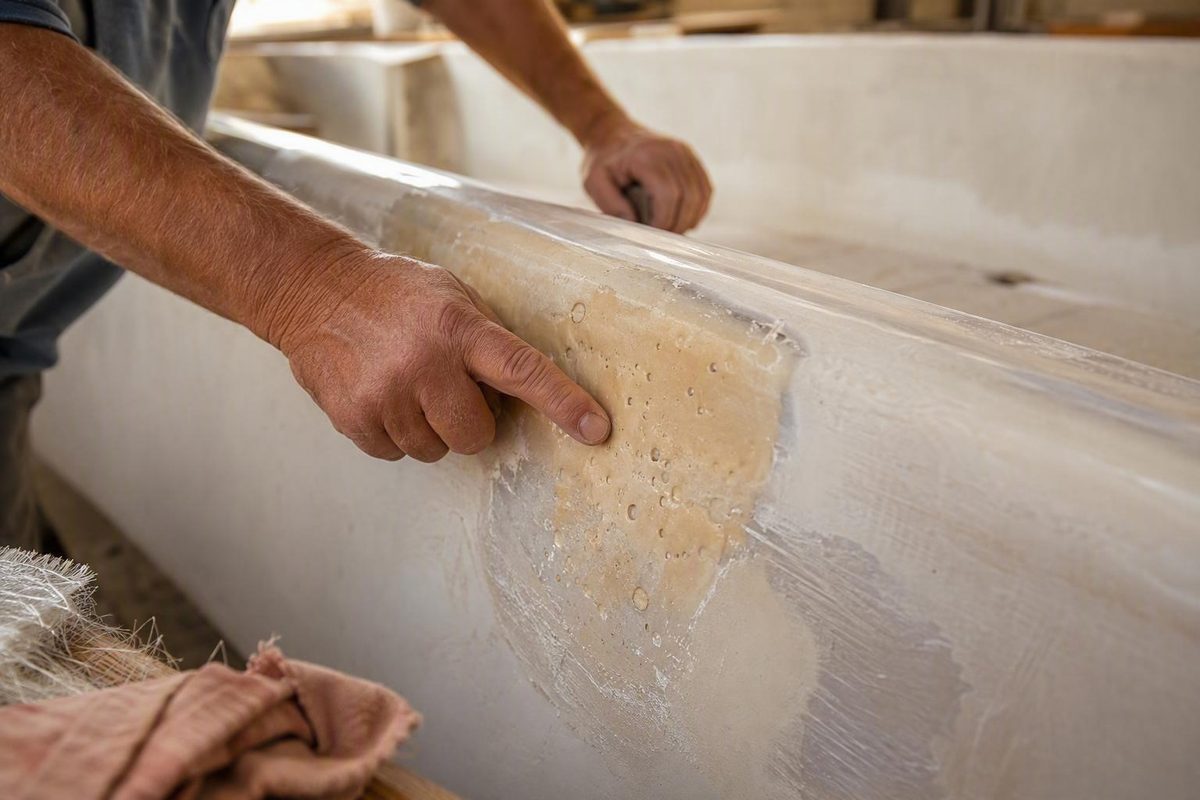
Air bubbles in fiberglass can range from shallow finishing flaws to internal voids that interrupt reinforcement or separate laminate layers. Appearance and size alone do not establish which type you have—or whether it is acceptable.
Use an inspect-before-repair sequence:
- Identify the likely defect type and cure stage.
- Record its extent, depth indicators, and location.
- Determine whether it affects reinforcement, a bond line, a core, or a load path.
- Check the requirements for the exact resin, reinforcement, coating, and component.
- Choose a response proportionate to the defect’s structural importance.
A small, fully exposed cavity in a noncritical location may sometimes be opened and filled. Cosmetic disappearance is not proof that the original laminate has been restored.
First identify what kind of defect you have
An air bubble or void is trapped air within the fiberglass-and-resin laminate or between its layers. A pinhole is a small, crater-like opening at the resin or gelcoat surface. These defects need different responses because one is an internal cavity and the other is a surface opening (True Composites’ explanation of bubbles and pinholes).
Other flaws can resemble air bubbles:
| Defect | Typical appearance | Likely position | Common mechanism | Sensible next action |
|---|---|---|---|---|
| Surface pinhole | Tiny crater or open pore | Resin, gelcoat, or finishing layer | Surface air, contamination, or incomplete finishing | Confirm that it is superficial, then prepare and refinish with a compatible product |
| Dry reinforcement | Persistent white, pale, or cloudy fibers | Within a reinforcement ply | Resin has not fully displaced air around the fibers | If workable, improve wet-out and consolidation; if cured, map and assess the affected reinforcement |
| Interply void | Bubble, pale patch, or visible gap bounded by laminate layers | Between plies | Poor contact, lifted fabric, or inadequate consolidation | Establish its boundaries, location, and structural importance before selecting a response |
| Bridging | Fabric spans a corner, ridge, overlap, or recess without touching the surface below | Beneath reinforcement at a transition | Cloth cannot conform to an abrupt step or sharp corner | Correct the transition while workable; after cure, assess whether unsupported material must be removed |
| Broad interlaminar separation | Extended hollow, raised, flexible, or differently sounding region | Between plies, skin and core, or repair and parent laminate | Poor bonding or another unverified process failure | Stop treating it as a cosmetic bubble and obtain an appropriate repair assessment |
| Blister | Local swelling beneath a coating or laminate surface | Coating, laminate, or an interface | Several possible mechanisms | Do not diagnose by shape alone; investigate the affected layers and exposure history |
Properly wetted reinforcement is commonly described as uniformly translucent. Persistent white or cloudy fibers can indicate incomplete saturation or trapped air, although color alone does not establish the defect’s cause or depth.
The cure stage helps organize the diagnosis:
- Visible while the resin is workable: Look for incomplete wet-out, folds, bridging, trapped edges, or insufficient consolidation.
- Appearing during cure: Consider whether reinforcement lifted, a porous substrate released air, or the laminate moved before gel.
- Discovered after cure or finishing: Determine whether the indication is confined to the surface, lies within reinforcement, extends between plies, or is concealed beneath a coating.
Do not judge significance by diameter alone. A tiny surface crater and a similarly sized interruption inside load-carrying reinforcement do not have the same implications. Conversely, an obvious mark may be confined to a nonstructural finish, while a smooth coating can conceal a bond defect.
Why bubbles form during layup and cure
Incomplete wet-out
Wet-out is the process of distributing resin around and between reinforcement fibers so that air is displaced. If resin does not penetrate the fabric adequately, areas may remain white, cloudy, or visibly dry.
Possible contributors include uneven resin application, rushed placement, reinforcement that does not conform readily, or attempting to wet multiple layers without confirming the condition of each one. Cold or otherwise viscous resin may also be more difficult to distribute.
Do not apply a generic working temperature to every epoxy, polyester, or vinyl-ester product. Use the exact resin manufacturer’s technical data for conditioning, application, working time, and cure limits.
Inadequate consolidation
Supplying enough resin does not automatically remove trapped air. The reinforcement must also be brought into close contact with the substrate or preceding ply.
Skipped areas, inaccessible edges, rushed rolling, or fabric that lifts again before gel can leave cavities. A roller, paddle, brush, or squeegee should move air toward an accessible boundary while establishing contact.
Air introduced during mixing
Vigorous mixing can introduce small bubbles into resin. Mix deliberately while following the product instructions for measuring, combining components, scraping the container, and observing working time.
There is no universal mixing speed, standing period, or bubble-release schedule for all resin chemistries. A procedure appropriate for one product should not be transferred automatically to another.
Porous-substrate outgassing
Wood, some foams, and other porous materials can release air after resin is applied. A compatible sealing or pre-wet process may reduce this effect, but the correct sequence depends on both the substrate and resin.
Do not assume outgassing merely because a bubble is near the substrate. The location, preparation history, substrate condition, and timing must support that explanation.
Contamination and moisture
Dust, oil, release material, residual cleaning products, or moisture may interfere with wetting or bonding. These are possible contributors, not automatic diagnoses.
Check how the reinforcement and substrate were stored and prepared. Follow the resin or coating manufacturer’s surface-preparation and overcoating instructions rather than improvising a cleaning method.
Corners, chines, edges, and overlaps
Sharp corners and abrupt thickness changes encourage reinforcement to bridge instead of following the surface. Common problem areas include:
- Outside corners and chines
- Raised tape edges
- Stacked reinforcement boundaries
- Tight recesses and inside corners
- Transitions between heavy and light reinforcement
- Ridges in an underlying cured layer
In one boatbuilding discussion, bubbles appeared where plain-weave cloth crossed the raised edge of heavier biaxial reinforcement. Participants suggested smoothing the underlying laminate, creating a compatible transition where appropriate, and stepping rather than stacking later tape boundaries. These were field suggestions for that particular layup, not universal repair specifications (Boat Design Net discussion of raised reinforcement edges).
Bubbles that appear during cure
A hand layup can look clear after rolling but show bubbles later. Field discussions have proposed reinforcement lifting before gel, damp material, residual solvent, cure heat, and a mismatch among resin condition, catalyst level, temperature, and working conditions. In the reported case, the precise cause was not established (Hot Rod Forum discussion of bubbles appearing during cure).
Treat these as troubleshooting hypotheses. Record the resin batch, measured component ratio or catalyst amount, substrate condition, ambient conditions, layer sequence, and timing. Avoid changing several variables at once.
Never adjust MEKP or another catalyst by guesswork. Keep the amount within the resin manufacturer’s specified range and follow its measuring and mixing instructions.
How serious is a fiberglass void?
The available evidence establishes no universal bubble diameter that is always safe or always unacceptable. It also does not provide a validated percentage of strength loss or failure probability for a particular void.
Assess the complete context:
- Area: How much laminate appears affected?
- Depth: Is the flaw in a coating, within one ply, between plies, or through several layers?
- Number: Is it isolated or repeated?
- Clustering: Are small indications concentrated along a joint, edge, or corner?
- Location: Is it on a finishing surface, at a chine, near an attachment, or in a load path?
- Construction: Is the component solid laminate, cored, bonded, molded, or previously repaired?
- Loading: Does the area carry bending, tension, compression, impact, or attachment loads?
- Environment: Will it be submerged, exposed to weather, or repeatedly cycled between wet and dry?
- Accessibility: Can the full defect be exposed without uncertain structural consequences?
- Surrounding condition: Are there cracks, movement, staining, soft material, or evidence of wider separation?
Commercial guides and forum contributors raise concerns about reduced strength, moisture retention, cracking, and delamination, but the available material does not quantify those risks for a specific laminate or defect (iboats discussion of bubble significance and repair judgment).
Lower-concern indications
An indication may be lower concern when it is:
- Confirmed to be an isolated pinhole in a nonstructural finish
- Fully visible and accessible
- Surrounded by hard material with no signs of wider separation
- Away from joints, attachments, concentrated loads, cores, and immersed service
- Stable, without cracking, movement, or water entry
“Lower concern” does not mean automatically acceptable. Drawings, warranties, manufacturer requirements, class rules, or a documented repair specification may impose stricter criteria.
Higher-concern indications
Escalate the assessment when a defect is:
- At a load-bearing joint, attachment, chine, keel, frame, or stiffener
- In an underwater hull area
- Within a cored laminate or near a skin-to-core bond
- Broad, deep, clustered, recurring, or difficult to map
- Associated with cracks, movement, water entry, or soft material
- Hidden beneath paint, gelcoat, lining, or bottom coating
- In a safety-critical component
- Part of a repair whose original laminate schedule is unknown
A smooth surface after filling or coating does not establish that fiber continuity, interlayer adhesion, or original strength has been restored. When the boundaries or consequences are uncertain, consult the component manufacturer or a qualified composites professional or marine surveyor.
What to do while the resin is still workable
When reinforcement can still be repositioned safely within the product’s working window, correcting a known void is generally preferable to allowing it to cure.
Use this sequence as a process check, not as a substitute for the resin instructions:
- Stop and inspect. Determine whether the area lacks resin, contains trapped air, or bridges an unsupported transition.
- Check wet-out. Look for persistent white or cloudy fibers rather than judging only the surface sheen.
- Reposition if permitted. Ease back bridged reinforcement only if the material, resin state, and remaining working time allow it.
- Correct the support condition. Do not keep forcing cloth over an abrupt ridge or sharp unsupported corner.
- Add only the resin required. Supply enough for complete saturation without flooding the area.
- Consolidate outward. Work from the trapped area toward an accessible edge using controlled, overlapping passes.
- Reinspect before gel. Watch corners, overlaps, and vertical surfaces for renewed lifting.
A fin, paddle, bristle, or other suitable laminate roller can help press reinforcement into contact and move air outward. Supplier troubleshooting guidance describes properly wetted glass as translucent rather than dry or heavily flooded and recommends methodical consolidation toward an edge (Fibreglass Supplies’ troubleshooting guidance).
More resin is not the automatic answer. If fabric bridges a step, pouring resin over it may leave a resin-rich skin above the same cavity. Excessive rolling or squeegee pressure can create the opposite problem by removing needed resin.
At a raised overlap or corner, pause and address the transition. Depending on the approved construction, that may involve smoothing an underlying ridge, forming a suitable radius, or using a specified transition material. Do not improvise a structural filler merely to make the fabric appear flat.
Monitor the layup during the product’s permitted early-cure period. The resin technical data—not a generic online schedule—should control working time, temperature, catalyst limits, overlamination, and cure.
How to assess bubbles after the laminate has cured
Begin with the least destructive inspection available.
Map visible and tactile indications
Where the laminate is exposed, mark:
- White or cloudy reinforcement
- Raised areas and open pinholes
- Cracks around the indication
- Soft or flexible regions
- Visible gaps between plies
- Boundaries following a joint, tape edge, corner, or core
- Staining or evidence of liquid
Photograph the area with a scale and record its location relative to joints and structural features before sanding, coating removal, or other alteration.
Paint, gelcoat, fairing compound, and bottom coating can hide fiber condition and obscure defect boundaries.
Use comparative tap testing only as a screen
A light comparative tap test may help identify conspicuous changes. Use a consistent tool and force, compare the suspect area with nearby laminate believed to be sound, and mark repeatable differences.
Forum participants have described suspicious concealed areas as producing a different or more rattling response. That discussion does not validate tap testing as a conclusive diagnostic method (Boat Design Net discussion of concealed laminate bubbles).
By itself, it cannot establish:
- Whether the indication is a void, disbond, construction change, or geometric effect
- The defect’s depth
- Its exact boundaries
- Whether the component is structurally acceptable
Professional nondestructive inspection may be considered when an important area is concealed, but the evidence here does not establish which method or acceptance criterion is appropriate for a particular component. Inspection method and interpretation should therefore be selected by someone familiar with the construction and objective.
Escalate when you find:
- Uncertain or expanding boundaries
- A suspicious response at a joint or load path
- Cored construction
- Underwater service
- Several connected abnormal responses
- Movement under light pressure
- Cracks, staining, or evidence of water entry
Do not begin exploratory grinding into a structural or finished component unless the laminate construction and resulting repair requirements are understood. If they are unknown, stop at mapping and documentation and seek qualified guidance.
Choosing between filling, injection, and relamination
Surface finishing, cavity filling, injection, and relamination are materially different responses. The following matrix is a decision overview, not an engineered repair specification.
| Response | Potentially suitable situation | What it may accomplish | What it does not prove |
|---|---|---|---|
| Surface sanding and recoating | Confirmed pinhole or superficial finishing flaw | Restores a properly prepared finish | Repair of an internal void or interply bond |
| Opening and filling | Small, accessible, noncritical cavity with visible limits and apparently sound surroundings | Removes loose material and fills a localized space | Restoration of interrupted fibers or original laminate strength |
| Resin injection | Accessible closed cavity covered by a suitable documented procedure | May occupy empty space without removing the entire face | Complete wet-out, restored fiber contact, renewed adhesion, or structural equivalence |
| Removal and relamination | Broad, deep, poorly bonded, load-bearing, recurring, or uncertain defect | Permits removal of unsound material and restoration of compatible reinforcement | Acceptability unless repair design, preparation, cure, and inspection are appropriate |
Surface finishing
Limit sanding, fairing, or recoating to a defect confirmed to be superficial. Applying another surface coat may hide an internal bubble without changing the cavity below.
Follow the coating and resin manufacturer’s preparation requirements. The necessary treatment depends on the specific chemistry, cure state, and permitted overcoating procedure.
Opening and filling a localized cavity
The opening must reveal its actual extent; filling over loose fibers or uncertain edges does not resolve the underlying defect.
A cautious decision sequence is:
- Expose and map the cavity.
- Stop if its boundaries extend beyond the expected area.
- Remove only material already established as loose or unsound.
- Follow the compatible resin system’s preparation instructions.
- Use a filler repair only where that type of repair is appropriate.
- Allow the product to cure under its specified conditions.
- Inspect the area before hiding it beneath fairing or coating.
This sequence does not provide criteria for declaring a structural repair fit for service. If the defect interrupts load-carrying reinforcement, a documented repair specification is needed.
Resin injection
Injection is sometimes proposed in field discussions for accessible voids. It may physically fill empty space, but the available accounts do not show that it restores dry-fiber wet-out, fiber positioning, or the original bond between plies. A visually successful result is therefore not evidence of restored strength.
Use injection only when a suitable procedure has been established for the particular materials, cavity, location, and inspection requirements. If those conditions cannot be defined, do not treat injection as a default structural repair.
Removal and relamination
At a high level, that means:
- Map the indication and establish the component’s construction.
- Obtain the original laminate schedule or an approved replacement schedule.
- Define what material must be removed.
- Prepare the bonding area according to the specified resin and repair procedure.
- Restore the required fiber type, orientation, and ply sequence.
- Cure within the stated environmental and timing limits.
- Inspect the structural work before fairing and refinishing.
These steps are deliberately non-dimensional. The available evidence does not establish a universal scarf ratio, grinding boundary, patch overlap, layer count, or interchangeable replacement material. Chopped-strand mat, woven cloth, biaxial reinforcement, and fiber-filled resin should not be treated as automatic substitutes for one another.
Stop work and obtain a documented repair specification when a repair is fuel-adjacent, enclosed, cored, highly loaded, underwater, or safety-critical and the laminate schedule or repair requirements are unknown.
Preventing bubbles on flats, corners, overlaps, and vertical work
Prevention depends on the entire layup sequence, not one rolling technique.
1. Condition the materials
- Confirm that the resin, reinforcement, substrate, and workspace meet the product’s permitted processing conditions.
- Keep reinforcement dry and protected from dirt.
- Check product shelf life and batch condition.
- Confirm the required resin-to-hardener ratio or catalyst range before mixing.
2. Prepare the substrate
The surface must be compatible with the intended bond and prepared as the product instructions require. Correct sharp transitions and unsupported ridges before mixing resin.
For porous wood, foam, or similar materials, use an appropriate sealing or pre-wet step when specified. The exact method must match the substrate and resin rather than being adopted as a universal rule.
3. Mix the resin carefully
Measure and combine the components exactly as directed. Mix deliberately to limit introduced air while still achieving complete blending.
Do not prescribe one mixing time or standing period across epoxy, polyester, and vinyl-ester products. Plan batch size around the stated working time so placement and consolidation do not become rushed.
4. Place reinforcement methodically
Dry-fit reinforcement before mixing resin. Confirm that it can follow the shape without forced wrinkles, folds, or unsupported spans.
On flat work, place the fabric progressively rather than dropping a resin-wet layer into an uncontrolled fold.
5. Wet out completely but not excessively
Distribute resin through the fibers until the reinforcement has a consistent wetted appearance. Address persistent pale or cloudy areas directly.
Do not equate a glossy pool with saturation. Resin above the cloth can coexist with dry fibers or a void underneath.
6. Consolidate toward an edge
Use a suitable roller, paddle, brush, or squeegee with controlled passes. Move trapped air toward an open boundary rather than repeatedly moving it around the same area. Apply enough pressure to establish contact without displacing excessive resin.
7. Monitor through gel
Inspect under good lighting, then recheck during the product’s permitted early-cure period. Pay particular attention to corners, raised overlaps, vertical work, and areas where the reinforcement tends to spring back.
Flats
For flat laminates:
- Start with a clean, compatible surface.
- Place the reinforcement without folds.
- Use complete but not excessive saturation.
- Consolidate methodically.
- Move trapped air toward an accessible edge.
- Inspect from more than one lighting angle.
Corners and chines
Use an appropriate radius that allows the reinforcement to stay in contact. More resin will not make stiff or heavy fabric conform reliably to a sharp unsupported corner.
Dry-fit each ply and confirm how it will turn the corner. If the construction requires a transition material, use only one specified as compatible and suitable for that purpose.
Heavy-cloth edges and overlaps
Smooth the underlying laminate before applying later plies. Where the approved construction permits it, create a compatible transition over a raised edge and step tape boundaries instead of stacking them at one abrupt line.
These practices reduce the height changes that encourage later reinforcement to bridge.
Vertical work
Vertical layups can experience resin runoff and reinforcement movement before gel. Treat both as process-control problems: use manageable batches, an orderly placement sequence, and the resin condition permitted by the manufacturer.
Use one only when the product documentation permits it for the intended resin and structural purpose.
Final operator checklist
Before mixing resin, confirm:
- Enough working time for placement and consolidation
- Dry reinforcement
- Clean, properly prepared substrate and tools
- Correct resin components and measuring equipment
- A consolidation tool suited to the reinforcement
- Accessible routes for trapped air
- Planned corner radii and overlap transitions
- Adequate lighting
- A workable sequence for vertical or overhead areas
- Time for a final inspection before gel
Vacuum consolidation, resin compatibility, and safe working limits
In the process described by the supplied evidence, wet-layup vacuum bagging begins with manually wetted reinforcement that is then sealed under a bag for consolidation. Resin infusion places dry reinforcement under vacuum and subsequently draws resin through a planned flow arrangement (Smartech’s comparison of vacuum bagging and resin infusion).
That distinction is intentionally limited to wet-layup bagging versus infusion. “Vacuum bagging” is a broader term in composites manufacturing and should not be assumed to describe only one material format.
Neither process guarantees a void-free laminate. Wet-layup bagging can retain problems caused by uneven manual wet-out or bridging. Infusion can produce defects when a bag leaks, resin distribution is incomplete, or the setup is incorrect. Both require process-specific materials, tooling, checks, and operator knowledge.
Vacuum-degassing mixed resin and pressure-casting unreinforced resin are separate processes. Advice written for clear resin artwork or castings should not automatically be transferred to reinforced structural laminates.
For any layup process, consult the exact resin and reinforcement documentation for:
- Storage and processing conditions
- Resin-to-hardener ratio or catalyst limits
- Pot life and working time
- Permitted fillers and additives
- Compatible preparation and cleaning methods
- Cure and post-cure requirements
- Recoat or overlamination limits
- Preparation after cure
- Reinforcement compatibility
- Vacuum-processing restrictions, if applicable
Safety boundary
This evidence pack does not support a comprehensive occupational-safety procedure for every resin, catalyst, solvent, coating, or worksite. Before starting, read the current safety data and manufacturer instructions for every product being used. Follow their specified controls and stop if the work requires equipment, ventilation, exposure controls, or training you do not have.
Cutting, sanding, and grinding also require product- and task-appropriate precautions. A resin-art manufacturer, for example, advises wearing a mask while sanding its cured product, but that narrow instruction should not be treated as a complete safety protocol for structural fiberglass work (ArtResin’s cured-resin sanding guidance).
Do not treat acetone, a torch, a heat gun, a filler, an additive, or an altered catalyst level as generic bubble-removal advice. Compatibility and safe operating limits must come from the applicable product documentation.
This article is a diagnostic overview, not a repair specification, engineering approval, inspection certificate, or guarantee of performance. Fiberglass Guide’s published terms likewise describe its content as general information provided as-is, with users responsible for how they apply it (Fiberglass Guide Terms of Use).
Frequently asked questions
Are tiny air bubbles in fiberglass always a structural problem?
No. A tiny pinhole confirmed to be in a nonstructural finish may be a surface issue, while a similarly sized void within load-carrying reinforcement may require closer assessment.
Judge the indication by depth, extent, clustering, location, construction, loading, exposure, and surrounding condition—not diameter alone. Concealed, cored, underwater, recurring, or difficult-to-classify defects should be assessed conservatively.
Can resin be injected into a cured fiberglass bubble?
Resin can sometimes be introduced into an accessible cavity, but injection is not a universal structural repair. It may fill empty space without restoring dry-fiber wet-out, fiber contact, or the original bond between plies.
Before considering injection, establish the boundaries, location, material compatibility, and applicable repair procedure. Broad, poorly bonded, load-bearing, or uncertain defects generally require evaluation for removal and compatible relamination.
How can I find air bubbles hidden beneath paint or bottom coating?
Begin by mapping cracks, raised areas, soft spots, staining, movement, and repeatable changes during a light comparative tap test.
Treat tapping as screening only. Coating thickness, core material, geometry, construction, and operator technique can change the response. Important or ambiguous areas may require controlled coating removal or professional inspection selected for the particular component.
Why do bubbles sometimes appear after the layup initially looked clear?
Reinforcement may lift, relax, or bridge again before gel, and air may emerge from a porous substrate. Field discussions also mention damp material, residual solvent, cure heat, and mismatches among resin condition, catalyst, and temperature, but appearance alone cannot identify the cause.
Record the materials and process conditions, verify the manufacturer’s requirements, and monitor future layups during the permitted early-cure period. Never move catalyst levels outside the specified range to troubleshoot bubbles.
Does vacuum bagging eliminate air bubbles in fiberglass?
No. Vacuum can assist consolidation and air removal, but bridging, uneven wet-out, bag leaks, incomplete resin distribution, and setup errors can still leave defects.
Vacuum processing is a controlled manufacturing method, not a substitute for correct material preparation, reinforcement placement, resin handling, and inspection.
The inspect-before-repair decision
Identify the defect before deciding how to repair it. Record its extent and location, determine whether it interrupts reinforcement or a bond line, and consult the exact resin and laminate requirements.
Use surface finishing only for confirmed surface flaws. Consider opening and filling only for fully exposed, noncritical cavities under a compatible procedure. Do not assume that injection restores structural continuity. Where a defect is broad, deep, poorly bonded, concealed, underwater, cored, recurring, highly loaded, or otherwise uncertain, obtain a documented repair specification or qualified composites or marine assessment.
The final appearance is not the final test. A bubble that has disappeared beneath resin, filler, fairing compound, or paint may still represent interrupted fibers or an inadequate bond.