
Resin Mold Release: How to Choose and Apply It
Compare wax, PVA, polymer, release film and semi-permanent systems by resin, mold, cure temperature, finish and production volume.
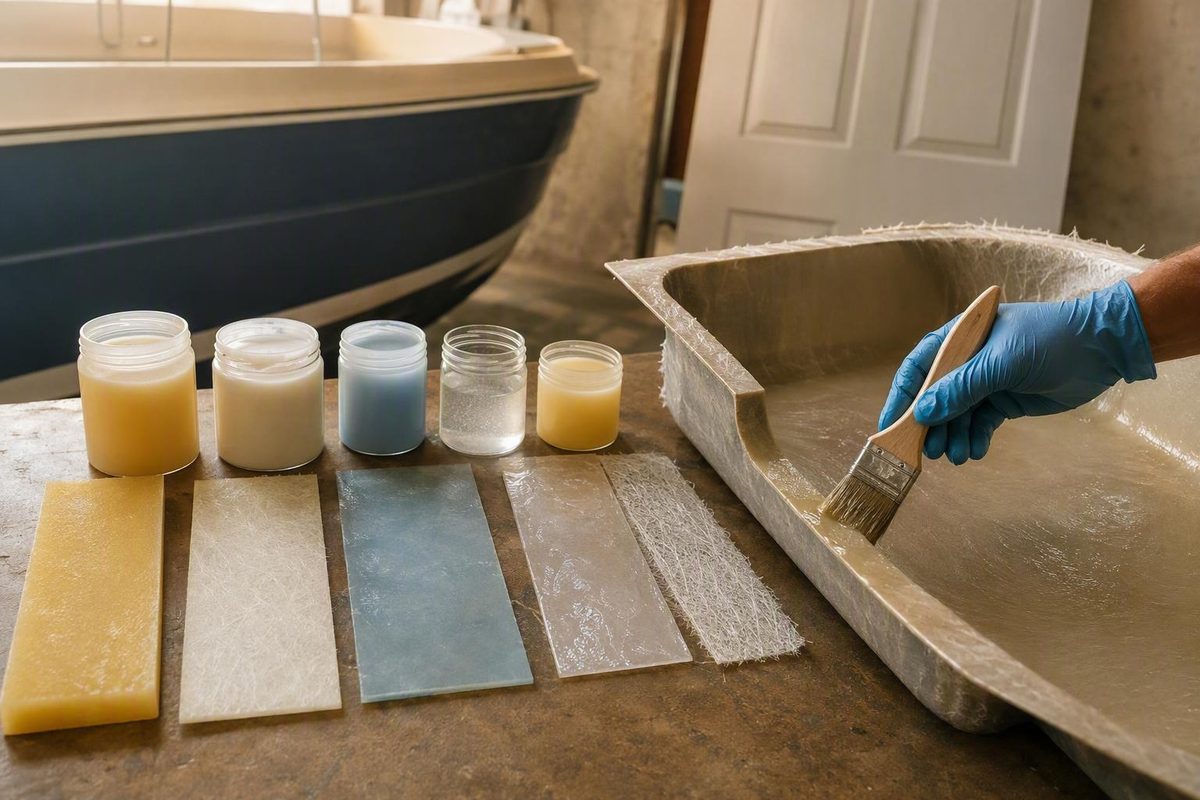
The right resin mold release is the system that matches the exact resin formulation, mold material and condition, cure temperature, production volume, required finish, and any later painting or bonding. Wax or PVA often suits prototypes and short runs; semi-permanent systems commonly suit repeated production. None is universally best. Prepare the tool correctly, follow the selected product’s current technical data sheet, and prove the complete process on a representative sample before coating a valuable mold.
Related: Fiberglass With Epoxy Resin Hinges on Compatibility.
Quick selection matrix: start with the job, not the brand
Use this matrix to identify a starting category, not a final prescription. Labels such as “epoxy-compatible” or “for polyester” do not establish compatibility with every formulation, tool surface, or cure schedule.
| Production situation | Likely starting category | Principal advantage | Principal limitation |
|---|---|---|---|
| One-off or prototype | Mold-release wax, PVA, or a compatible polymer release | Accessible options for short-run work | Wax requires application and buffing; poorly applied PVA can reproduce surface defects |
| New mold needing a full physical barrier | PVA, sometimes over a compatible prepared base | Creates a continuous, water-soluble sacrificial barrier | Pooling, fish-eyes, runs, or application texture may transfer to the part |
| Repeated production | Complete semi-permanent system | May support multiple pulls with relatively little transfer | Preparation, curing, and maintenance are system-dependent |
| Part to be painted or structurally bonded | Documented low-transfer, non-transfer, paintable, or bonding-compatible system | Reduces the risk of contaminating later operations | “Silicone-free,” “paintable,” and “bonding-compatible” are not interchangeable claims |
| Porous, worn, or microporous tool | Compatible sealer or base coat followed by release | Fills porosity and improves release-coating continuity | Adds preparation steps and must adhere to the existing tool surface |
| One-off mold suitable for release film | Dedicated release film | Provides a complete barrier without applying a liquid coating | Seams can print through, and compound curves can be difficult to cover |
Before making the final selection, check the following:
| Situation | Checks required before use |
|---|---|
| One-off or prototype | Resin formulation, mold substrate, cure temperature, desired gloss, cleanup |
| New mold with PVA | Base-coat compatibility, application method, drying conditions, finish standard |
| Repeated production | Cleaner, sealer, release chemistry, cure conditions, maintenance criteria |
| Painting or bonding | Exact paint, primer, adhesive, and surface-preparation process |
| Porous or worn tool | Tool material, existing residue, sealer compatibility, required cure |
| Release film | Adhesive compatibility, seam placement, service temperature, geometry, finish |
Wax can transfer to the molded part and accumulate on the tool, while PVA forms a thicker, water-soluble physical film. Release films can work well for prototypes but may leave overlap lines or resin ridges. These practical differences are outlined in the Explore Composites guide to mold-release systems.
Semi-permanent release is not simply stronger wax. It is designed to bond or cross-link to the tooling surface and may remain effective for multiple pulls, but there is no dependable universal cycle count. Abrasion, resin chemistry, mold condition, temperature, application quality, and part geometry all affect maintenance.
Before buying, verify five items in current product documentation:
- The complete resin formulation, including fillers, pigments, catalysts, and additives.
- The mold substrate, coating, porosity, age, and condition.
- The highest mold and cure temperatures.
- The required gloss, texture, color, or cosmetic standard.
- Whether the part will later be painted, coated, bonded, plated, decorated, or sealed.
What mold release does—and when another coating may be unnecessary
Cured resin can stick in two ways. Mechanical adhesion occurs when resin enters scratches, texture, pores, or damaged areas and locks into them. Chemical adhesion occurs when the resin interacts or bonds with the mold surface. Undercuts and unfavorable draft angles create another problem: geometric trapping.
A release system counters these mechanisms by providing one or more of the following:
- A smooth surface with fewer features for the resin to grip
- A low-surface-energy coating
- A chemically inert interface
- A continuous physical barrier between resin and mold
An external release is applied to the tool. Wax, PVA, release film, polymer coatings, and semi-permanent coatings fall into this group. An internal release is incorporated into a formulated resin system.
Resin type alone does not determine the answer. A filled epoxy cured hot against a porous composite tool presents a different release problem from an unfilled, room-temperature epoxy cast in a smooth flexible mold.
Some naturally low-adhesion molds and dedicated release films may work without another coating. That does not mean every silicone, polyethylene, or nominally non-stick tool can be treated alike. Establish whether an additional release is needed from the resin and mold manufacturers’ guidance, then confirm the combination with a sample.
Release agent also cannot correct every demolding problem. A casting may remain trapped because of an undercut, rough tool, negative draft, or incomplete resin cure even when the release layer is intact.
Compare wax, PVA, polymer, and semi-permanent systems
| Category | Application and barrier | Transfer and finish risk | Best-fit scale and durability |
|---|---|---|---|
| Wax | Applied and buffed to create a sacrificial, low-energy layer | Can transfer, build up, or leave buffing defects | Prototypes and short runs; labor increases with repeated use |
| PVA | Applied as a continuous, water-soluble physical film | Runs, sags, pooling, spray texture, or fish-eyes may reproduce on the part | One-offs, new tools, and jobs needing a distinct physical barrier |
| Thin polymer coating | Typically leaves a low-energy polymer film after its carrier evaporates; some products may be easier to apply than buffed wax | Uneven coverage or transfer remains possible, though heavy-film distortion may be lower than with PVA | Short-to-moderate runs; may be less durable than a complete semi-permanent system |
| Semi-permanent system | Bonds or cross-links to the tool and may include cleaner, sealer, and release coating | Often selected where limited transfer matters, but performance remains product-specific | Repeated production with planned inspection and touch-up |
| Release film | Sheet or adhesive-backed physical barrier | Seams, wrinkles, overlaps, and difficult curves can mark the part | One-offs, prototypes, or suitable simple geometry |
When establishing a mold with wax, several complete coats are generally applied and buffed to reduce the chance of missed areas. Do not substitute a generic coat count or waiting period for the wax manufacturer’s instructions.
PVA is thicker than wax or thin polymer coatings and physically separates the casting from the tool. Transferred PVA can generally be removed with water, but the removal method must be compatible with the casting and follow the product instructions.
A semi-permanent system may include separate cleaner, primer or sealer, and release products. These are not interchangeable liquids. Chem-Trend describes semi-permanent systems as cross-linked films and notes that wax contamination can compromise their bond to the mold in its manufacturer guidance for composite molding.
“Water-based” and “solvent-based” identify the carrier. They do not establish whether a product is silicone-free, nonflammable, non-transferring, paintable, suitable for structural bonding, or compatible with a particular substrate. Water-based coatings may also dry more slowly or respond differently to humidity, low temperature, freezing, and incomplete evaporation. Check each property independently.
Prepare the mold before applying release
A release coating cannot reliably compensate for a dirty, damaged, or porous tool. Use this preparation sequence:
- Inspect the tool. Look for undercuts, chips, cracks, exposed fibers, worn edges, rough repairs, porosity, and previous coating buildup.
- Remove incompatible residue. Strip old wax before converting to a semi-permanent system because residual wax can interfere with the new coating’s bond.
- Clean with an approved product. The cleaner must suit the mold substrate, its surface coating, and the release chemistry being removed.
- Dry the mold completely. Remove cleaner residue and allow moisture or condensation to dissipate.
- Repair damage and address porosity. Smooth rough areas and correct defects that could mechanically lock the resin.
- Apply a compatible sealer when required. New, worn, porous, or microporous FRP and composite molds may need a sealer or base coat.
- Apply the selected release layer. Follow its specified applicator, coat sequence, flash intervals, and final cure.
A smoother, cleaner, less porous mold gives resin fewer places to grip and makes continuous coverage easier to achieve. Extra release is not a substitute for sealing porosity or repairing tool damage.
When changing chemistries, do not assume the old and new systems are compatible. Strip and clean as directed, then test a small area. Moisture, condensation, residual cleaner, dirty applicators, and incompatible coatings can cause haze, streaks, or inconsistent release.
Applicator instructions are also product-specific. For example, Chem-Trend recommends a clean 100% cotton cloth for the semi-permanent systems covered by its guidance; that numeric specification should not be applied automatically to every wax, PVA, spray, or water-based coating. Chem-Trend’s application guidance should be read in the context of the exact system being used.
Apply the coating and run a test casting
Read the current technical data sheet and safety data sheet for the exact product and version in hand. Use the temperature, humidity, ventilation, application, and curing conditions stated in those documents rather than relying on instructions for another product in the same broad category.
Then:
- Apply thin, even coats using the specified cloth, spray equipment, brush, or other applicator.
- Cover edges, recesses, details, and high-risk areas without flooding them.
- Allow every coat to flash, dry, or cure for the specified period.
- Inspect under good lighting for missed spots, runs, pooling, lint, haze, or contamination.
- Complete the required final cure before introducing resin.
Several thin coats are generally safer than one heavy coat because they improve the chance of continuous coverage while reducing pooling, transfer, streaking, and buildup. Generic coat counts and drying times must never override the current product instructions.
Before committing a valuable mold, run this sample protocol:
- Choose a representative mold coupon, spare insert, or inconspicuous area.
- Prepare it with the complete proposed system, including cleaner and sealer where applicable.
- Cast the actual resin formulation, including planned pigments, fillers, reinforcement, and additives.
- Reproduce the intended cure temperature and schedule.
- Confirm that the resin has reached the cure state required by its manufacturer.
- Demold and note the force, sticking locations, and condition of both surfaces.
- Inspect gloss, texture, fish-eyes, haze, residue, print-through, and damage.
- Apply the planned paint, coating, adhesive, or other secondary process to the sample.
Record the resin batch, mold material, release product, coat sequence, temperature, humidity, cure schedule, demolding result, and any touch-up. This record supports a process-based reapplication decision instead of an assumed number of pulls.
A clean demold proves only that the sample released under those conditions. It does not prove that the surface is sufficiently uncontaminated for paint or a structural bond.
Protect painting, bonding, and cosmetic finish
Wax, silicone, PVA, and some polymer releases can transfer to the casting or leave residue. Depending on the process, that contamination can affect:
- Painting and coating
- Adhesive or structural bonding
- Masking
- Plating and decorating
- Hot stamping or similar finishing
- Attachment of vacuum-bag sealant tape
For parts receiving secondary operations, look for product-specific documentation supporting the relevant property: low transfer, non-transfer, silicone-free, paintable, or bonding-compatible. These terms are not synonyms. A silicone-free coating may leave another residue, while a paintable release has not necessarily been validated for a highly loaded structural adhesive joint.
More product is not automatically safer. Excess release can increase transfer, buildup, cosmetic defects, and cleanup without correcting poor mold preparation or inadequate cure time.
Choose cleaning methods around both the molded resin and the intended finish. No single solvent, degreaser, detergent, abrasive pad, or heat treatment is safe and effective for every casting. Manufacturer guidance likewise distinguishes cleaning by release chemistry and molded material, as explained in Stoner’s guide to cleaning parts before secondary applications.
Masking-tape adhesion can serve as a rough qualitative indication that a slippery residue remains. It is not proof that a surface is ready for a structural bond. Validate the complete cleaning, priming, painting, or bonding process on the test casting, preferably using the finish or adhesive manufacturer’s acceptance criteria.
Troubleshoot sticking, premature release, haze, and buildup
| Symptom | Likely causes | Immediate checks | Prevention |
|---|---|---|---|
| Part sticks | Incomplete cure, undercut, rough or porous tool, missed coating, incompatible chemistry, contamination, worn film | Verify resin cure requirements; inspect draft and mechanical lock before applying force; map sticking locations | Repair and seal the tool, improve coverage, test compatibility, maintain high-wear areas |
| Gelcoat or skin coat releases too early | Excessive slip, mold design, formulation, cure conditions, temperature, humidity | Compare the affected area with process records and check for overapplication | Use the documented application amount and cure; test lower-slip options without compromising final demolding |
| Haze or streaks | Moisture, condensation, contamination, unsuitable applicator, heavy coating, inadequate flash time | Check mold temperature, cleanliness, applicator condition, and elapsed drying time | Keep materials within specified conditions and apply thin, uniform coats |
| Residue or mold buildup | Overapplication, repeated sacrificial wax or silicone use, unsuitable cleaning | Identify the existing chemistry before cleaning and inspect edges for accumulation | Use a cleaner approved for both the mold and release chemistry |
| Localized sticking after successful pulls | Abrasion, worn edges, difficult details, incomplete touch-up | Inspect the exact failure zone instead of recoating blindly | Touch up affected areas according to product instructions and document the interval |
| Variable finish or fish-eyes | Surface contamination, incompatible layers, pooled PVA, cleaner residue | Compare with the test coupon and inspect the application pattern | Strip incompatible material, clean and dry fully, then re-establish the tested system |
For a stuck part, first verify the resin manufacturer’s cure requirements and inspect for mechanical lock. Do not treat freezing, heat, soap, oil, sharp tools, or improvised solvents as universal remedies; any may damage the casting, tool, coating, or finish.
Excessive slip can contribute to premature release, but it is not the only explanation. Mold geometry, resin or gelcoat formulation, cure state, temperature, and humidity may also be involved.
There is no universal reapplication interval. Broad, low-wear surfaces may remain serviceable while edges, abrasive zones, and intricate details need earlier attention. Tool condition, resin chemistry, temperature, application quality, and the specific release system determine when cleaning, touch-up, or full reapplication is appropriate.
Use product-specific safety and compatibility instructions
Use the current safety data sheet and technical data sheet for the exact release product, not merely a retailer summary or a broad description of wax, silicone, polymer, water-based, or solvent-based chemistry. Manufacturers may publish both documents alongside the product; for example, Alumilite provides separate SDS and TDS downloads on its mold-release product page.
Use those exact documents to determine:
- Whether ventilation or ignition controls are required
- Which gloves, eye protection, or other PPE are specified
- Whether the product is flammable
- Applicable storage conditions and shelf life
- Sensitivity to freezing, heat, air exposure, or moisture
- Disposal requirements
- Mold-substrate and resin compatibility
- Service-temperature limits
- Flash or drying time between coats
- Final curing requirements before molding
- Compatibility with later painting, bonding, plating, or decorating
A solvent-based product may require additional ventilation or fire precautions, but the exact controls must come from its current documentation. Likewise, “water-based” does not by itself establish that a product is hazard-free, nonflammable, or compatible with every mold and resin.
Do not substitute generic cleaning solvents, household remedies, or improvised release materials without checking their effects on the mold, existing coating, resin, and final finish. If current documentation does not establish suitability for the resin, tool, process temperature, or intended secondary operation, stop. Contact the manufacturer or run a controlled sample evaluation before proceeding.
Choose by process, then prove the workflow
Choose resin mold release by process rather than popularity: verify the exact resin and mold combination, account for temperature and later finishing, prepare and seal the tool as required, apply the selected system as documented, and prove the workflow on a representative sample. If sticking occurs, check cure and mechanical lock before blaming the coating. If the finished part will be painted or bonded, validate that secondary operation separately.