
How to Build a Fiberglass Mold: A One-Piece DIY Workflow
Learn how to build a fiberglass mold: plan release, finish the plug, apply tooling gelcoat, laminate, support, cure and demold safely.
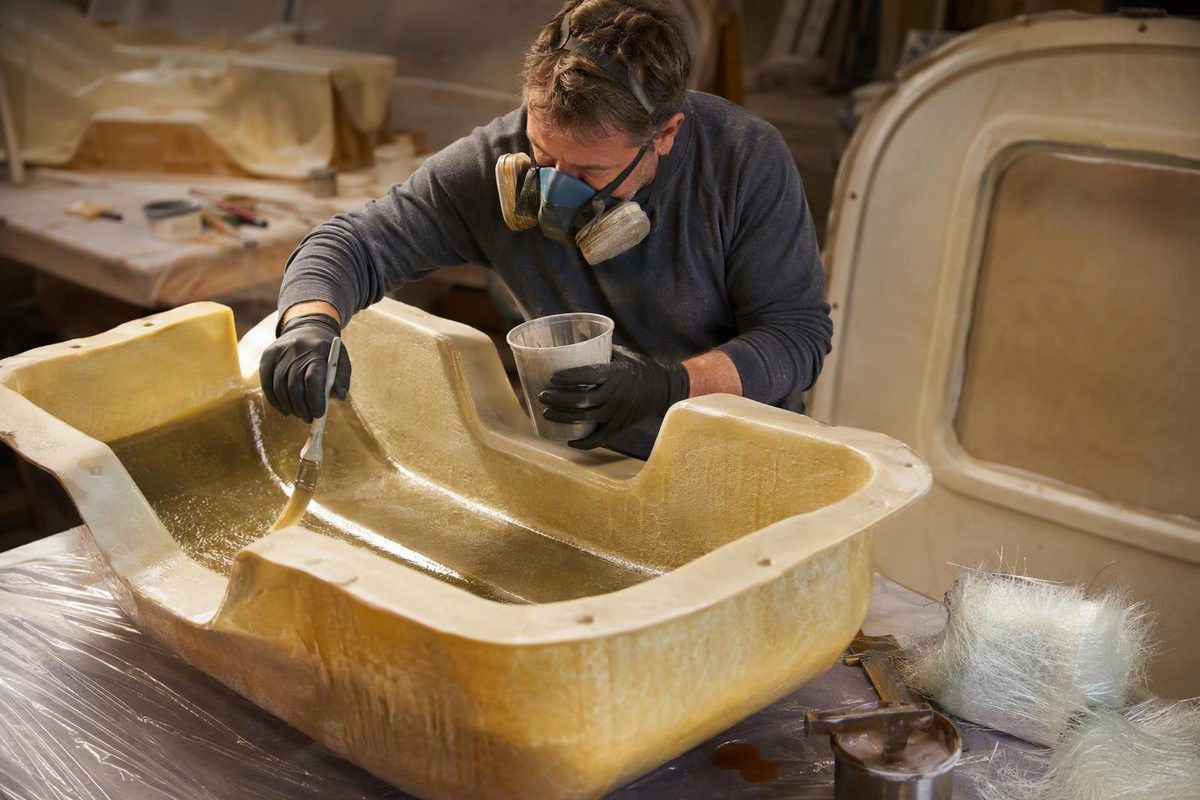
To build a fiberglass mold, prepare a smooth master pattern, apply a compatible release system, coat it with tooling gelcoat, then back that surface with fiberglass and tooling resin. Cure and support the mold before separating it from the pattern.
This workflow is for a small, one-piece female mold—a cavity mold for a simple nonstructural cover or panel. The master pattern, called a plug, represents the finished outside shape. Later, you laminate the actual part inside the mold. A mold-making schedule is not a structural laminate specification for a hull, deck or load-bearing fixture.
Before mixing: choose a matched tooling system
Gather:
- A finished plug, flange barriers and compatible filleting wax or clay
- Mold release wax, PVA release film or a compatible chemical release agent
- Tooling gelcoat and its specified catalyst or hardener
- Matching skin/coupling-coat resin, backing resin and fiberglass reinforcement
- Brushes, laminating rollers, scissors, mixing containers and accurate measuring equipment
- A wet-film gauge, plastic release wedges and finishing supplies
Buy these as a documented system rather than combining leftover repair materials. Confirm compatibility with both the plug finish and the resin used for future parts, plus the intended curing temperature. Some tooling systems specifically support epoxy parts; do not assume every polyester-based mold does. Easy Composites’ tooling guide identifies those capabilities for its particular system.
Read every technical and safety datasheet first. Provide ventilation and chemical-resistant gloves, protective clothing, eye protection and face protection as specified. MEKP catalyst can cause severe burns and eye damage and must be kept away from heat and ignition sources. Its safety datasheet also specifies handling and respiratory precautions. An N95 filters particles, not resin vapors; select respiratory protection for the actual exposure, not just sanding dust. NIOSH explains this distinction.
1. Prove that the shape can release
Choose the direction in which the plug will leave the mold. Check every sidewall, lip and recess along that direction:
- Walls should taper to allow separation—this is positive draft.
- Return lips and other undercuts can mechanically trap the plug.
- A shape that cannot withdraw cleanly needs redesign, removable inserts or a split mold.
Release wax cannot overcome a mechanical lock. Stop before coating if you cannot explain how both the plug and future parts will come out. Fibre Glast’s mold-construction guide describes draft and split-mold requirements.
Add barriers around the plug to form a flange: an extension beyond the finished part’s edge. Secure the barriers and seal their junction with the plug using a smooth fillet so gelcoat cannot flow underneath. For scale, Easy Composites suggests flanges around 50 mm (2 inches) for some hand-layup molds and prefers at least 100 mm (4 inches) for infusion. Those are process-dependent starting points, not universal dimensions. Its flange tutorial explains the layout.
2. Finish and stabilize the plug
Use an existing part or build the plug from a suitable material such as sealed wood, MDF or tooling foam. Support it so brushing and rolling cannot change its shape.
Fill defects, fair uneven areas, seal porosity and apply a compatible finishing system. Allow the coatings to cure, then sand and polish to the finish you want reproduced. Scratches and dents on the plug transfer into the mold and subsequent parts. Fibre Glast’s plug guide covers this sequence.
Test an unknown finish on a separate sample before coating the whole plug. Styrene-containing tooling gelcoat can attack unsuitable paints; Easy Composites specifically warns about common one-part aerosol finishes. A glossy surface alone does not establish compatibility. See its pattern-compatibility guidance.
3. Apply the release system
Clean the plug and flange barriers with products compatible with their finishes. Apply the selected release system everywhere the tooling laminate will contact them, including corners and fillets.
Follow that product’s coat count, buffing method and drying intervals. Do not substitute household polish for mold release wax. Where the system permits it, a dry PVA film over release wax adds a barrier for the first separation, although it can reduce surface quality. Fibre Glast describes wax-and-PVA preparation; Easy Composites notes PVA’s finish tradeoff.
Inspect for missed areas or a broken film before proceeding.
4. Apply tooling gelcoat
Measure and mix the gelcoat with its specified catalyst or hardener. Apply it evenly across the plug and flange, avoiding runs, pooling in corners and thin spots. Check thickness against the product specification using a wet-film gauge.
Let it reach the manufacturer’s stated condition for backing—not merely “dry-looking.” Laminating too soon can wrinkle the gelcoat. Recoat windows vary: a tack test or waiting time from another resin system may not apply. Easy Composites’ application instructions describe this failure mode.
Stop if the coating wrinkles, lifts or remains abnormally soft. Backing it with fiberglass will not repair the working surface.
5. Laminate the skin coat, then the backing
Precut the reinforcement before mixing resin. Use smaller pieces where necessary so the glass follows contours instead of bridging over corners.
Apply the specified skin or coupling coat first. Its lightweight reinforcement follows surface detail and supports the gelcoat. Wet the surface, place the glass and stipple or roll it into the resin. Remove air pockets before adding more material. With transparent coupling-coat resin, fully wetted glass becomes nearly transparent; inspect any opaque areas for dry fibers or trapped air. Easy Composites demonstrates this sequence.
Build the backing according to the tooling system’s schedule. There is no universal “three layers” recipe. Conventional polyester tooling may require staged buildup to limit heat and shrinkage, while some filled low-shrink tooling resins require several specified plies together to generate enough cure heat. Easy Composites’ Uni-Mould instructions, for example, require four 450 g/m² backing plies in one lamination. Do not transfer that schedule to ordinary laminating resin. The manufacturer explains why.
Check reinforcement compatibility too; see our fiberglass cloth versus mat guide.
6. Add support and complete the cure
Plan backing thickness and stiffeners around mold size, shape, handling and production process. Large flat areas need more support than their appearance may suggest. Add specified ribs or a backing frame while the plug still holds the mold in shape, allowing the laminate to reach the appropriate cure stage first.
Keep the assembly supported through the manufacturer’s demolding cure. Follow any required post-cure schedule rather than improvising with a heat gun. Fibre Glast’s guide covers backing structures and cure before release.
7. Demold, inspect and prepare for the first part
Remove the flange barriers and start separation with plastic wedges at accessible edges. Work progressively around the perimeter; do not lever a screwdriver against the tooling face. If release resists, stop and check for missed barriers, undercuts or an incomplete cure instead of forcing one spot.
Inspect the cavity for pinholes, cracks and gelcoat damage. Clean release residue by the release product’s prescribed method, repair defects with a compatible tooling system, and polish as needed. Then apply release agent to the mold itself before laminating the first part—the release used on the plug does not replace this step. Fibre Glast’s construction guide details progressive release, surface inspection and release preparation for new molds.