
Composite Molding: Plan a Small Fiberglass Part
Plan a small fiberglass molding project: choose male or female tooling, check release and resin compatibility, dry-fit cloth, and control cure.
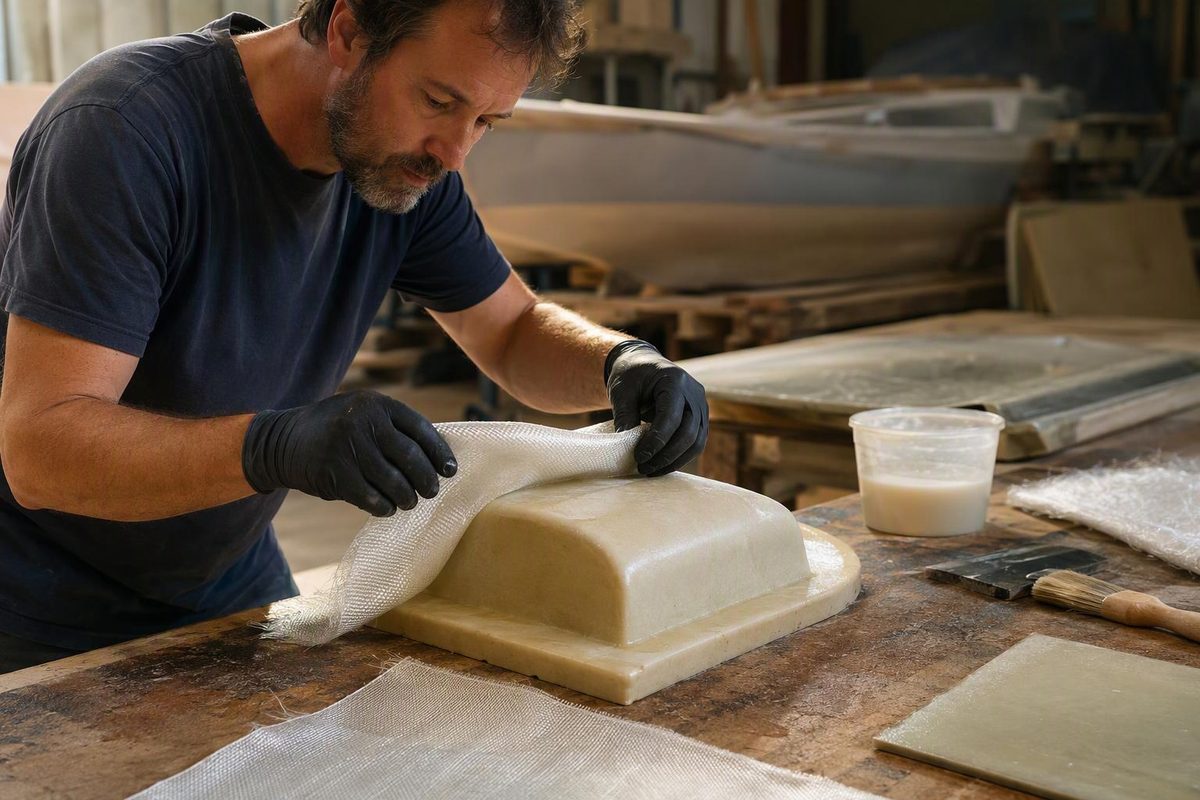
Composite molding forms reinforcement and resin against a mold to produce a shaped part. For a small fiberglass cover or trim piece, wet hand layup is a practical starting method: place glass fabric against the prepared mold, wet it with resin, remove trapped air and excess resin, then let the laminate cure. CompositesWorld describes wet layup as coating and compacting each ply as it is placed.
The first decision is not how much resin to buy. It is whether the mold will produce the required surface—and whether the cured part can come out.
This planning sequence suits a small, non-load-bearing part. A molded copy of a hull component, load-bearing hatch, door skin or shower pan is not automatically an adequate replacement. Those jobs need a specified laminate, support and attachment design. For broader process choices, see composite manufacturing methods.
1. Choose which surface the mold must control
The surface touching the mold takes its finish and shape from that mold.
| Mold type | Where the fiberglass goes | What it controls |
|---|---|---|
| Female mold—a cavity | Inside the mold | Usually the part’s outside surface |
| Male mold—a projecting form | Over the mold | Usually the part’s inside surface |
| Flat mold or table | On a flat surface | One face of a panel |
For a cover with a visible exterior, a female mold generally puts the better finish where you want it. A male form may suit a one-off part whose exterior will be faired and painted. Allow for laminate thickness when checking fit: laying glass over an existing cover makes a larger outside shape, not an exact replacement. WEST SYSTEM’s mold guidance, section 3, explains these surface relationships and notes that flaws in a pattern transfer to the mold and finished part.
A plug, or pattern, is the shape used to make the mold; it is not necessarily the tool used to make the final part. Making repeated copies can justify a finished plug and durable fiberglass mold. For one simple part, consider whether direct tooling avoids unnecessary work.
2. Check the removal path before building the mold
Imagine pulling the rigid finished part straight out. A cavity should widen toward its opening; this taper is called draft. An inward lip or other undercut can mechanically trap the part, even when the release agent works.
Stop if there is no clear removal path. Change the shape or plan a split mold with separate sections. CST’s fiberglass mold tutorial demonstrates a two-piece mold and explains the positive relief angle needed to remove rigid parts.
Also check:
- Whether brushes and spreaders can reach the deepest areas.
- Whether cloth can follow corners without spanning an air gap.
- Where the finished trim line lies, with extra laminate beyond it for trimming.
- Whether the pattern and mold remain in shape during handling and layup.
Make a small test molding that includes the tightest corner, rather than testing only a flat patch. Use it to check cloth fit, release and the resulting surface before committing to the full part.
3. Match the materials and prepare the workspace
Before mixing, write down the intended glass type, fiber directions, ply count, overlaps and any local reinforcement. Do not treat a tutorial’s cloth weight or layer count as a universal strength specification. If the part carries loads and no laminate specification exists, resolve that before molding.
Check the product instructions for:
- Resin and curing component: the approved epoxy hardener or polyester/vinyl ester catalyst system, its measurement method and working temperature.
- Reinforcement: confirmation that the fabric, including any mat backing or binder, suits the resin.
- Mold surface and release: a compatible, fully prepared coating and release system.
- Finish: whether the part uses an approved in-mold gelcoat system or will be painted afterward.
If heated cure or post-cure is required in the mold, confirm that the tooling can withstand that schedule without distortion. WEST SYSTEM’s mold manual, section 3.5, explains why elevated-temperature work requires suitable mold materials and construction.
See fiberglass resin selection if the chemistry is still undecided.
Use the safety data sheets for the resin, curing component and release products to plan ventilation, chemical-resistant gloves, eye protection and protective clothing. Arrange dust control for trimming and sanding, with respiratory protection appropriate to the vapors or dust involved—not one mask assumed to cover both. WEST SYSTEM’s exposure-prevention guidance emphasizes reducing exposure as well as wearing protective equipment.
4. Apply release, then dry-fit every ply
Follow the release manufacturer’s application, drying and buffing instructions. Do not borrow a wax-coat count from an unrelated mold. Cover all areas likely to contact resin, including relevant edges and flanges.
CST’s part-molding tutorial illustrates why release coverage and corner preparation matter: cloth can pull away from tight corners and leave bubbles.
Dry-fit and label the plies before mixing. Confirm that they sit against the mold rather than bridging corners. Resolve wrinkles, cuts and overlaps now, keeping the layup consistent with the planned fiber directions and reinforcement.
5. Wet out without floating the cloth
Mix manageable batches using the specified ratio. For epoxy, do not add extra hardener to accelerate cure. Scrape the container’s sides and bottom during mixing. A deep mass of mixed epoxy retains heat and can become dangerously hot; WEST SYSTEM’s mixing instructions recommend small batches and spreading mixed resin into a shallow container when appropriate.
Wet out each ply and gently work out air. With ordinary glass cloth and clear epoxy, properly wetted fabric becomes transparent; white fabric indicates incomplete wet-out. Remove resin puddles without squeezing the cloth dry. The aim is saturated reinforcement in contact with the mold—not reinforcement floating in resin. These checks follow WEST SYSTEM’s cloth application guidance.
If cloth repeatedly lifts from a corner, stop and correct the fit while the resin remains workable. Adding the next ply hides the problem rather than fixing it.
6. Cure, release and inspect before finishing
Use the resin system’s stated demolding and post-cure requirements at the actual working temperature. “Hard to touch” is not a universal full-cure test: WEST SYSTEM’s cure-stage guidance distinguishes workable liquid, partially cured gel and solid material that continues developing properties.
After release, inspect both faces and edges for dry glass, corner voids, wrinkles, distortion and soft areas. Check fit before drilling attachments or painting. Do not cover uncertain laminate defects with filler and call the part finished.
For an epoxy part exposed to sunlight, choose a compatible UV-protective finish and follow its surface-preparation instructions. WEST SYSTEM’s finish-coating guidance recommends testing coating compatibility on a panel first. Keep a record of the materials, layup and cure conditions so a successful molding can be reproduced.