
Gel Stain on Fiberglass Doors by Finish Grade
It is appropriate for stain-grade fiberglass doors and other models whose manufacturers expressly approve the system.
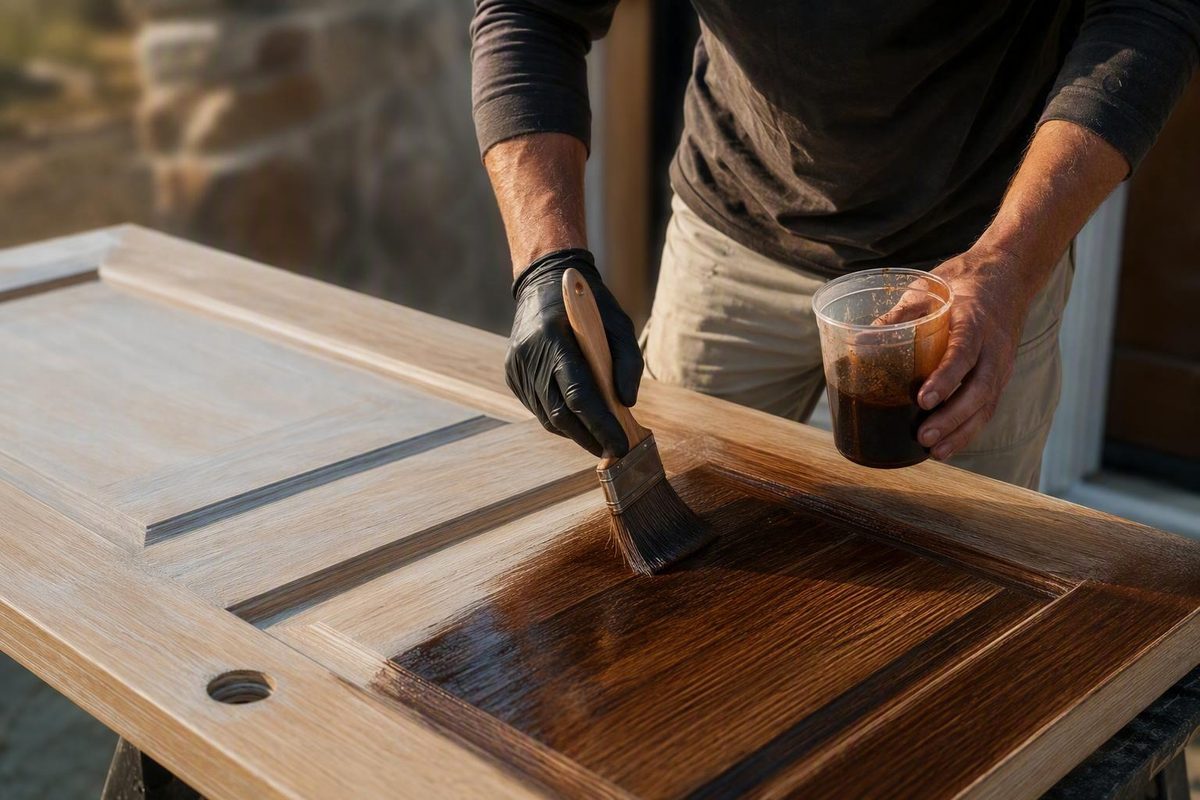
Using gel stain on a fiberglass door can produce a convincing wood-like appearance, but the result is never guaranteed by color choice alone. Success depends on identifying the door’s finish grade and existing coating, validating one compatible cleaner-primer-stain-clear-coat system, testing that complete system, and applying thin coats in the direction of the molded grain.
The door manufacturer’s current instructions should control the project. Generic techniques can help you understand the process, but they cannot establish compatibility for a particular door.
First, confirm that the fiberglass door is stainable
Do not assume a fiberglass door is stainable merely because it has an embossed wood-grain texture. Fiberglass doors may be prefinished, stain-grade, or paint-grade, and may have either smooth or textured surfaces. Gel stain followed by a protective clear finish is an established option for stain-grade doors, but the molded pattern alone does not establish the finish grade, as explained in this technical bulletin on fiberglass door grades.
Begin with this decision tree:
- Stain-grade, unfinished door: Gel stain may be appropriate. Confirm whether the manufacturer specifies direct staining or requires a primer or colored base coat.
- Paint-grade door: Stop unless the manufacturer provides an approved staining process. Otherwise, use the specified paint system.
- Factory-primed door: Identify the primer and confirm that it accepts the proposed stain. Do not automatically apply another primer.
- Factory-finished door: Treat the factory color and clear finish as existing coatings, not as bare fiberglass. Follow the approved cleaning, deglossing, removal, or refinishing process.
- Previously stained door: Identify the stain and clear finish if possible. Inspect for fading, scratches, peeling, softness, and adhesion failure before deciding between maintenance and complete refinishing.
- Previously painted door: Do not apply gel stain directly over unidentified paint. Ask the manufacturer whether an approved stain conversion is possible; otherwise, continue with compatible paint.
- Unknown door or finish: Stop until the door and its coating can be identified.
Look for a label on the hinge edge, top edge, frame, packaging, or installation paperwork. Record the manufacturer, product line, model number, finish designation, and production information. If no label remains, send the manufacturer photographs of the full door, panel layout, edges, markings, and existing finish.
Obtain the current finishing guide for that exact model. It should answer four questions:
- Is the door stain-grade?
- Is the surface bare, primed, previously coated, or factory-finished?
- Which cleaners and coatings are permitted?
- Which faces, edges, jambs, sidelights, and trim components must be finished?
Edge treatment is model-specific. Do not assume that the top, bottom, hinge edge, latch edge, faces, jambs, or glass trim all receive identical treatment.
Check the current warranty before altering a factory coating. Warranty effects vary by manufacturer and model, so do not predict whether refinishing will affect coverage without reading the warranty that applies to the door. Ask the manufacturer for written clarification if its documents are unclear.
Stop-or-proceed checklist
Proceed only if all applicable answers are yes:
- The door is stain-grade or expressly approved for gel stain.
- Its current surface is identified as bare, primed, stained, painted, or factory-finished.
- The door manufacturer permits the proposed preparation and coating sequence.
- The finish system is approved for the door’s interior or exterior exposure.
- You have checked the applicable warranty.
- You know how the faces, edges, frame, and related components should be treated.
Stop and choose paint or obtain manufacturer guidance if:
- The door is paint-grade.
- Its grade or existing finish cannot be identified.
- The surface has widespread peeling, softness, or adhesion failure.
- A compatible cleaner, stain, and clear-coat system cannot be confirmed.
- The proposed method conflicts with the current finishing guide.
Treat the primer, stain, and clear coat as one system
A product labeled for exterior use is not necessarily compatible with every other exterior coating. The stain must bond to the door or approved primer, and the clear finish must bond to the dried stain without lifting, softening, wrinkling, or trapping it.
Complete this checklist before buying supplies:
| System field | What to confirm |
|---|---|
| Door surface | Stain-grade fiberglass; bare, factory-primed, factory-finished, or previously coated |
| Approved cleaner | Safe for the present surface and compatible with the coating that follows |
| Primer, if required | Approved for the door and specifically able to receive the selected gel stain |
| Gel stain | Approved for the substrate or primer, exposure, and application method |
| Exterior clear finish | Compatible over the stain and rated for exterior weather and UV exposure |
A manufacturer-approved finishing kit can simplify product selection because its components are intended to work together. If you assemble products separately, read the current door instructions, product labels, and technical data sheets for every layer. Ask the manufacturers to confirm the sequence when the documents do not clearly permit it.
Primer is conditional, not universal
Some stain-grade doors are designed for direct staining; others require a bonding primer or colored base. Krosswood, for example, says its unstained fiberglass doors are not supplied pre-primed and specifies a bonding primer before stain. That instruction applies to the doors covered by the Krosswood fiberglass-door staining guide, not to every fiberglass door.
A factory-primed door creates a different question: whether the existing primer accepts the proposed gel stain. The correct answer may instead be a different stain, approved preparation, or paint system.
Published guidance also conflicts over oil-based coatings. Krosswood recommends an oil-based gel or multi-surface stain compatible with the primer for its process, while Florida Paints broadly discourages oil-based coatings on fiberglass. The Florida Paints bulletin does not establish whether that warning encompasses every oil-based gel-stain system, and the Krosswood recommendation does not apply to every door. Resolve the conflict by obtaining approval for the exact door, existing finish, cleaner, primer, stain, and clear coat.
Do not combine products simply because each can says “fiberglass,” “door,” or “exterior.” Those descriptions do not establish intercoat adhesion.
Keep a project record containing:
- Door manufacturer, model, and production information
- Existing surface and condition
- Cleaner, primer, stain, and clear-finish names
- Product numbers, colors, sheen, and batch or lot information
- Number of coats
- Application and recoat dates
- General temperature and weather conditions
- Copies or photographs of labels and instructions
- Test-panel observations
- Manufacturer correspondence
That record can simplify later touchups and help answer maintenance or warranty questions.
Set up the door, workspace, tools, and safety controls
Removing the door is generally the most controllable approach when practical. Lay it flat on padded sawhorses; the horizontal position makes runs and pooling easier to control. Remove hardware and detachable weather stripping where the door instructions permit, and mask glass and adjacent materials.
Plan how the opening will be secured and protected while the slab is removed. If the door is too large, heavy, or awkward for you to move safely—particularly if it contains glass—use adequate assistance or hire an installer. Follow the door maker’s handling and installation instructions.
A practical tool set includes:
- Clean, lint-free cloths
- The manufacturer-approved cleaner
- Painter’s tape and masking paper or film
- Gloves and eye protection specified by the product labels
- The brush, cloth, foam applicator, or other stain tool specified by the label
- A separate clean, dry blending brush, if permitted
- Cotton swabs or another approved tool for deep grooves
- Stir sticks
- Approved containers if decanting is permitted
- Materials needed for the specified primer
- Applicators required for the clear finish
- Drop cloths
- Strong work lighting
- Padded door supports
Work in a clean, well-lit, dust-controlled, adequately ventilated area out of direct sunlight. Krosswood specifies 50–80°F for its process, but that is an attributed example rather than a universal range; use the narrowest temperature and humidity limits stated in the applicable door and coating instructions.
Cool or humid conditions and heavy stain films can prolong drying.
Before opening any coating, read its current label and safety data sheet. Use only the ventilation, gloves, eye protection, and respiratory protection specified for that product and the actual exposure conditions. Krosswood calls for a well-ventilated work area and respiratory protection in its process, but the applicable product label and safety data sheet must determine the equipment required. Keep ignition sources away wherever a coating label identifies flammable liquid or vapor, and never use an improvised solvent or transfer a product into an unmarked container.
Oil-containing stain waste presents a specific fire hazard. Old Masters warns that oil-soaked rags and related waste can ignite spontaneously and directs users to place them immediately in a sealed, water-filled metal container, followed by disposal under local fire regulations. Follow the coating label and applicable local requirements, as detailed in the Old Masters fiberglass-door staining guide.
Clean and test without damaging the molded grain
Inspect the door under strong, angled light before cleaning. Look for:
- Dust, dirt, grease, fingerprints, wax, or adhesive
- Silicone or sealant around glass
- Loose, checked, or peeling clear finish
- Scratches, dents, or worn grain
- Water staining or weathering
- Previous touchups
- Soft, tacky, or transferable coating
- Different color or sheen around hardware
- Overspray from nearby painting
Do not hide a failing coating beneath new stain. Widespread peeling, checking, softness, or uncertain contamination must be diagnosed first.
Use only an approved cleaner
There is no universally safe cleaner for every fiberglass door. Published instructions variously mention diluted vinegar, mild soap, all-purpose cleaner, denatured alcohol, mineral spirits, or acetone, but those substances are not interchangeable.
Likewise, a solvent permitted by a stain maker may conflict with the door manufacturer’s instructions. Use only the cleaner approved for the door’s present surface and the coating system that will follow.
Apply the cleaner with uncontaminated materials and avoid flooding joints, glazing trim, and openings. Let the surface dry completely before applying primer or stain.
Do not sand molded wood-grain fiberglass unless the door manufacturer expressly permits it. Abrasion can diminish the embossed pattern and create a smooth patch that remains visible after staining. Both Krosswood and Florida Paints caution against sanding textured fiberglass in the processes they describe.
Make the test patch a required checkpoint
A small color dab is insufficient. Test the complete proposed system:
- Clean the sample by the approved method.
- Apply primer or base coat if required.
- Apply stain with the planned tool.
- Wipe, brush, or blend it exactly as instructed.
- Allow it to dry for the specified period.
- Apply the proposed clear finish at the correct interval.
- Observe it through the stated recoat and handling periods.
Use a concealed area only if the door manufacturer permits it. An approved sample with comparable texture is preferable because a failed test will not damage the door. A smooth scrap may show approximate color but not how pigment collects in molded grain.
Evaluate the test for:
- Color in daylight and entry lighting
- Definition of the embossed grain
- Uniformity at section transitions
- Adhesion of each layer
- Tackiness or softness
- Color transfer, if the instructions permit that check
- Lifting, wrinkling, discoloration, or other layer reactions
- Cleaner damage
- Clear-coat sheen and appearance
The evidence does not establish one observation period or a standardized do-it-yourself adhesion test for every system. Follow the current door and coating instructions rather than inventing a scratch test.
An unacceptable result is a stop signal. Technique changes may solve a visual problem, but persistent tackiness, poor adhesion, or intercoat reaction requires a different approved system.
Apply gel stain section by section with the molded grain
Study how a wood version of the door would be assembled. The simulated grain normally changes direction among panels, rails, and stiles. Brushing the whole face from top to bottom can make the result look painted rather than wood-like.
A practical application map is:
- Recessed or center panels
- Raised panel faces and panel trim
- Deep grooves and molded details
- Horizontal rails
- Vertical stiles
- Edges, if required by the door manufacturer
Use the manufacturer’s sequence if it differs. The governing principle is to treat each logical component separately:
- Work vertical stiles vertically.
- Work horizontal rails horizontally.
- Follow the molded direction on panels and panel trim.
- End each section where a real rail, stile, or panel component would meet the next.
Control the film from the beginning
Stir the stain as directed, bringing settled pigment up from the bottom without introducing unnecessary bubbles. Do not shake, thin, or combine it with another stain unless the technical instructions permit that step.
Apply a thin, controlled layer to one manageable section. Maintain a wet edge within that section instead of covering the whole door and returning after the stain has started to set. Work color into the embossed grain without leaving heavy ridges on the high points.
Watch corners, moldings, glass trim, and deep grooves continuously. Move pooling back into the open area or remove it using the label-approved method. Cotton swabs may help in grooves if the system permits them, provided they do not shed lint or leave isolated dark dots.
When allowed, use a clean, dry brush to blend. Light strokes with the grain can soften brush marks, feather section transitions, and redistribute excess. Wipe accumulated stain from the blending brush onto a clean, dry cloth. Stop once the product exceeds its stated working time; continuing to drag partially set material can create bare streaks and ridges.
Should the stain be wiped or left on?
There is no universal method.
Old Masters instructs users to work its stain into the embossed texture, remove excess so color remains in the grain, and brush out lap marks. Krosswood emphasizes thin application and dry-brush redistribution of pooled or excess material. Forum participants report both wiping and leaving a carefully brushed film, but those reports are anecdotal and product-specific.
Let the exact stain instructions decide:
- If the label specifies wiping, follow its timing, cloth, pressure, and direction.
- If it specifies dry-brush blending, keep the film thin and redistribute buildup as directed.
- If it specifies no wiping, do not remove color with a cloth or solvent.
- If the instructions are ambiguous, contact the stain manufacturer before working on the visible face.
Do not use mineral spirits on fresh stain unless the current instructions expressly allow it at that stage. In one Sawmill Creek forum report, mineral spirits removed most of a newly applied coat. That anecdote does not establish universal behavior, but it illustrates the risk of improvising with solvent.
Practice the hand movement and section transitions first. A believable effect depends on pressure, film thickness, brush angle, grain direction, and timing.
If the first coat is too light, let it dry completely and add another thin compatible coat if permitted. Building color in fully dried layers is more controllable than overloading a wet film.
Do not add glazes, unrelated stain colors, improvised thinner, or tinted intermediate coats merely because a decorative method worked on another door. Each added material changes the system and must be approved.
Let the stain dry fully before recoating or clear-coating
There is no universal drying time for gel stain on fiberglass. Drying varies with:
- Product chemistry
- Film thickness
- Number of coats
- Temperature and humidity
- Ventilation
- Primer or underlying coating
- Wiped versus unwiped application
- Pigment buildup in grooves
- Whether the slab is lying flat or has been turned over
Use published times only in context. Old Masters specifies at least 8–12 hours before another stain coat and at least 8 hours to 24 hours or longer before polyurethane, depending on conditions. In a separate Sawmill Creek discussion, a forum participant with self-reported experience preferred 48–72 hours before topcoating for a different method. These figures are product- or method-specific, not interchangeable guarantees.
Follow the longest applicable requirement among the door, primer, stain, and clear-finish instructions. Do not average conflicting times.
Before recoating, turning the slab, or applying clear finish, check for:
- A uniformly dry appearance
- A firm rather than soft film
- No tackiness
- No color transfer under a label-approved light-touch check
- No wet-looking accumulation in grooves
- No wrinkling, lifting, or other visible reaction
These checks can reveal a problem, but they do not prove that a coating is cured throughout.
Allow more time under conditions permitted by the label. If the condition persists beyond the manufacturer’s expected range, contact the coating manufacturer.
Apply the protective clear finish
On an exterior stained fiberglass door, the compatible clear finish supplies much of the weather and UV protection over the color layer. It is not merely an optional gloss. Use a mutually compatible, exterior-rated, UV-resistant clear finish approved over the specific stain.
The manufacturer guides in the evidence commonly recommend at least two protective coats: Old Masters recommends at least two polyurethane coats for its system, and Krosswood recommends at least two UV-protective clear coats for its process. The selected system still controls:
- Coat count
- Spread or wet-film requirements
- Whether intercoat sanding is permitted
- Recoat timing and maximum recoat window
- Applicator
- Final cure before handling or exposure
Apply the clear finish in the simulated grain direction, following the panel, rail, and stile layout. Avoid flooding grooves and leaving heavy edges around glass trim. Let each coat dry as directed.
Do not reinstall hardware, hang the slab, compress weather stripping against the finish, or expose the door to service until the applicable instructions permit it. If the slab must be turned over, support the finished face only after it has reached the required handling stage and use clean, nonmarking pads.
Troubleshoot defects without making the damage worse
The right response depends on whether the stain is still workable, cosmetically uneven, or chemically failing. Blend visual defects only within the approved working period. Stop when there is persistent softness, adhesion loss, or intercoat reaction.
| Symptom | Likely cause | Safe immediate response | When to seek help |
|---|---|---|---|
| Fresh pooling in corners or grooves | Excess application or inadequate redistribution | Move or remove excess immediately by the label-approved method | If correction tears a film that has begun to set |
| Fresh lap marks | Section too large, lost wet edge, or short working time | Blend gently while the product remains workable | If blending exposes the base or makes the film gummy |
| Fresh brush streaks | Heavy film, unsuitable tool, overworking, or rapid setting | Make light, grain-following passes with an approved clean brush | If the product has exceeded its working time |
| Stain wipes away | Wrong wiping method, excess pressure, unapproved solvent, or incompatible surface | Stop wiping and stop using solvent; let the surface stabilize | If the base is exposed or softened |
| First coat is too light | Thin coat or naturally light result | Let it dry fully, then add another compatible thin coat if allowed | If added coats remain soft or uneven |
| Isolated dark area | Pooling, overlap, deeper texture, or earlier touchup | Avoid aggressive spot cleaning; test any correction elsewhere | If the patch will not blend |
| Persistent tackiness | Heavy film, poor drying conditions, incompatible layers, or application error | Do not clear-coat; use only label-approved drying conditions | If tackiness persists beyond the expected range |
| Peeling or widespread poor adhesion | Contamination, incompatible coating, failed prior finish, or improper preparation | Stop adding finish and protect the door from exposure | Consult the door and coating manufacturers or a qualified finisher |
| Clear coat wrinkles or lifts stain | Premature topcoating or intercoat incompatibility | Stop; do not bury the defect beneath more coating | Obtain an approved removal and refinishing plan |
| Touchup has different sheen | Different film thickness, aging, or product mismatch | Let the repair dry before judging it | If a broader or full-face refinish is needed |
If stain comes off during wiping, determine whether the product calls for dry wiping, dry-brush blending, or no wiping. Do not escalate to a stronger solvent.
Treat isolated dark spots cautiously. Sanding or aggressive solvent cleaning can enlarge the defect, diminish the molded grain, or expose a different-colored base. Test any approved correction before applying it to the visible area.
Spot repair is most promising when the defect is small, the original products are known, and the surrounding coating is sound. Even then, color or sheen differences may remain. A full-face treatment may be necessary when localized blending leaves a halo; widespread peeling or softness generally requires broader removal under an approved procedure.
Forum suggestions involving strippers, steel wool, mineral spirits, tinted primers, or immediate conversion to paint are anecdotal. The discussions generally do not establish the door model, factory finish, precise coating chemistry, or long-term result. Do not treat those suggestions as universal repair procedures.
If converting a failed stained door to paint, obtain an approved system that specifies:
- How much failed stain and clear finish must be removed
- Which remover, if any, is safe for the door
- How residue must be removed
- Whether abrasion is permitted
- Which primer bonds to or isolates the remaining surface
- Which exterior paint is compatible with that primer
- How edges and repaired areas must be treated
Use a qualified door finisher when the embossed grain has been damaged, failure covers much of the face, the door has a valuable factory treatment, or the manufacturers cannot validate a do-it-yourself repair.
Inspect and maintain the UV-protective clear finish
A stained exterior door is a maintenance finish. Its service life varies with the system and exposure, including:
- Compass orientation
- Hours and intensity of direct sunlight
- Rain and wind
- Reflected heat
- Humidity and temperature changes
- Presence and depth of an overhang
- Quality and condition of the clear finish
- Condition of edges and trim
- Cleaning and abrasion
The stain creates the wood-like color and emphasizes the molded grain; the compatible clear finish supplies much of the weather and UV resistance.
Inspect it periodically in direct and angled light. Look for:
- Dull or dry-looking areas
- Loss of gloss or uneven sheen
- Fading
- Fine scratches
- Cracking or checking
- Peeling around edges or moldings
- Exposed or transferable stain
- Cloudiness
- Wear near locks and handles
- Deterioration around trim
Clean only by the method approved by the door and clear-coat manufacturers. Do not assume abrasive pads, harsh household chemicals, or pressure washing are acceptable.
Follow the maintenance schedule for the exact door and clear finish rather than relying on a universal recoating interval. Commercial articles and forum reports describe outcomes ranging from frequent failure to several years of acceptable appearance, but those accounts involve different doors, products, climates, preparation, and overhangs. They are not controlled durability evidence.
Renewing a sound, compatible clear finish before it fails may be simpler than repairing exposed or faded stain. Once the color has changed or adhesion has failed, maintenance can become complete refinishing.
For a small scratch or localized fading:
- Confirm that the surrounding finish is firmly bonded.
- Identify the original stain and clear coat.
- Verify that those products, or approved replacements, can be used for repair.
- Test the color and sheen.
- Blend stain only where necessary.
- Use a full-face clear coat if that is the approved way to obtain consistent sheen.
A full-face clear coat can improve sheen consistency but cannot guarantee a color match. If repairs no longer blend or adhesion has failed broadly, complete refinishing may be necessary.
Maintain a log of inspection dates, products, exposure, observed condition, cleaning, touchups, and clear-coat renewal. Photographs taken from consistent angles can help reveal gradual fading and sheen loss.
Frequently asked questions
Can gel stain be used on every fiberglass door?
No. It is appropriate for stain-grade fiberglass doors and other models whose manufacturers expressly approve the system. Paint-grade, factory-finished, factory-primed, previously painted, and unidentified doors may require different preparation or paint.
A wood-grain texture alone does not prove that a door is stainable.
Does a fiberglass door need primer before gel stain?
Sometimes. Primer depends on the exact door and stain system.
Krosswood specifies bonding primer for the unprimed fiberglass doors covered by its instructions. Other stain-grade systems may permit direct staining. On a factory-primed door, first verify whether the existing primer accepts the chosen stain rather than automatically adding another primer.
Should gel stain be wiped off a fiberglass door or left on?
Follow the selected stain’s current instructions. Some systems require removing excess so color remains in the embossed grain; others emphasize a thin film redistributed with a dry brush.
Do not wipe fresh stain with mineral spirits unless the label expressly permits it at that stage.
How long should gel stain dry before clear-coating a fiberglass door?
There is no universal number. Chemistry, film thickness, application method, temperature, humidity, ventilation, and the underlying coating all affect drying.
Old Masters gives a range beginning at 8 hours and extending to 24 hours or longer before polyurethane for its system. A participant in the Sawmill Creek forum preferred 48–72 hours for a different method. Follow the longest applicable requirement in the door, stain, and clear-coat instructions, and never topcoat stain that remains tacky, soft, strongly odorous, or transferable.
What topcoat should be used over gel stain on an exterior fiberglass door?
Use a clear finish that is:
- Explicitly compatible with the selected gel stain
- Approved for the door and coating system
- Rated for exterior exposure
- UV-resistant
- Applied at the coat count and spread rate required by its instructions
Depending on the approved system, the product may be described as exterior polyurethane, acrylic, spar urethane, or a proprietary door-system clear coat. Those categories are not automatically interchangeable.
Before starting, make the decision explicit:
- Go only after confirming that the door is stain-grade, identifying its existing finish, validating the complete cleaner-primer-stain-clear system, and obtaining an acceptable full-system test.
- Stop if the grade is unknown, the test remains tacky or reacts badly, adhesion is failing, or the manufacturers cannot confirm compatibility.
- Once approved, work in thin, grain-following sections, let every layer dry according to current instructions, apply the specified UV-resistant exterior clear finish, and inspect that protective layer before fading or peeling begins.