
Silicone Tub Caulk: How to Choose, Apply, and Replace It
For the joint where a bathtub meets tile or a wall surround, start with a compatible 100% silicone labeled “Kitchen and Bath” or “Tub and Tile.” It is usually…
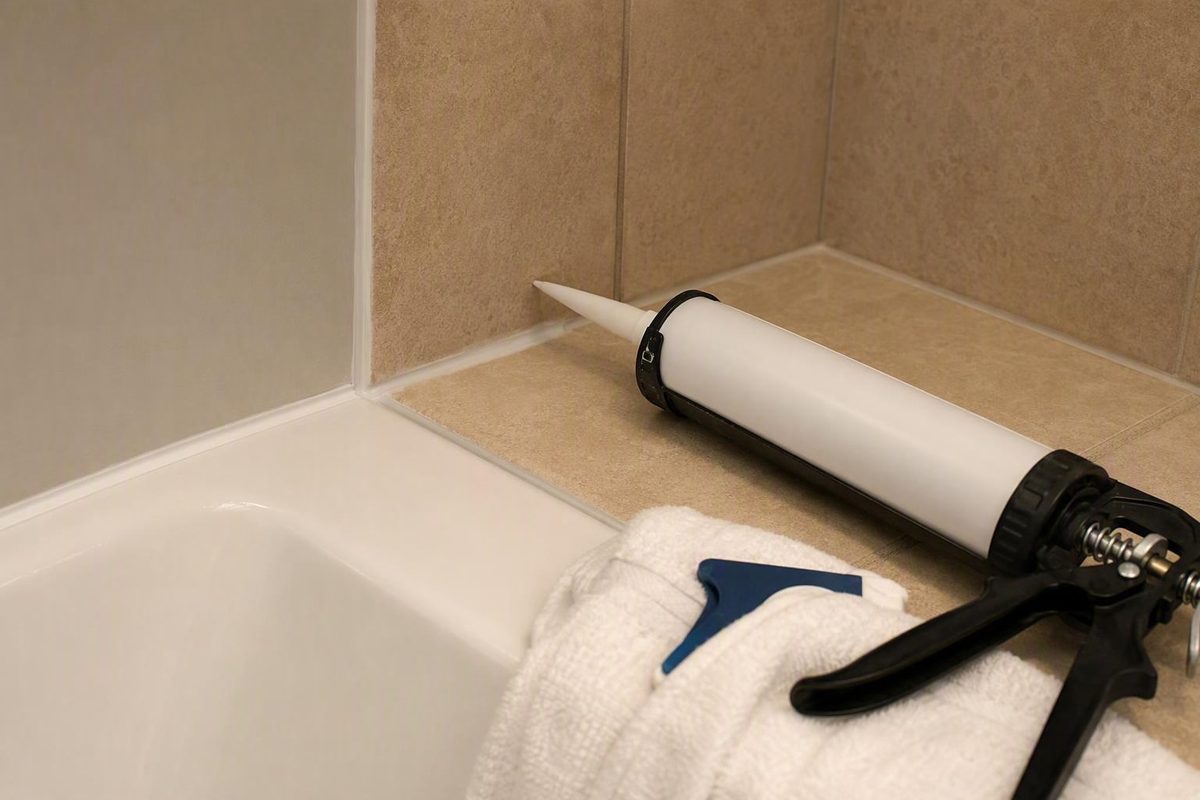
For the joint where a bathtub meets tile or a wall surround, start with a compatible 100% silicone labeled “Kitchen and Bath” or “Tub and Tile.” It is usually a strong choice for a seam exposed to frequent water and modest movement.
The product name is only the beginning. A lasting tub seal depends on compatibility with both surfaces, complete removal of old silicone, a clean and fully dry joint, a continuous well-tooled bead, and the curing instructions on the cartridge. Broad waterproof or mold-protection claims cannot compensate for residue, trapped moisture, poor adhesion, excessive movement, or a joint outside the product’s limits.
Editorial note: This guide synthesizes manufacturer specifications and practical home-improvement guidance. The current product label, technical data, safety directions, and fixture-care instructions should control the work.
When silicone is the right caulk for a bathtub
Compatible 100% kitchen-and-bath silicone is commonly selected because it remains flexible and water-resistant after proper preparation and curing.
That does not make silicone universally best. A dry decorative seam that must be painted has different requirements from the wet perimeter of a tub. Color availability, cleanup, working time, joint movement, and substrate compatibility can all change the decision.
| Formulation | Best fit | Main advantages | Main tradeoffs |
|---|---|---|---|
| 100% kitchen-and-bath silicone | Frequently wet tub-to-wall or tub-to-tile joints with expected movement | Flexible; strong water resistance after curing; commonly available in mold-resistant bathroom formulas | Usually non-paintable; fewer colors; harder to tool and remove; uncured cleanup may require a specified solvent |
| Acrylic latex | Drier interior seams that need paint or easy cleanup | Usually paintable; water-cleanable before curing; easier for many DIY users to tool | Standard formulations tend to shrink and harden more and are generally less suited to repeated water exposure and movement |
| Siliconized acrylic | Selected bathroom joints when the individual label expressly approves them | May combine easier application or paintability with better water resistance than basic acrylic | Performance varies by formulation; the category name alone does not establish suitability |
| Specialty tub-and-tile latex | Tub or shower locations specifically listed by the manufacturer | May offer water cleanup, paintability, or additional colors | Must be assessed by its individual water-exposure, movement, substrate, and cure instructions |
| General-purpose caulk or sealant | Only the applications printed on its label | Varies | The words “caulk” and “sealant” do not establish formulation, water resistance, paintability, or bathroom suitability |
Silicone’s principal compromise is convenience. It is less forgiving than acrylic latex during tooling, may require solvent rather than water for uncured cleanup, and ordinarily cannot be painted. Acrylic latex is easier to smooth, is generally paintable, and cleans up with water before curing, but typical formulations cure harder and shrink more. These category-level differences are summarized in Oatey’s comparison of common caulks and sealants.
A hybrid or specialty latex product may still be appropriate when its current label explicitly approves the tub material, adjoining wall finish, moisture exposure, and joint dimensions. Do not infer those capabilities from words such as “siliconized,” “bathroom,” or “water resistant.” Products sitting beside one another on a store shelf can have different exclusions, cleanup methods, working times, and return-to-service instructions.
For most frequently wet, non-paintable tub-perimeter joints, use this selection order:
- Confirm that the product is intended for tubs, showers, or tub-and-tile joints.
- Confirm compatibility with both adjoining surfaces.
- Check whether it accommodates the actual joint dimensions and expected movement.
- Choose the required color and package format.
- Check the working time and water-ready interval.
- Make sure you can meet its preparation, ventilation, cleanup, storage, and curing requirements.
If the seam must be painted or matched to a color unavailable in silicone, a label-approved specialty product may be more practical. If the joint is repeatedly soaked and moves, compatibility, flexibility, and water resistance are usually more important than paintability.
How to read a silicone tub caulk label before buying
Do not choose silicone tub caulk solely by brand tier, package design, mold-protection period, or retailer rating. Read the cartridge and current technical data as installation instructions, not merely advertising.
Use this purchase checklist:
- Formulation: Does it say 100% silicone, siliconized acrylic, acrylic latex, or something else?
- Approved application: Does it explicitly name bathtubs, showers, tub-and-tile joints, or kitchen-and-bath use?
- Compatible substrates: Are both the tub and surround materials listed?
- Finish restrictions: Are refinished surfaces, natural stone, sensitive metals, coated finishes, or certain plastics excluded?
- Water-exposure limits: Is the product unsuitable for drains, immersion, or continuously submerged joints?
- Color: Will white, clear, almond, or another available color suit the finished seam?
- Package: Is it a caulk-gun cartridge or a smaller squeeze tube?
- Paintability: Most 100% silicone is non-paintable, but verify the individual label.
- Cleanup: Does uncured material require water, mineral spirits, or another specified cleaner?
- Working or tooling time: How quickly must the bead be shaped?
- Skin-over and dry-to-touch time: These describe handling progress, not necessarily water readiness.
- Water-ready time: How long must the installed bead remain dry?
- Full cure: When does the manufacturer consider curing complete under the stated conditions?
- Joint limits: What widths and depths are permitted, and when is backer rod required?
- Conditions: What temperature, humidity, airflow, or ventilation directions apply?
- Storage and age: Is there a use-by date, batch code, or storage range?
- Documentation: Does the technical data sheet, safety data sheet, or warranty language qualify the headline claims?
A documented example shows why those details matter. GE identifies Tub & Tile Silicone 1 as a non-paintable, 100% silicone product supplied in white and clear 10.1-fluid-ounce cartridges. The manufacturer lists fiberglass among its compatible substrates and lists ASTM C920 and additional federal specifications. Its instructions also call for backer rod when a gap is larger than 1/2 inch by 1/2 inch. Water-ready information on the page is inconsistent: application instructions state 12 hours before water exposure, while other product material lists 24 hours or uses “same-day water-ready.” These are manufacturer specifications and claims, not independent proof that the product outperforms another sealant; consult the current GE Tub & Tile Silicone 1 documentation before relying on them.
A fiberglass tub may have a factory gelcoat, a refinishing coating, or a previous repair. Acrylic fixtures, natural stone, and coated or decorative metals may also have finish-specific restrictions. Check the exact cartridge and current technical data for the surfaces in front of you.
Treat marketing claims as claims, not instructions
Manufacturers and retailers may describe selected products as waterproof, permanently flexible, mold resistant, shrink resistant, crack resistant, or covered by long guarantees. Those statements help identify the intended market, but they do not establish comparative performance in every bathroom or replace the installation directions.
A mold- or mildew-resistant formulation can be useful in a damp room. It cannot guarantee a permanently spotless joint. Soap residue, standing water, poor airflow, surface contamination, leakage, and moisture behind the bead can still contribute to discoloration or growth around it.
Likewise, names such as “advanced,” “premium,” or “supreme” do not prove that a product is better for your tub. Compare documented attributes instead:
- approved substrates and finishes;
- available colors;
- package format;
- water-ready and full-cure instructions;
- joint-size limits;
- cleanup requirements;
- working time;
- ventilation directions;
- product-specific exclusions.
Price, stock, sales totals, and review counts change. Reviews may reveal handling problems worth anticipating, but they do not establish which sealant will perform best in your joint. The best purchase is the product whose instructions match the application and the time the tub can remain out of service.
Inspect the joint before assuming caulk is the whole repair
Caulk replacement is appropriate when the existing bead has lost its seal or become too contaminated to restore. Reasons to inspect and potentially replace it include:
- cracks or splits;
- peeling edges;
- separation from the tub or wall;
- open gaps;
- persistent mold or discoloration;
- soft, deteriorated, or crumbling material;
- evidence that water is passing through the joint.
Cleaning may improve superficial soap film or staining on an otherwise sound bead. It will not restore adhesion to loose silicone or reconnect a split bead. Detached, deeply contaminated, or deteriorated caulk should generally be removed rather than concealed under another layer.
Before cutting anything out, examine the surrounding assembly:
- Does the tub rim move noticeably when the tub is loaded or stepped into?
- Is any tile or surround panel loose?
- Does the wall or surround feel soft?
- Is the gap unusually wide, deep, or irregular?
- Has the same section reopened repeatedly?
- Is water appearing below, behind, or beside the tub?
- Are plumbing fittings, trim, or the tub itself loose?
- Is discoloration confined to the bead, or does it extend into adjacent material?
Stop the recaulking job and investigate further if there is active leakage, a visibly moving tub, loose finishes, soft wall material, extensive concealed contamination, or a joint that cannot be sealed within the selected product’s dimensions.
If the tub or surround itself is cracked, identify whether it is fiberglass, acrylic, or another construction before planning a repair. The material, finish, location, and extent of the damage matter more than the crack’s cosmetic appearance.
Tools, materials, and surface-safety planning
Gather everything before removal so the open joint is not left half-cleaned while you search for supplies.
Core materials and tools
- Compatible silicone tub caulk
- Caulk gun sized for the cartridge
- Caulk-removal tool
- Plastic scraper or plastic putty knife
- Utility knife, used cautiously
- Clean, lint-free cloths
- Painter’s tape, if desired
- Gloves
- Eye protection
- Cleaner approved for the tub and surround
- Optional clean profiling tool
- Optional backer rod if required by the sealant and joint
- Drain cover or stopper
Begin with plastic removal tools and gentle pressure around fiberglass, acrylic, glass, polished tile, porcelain, and other finishes that may scratch. A utility blade can separate silicone quickly, but it can also score a tub or surround. If the finish manufacturer permits a sharp blade, work slowly at a shallow angle and keep the cutting edge from sliding across the exposed surface. General bathtub-caulking guidance likewise recommends plastic blades around acrylic and plastic fixtures because metal can scratch them; see This Old House’s bathtub-caulking guide.
Close or cover the drain before removal. Thin silicone strips and scraped fragments are easy to lose. Ace Hardware’s removal demonstration also recommends careful cutting, a plastic putty knife, and blocking debris from the drain in its tub and shower caulk-removal video.
Treat chemical and abrasive methods as conditional
Mineral spirits, commercial silicone remover, citrus cleaner, rubbing alcohol, heat, abrasive pads, nylon brushes, and mold treatments are not universally suitable. Their acceptability depends on the product label, the tub and surround finishes, exposure time, ventilation, and cleanup requirements.
Before using an optional cleaner or remover:
- Read its label and safety instructions.
- Check the tub and surround manufacturers’ care instructions.
- Confirm that it is permitted on both adjoining materials.
- Follow the product’s ventilation and protective-equipment directions.
- Spot-test where any resulting finish change will be inconspicuous.
- Use the minimum force and exposure needed.
- Remove the cleaner or solvent residue as directed before resealing.
Removal guides mention solvents, commercial removers, abrasive pads, and heat, but also warn that sharp tools, aggressive scraping, and excessive heat can damage surrounding materials. The safest method therefore depends on the actual surface and product, not on a universal removal recipe; see this surface-conscious silicone-removal guide.
Painter’s tape is optional. It can help a beginner define straight edges and control spread, but a clean bead can also be produced without it. If you use tape, decide its position and removal sequence before opening the cartridge because silicone may begin skinning while you work.
Remove the old silicone and prepare a clean, dry joint
The central preparation rule is simple: do not apply a cosmetic bead over failing or cured silicone. Fresh silicone generally does not adhere reliably to old silicone or the film it leaves behind.
Removal often takes longer than application. That is normal. A neat new surface over poorly prepared residue is still a weak repair.
Removal sequence
- Clean loose surface dirt. Remove soap residue and grime that obscure the bead’s edges, then let the area dry before cutting.
- Cover the drain. Catch long strips and small scrapings.
- Cut the lower bonded edge. Carefully separate the bead from the tub.
- Cut the upper bonded edge. Separate it from the tile, surround, or wall finish.
- Lift one end. Use a removal tool or plastic scraper to create a grip point.
- Pull slowly. Remove the bead in long strips when possible.
- Scrape remnants gently. Keep the scraper positioned to avoid gouging the surface.
- Inspect under strong light. Thin smears of clear silicone can be difficult to see.
- Treat stubborn residue conditionally. Use only a compatible commercial remover or manufacturer-approved solvent, following its dwell-time and cleanup directions.
- Clean again. Remove oils, dust, mold residue, cleaner, and solvent residue.
- Dry the full joint. Water may remain deeper in the gap after the visible edges appear dry.
A plastic scraper is the default around fiberglass and acrylic. Use a metal blade only if the surface manufacturer permits it and you can prevent its edge from contacting the finish. Do not simply increase force when a thin film is difficult to remove; change the angle, lighting, or approved removal method instead.
Vinegar may help clean compatible surfaces affected by soap film or superficial mildew, but it does not replace mechanical removal of cured silicone. A silicone-softening product may make scraping easier, yet the loosened material still has to be lifted away.
The usual sequence is to cut both bonded edges, pull the bead, scrape the residue, clean the surfaces, and let the joint dry. Residue left behind can interfere with the new bond, as explained in this step-by-step silicone-removal guide.
Dry means the depth of the joint
A deep seam can look dry at the front while remaining damp behind the visible surfaces. Improve airflow and allow enough time for the complete gap to dry. Do not seal visible or suspected trapped water into the joint.
Immediately before application, confirm all five conditions:
- Both surfaces are structurally sound.
- Old caulk and silicone film are gone.
- Dust, oils, cleaners, and remover residue are gone.
- The complete joint is dry.
- The substrates and joint dimensions fall within the selected sealant’s limits.
If any checkpoint fails, preparation is not complete.
Apply and tool a continuous silicone bead
Silicone application is time-sensitive. Read the working-time directions first, place the necessary tools within reach, and decide where the bead will start and stop.
Set up the cartridge
- Release the caulk-gun plunger and load the cartridge.
- Cut the nozzle at an angle suited to the actual joint.
- Pierce the inner seal if the cartridge design requires it.
- Test a short bead on scrap material or cardboard.
- Adjust your grip and pace before approaching the tub.
There is no universal nozzle opening. A narrow seam does not need the same cut as a wide corner, and a profiling tool may work best with a particular amount of material. The opening should be large enough to fill the joint without repeated passes but not so large that it deposits excessive silicone.
If using painter’s tape, place it along both sides to define the intended bead edges. Leave sufficient exposed surface for the silicone to contact both materials.
Apply the bead
Hold the gun at a comfortable angle, use steady trigger pressure, and move continuously where practical. The bead should fill the working joint and contact both adjoining surfaces without skips, bubbles, or voids.
Watch the silicone entering the seam rather than watching only the nozzle. Material that sits on top like a loose cord may not be contacting the surfaces adequately. If the bead breaks, refill the missed area promptly and tool it while the material remains workable.
Avoid building repeated layers to correct a badly undersized first pass. One properly filled bead is easier to control than several partially skinned passes.
Tool promptly
Use a clean profiling tool or another method permitted by the manufacturer.
Aim for a smooth, consistent profile with:
- firm contact on both sides;
- no pinholes or bubbles;
- no feather-thin edges;
- no isolated low spots;
- no deep recess that routinely holds water;
- no excessive ridges that are difficult to clean.
A profiling tool is one workable option, but it is not automatically superior in every joint. Finger-tooling is also used in practice, subject to the product instructions and the installer’s technique. The important result is a continuous, properly bonded profile.
If you used tape, remove it immediately after tooling and before the silicone forms a skin. Pull it away carefully so it does not lift the fresh edges. If tape removal leaves a ridge, make only the minimum correction allowed within the product’s working time.
Do not fill an oversized cavity blindly
Large or deep gaps may require correctly sized backer rod instead of being filled solidly with silicone.
Joint limits are product-specific. Follow the width, depth, and backing directions for your selected sealant rather than transferring a threshold from another product. If backer rod cannot create an acceptable joint geometry, correct the underlying gap or installation problem instead of bridging it with an oversized surface bead.
Do not automatically fill the bathtub with water before caulking. That practice is sometimes suggested as a way to load the tub, but the available DIY evidence does not establish it as a universal requirement. Tub construction, support, attachment, and manufacturer instructions differ. A tub that moves enough to reopen a joint should be inspected for a support or installation problem.
Let the bead cure according to the exact product label
“Dry” can describe several different stages. Treating them as interchangeable can expose silicone to water too early.
- Working or tooling time: The period during which fresh sealant can be applied and shaped.
- Skin-over time: When the exposed surface begins forming a film.
- Dry-to-touch time: When light contact may no longer transfer material.
- Water-ready time: The manufacturer’s stated interval before water exposure.
- Full cure: The point at which curing is considered complete under the stated conditions.
There is no dependable universal wait for every silicone tub caulk. Generic guidance varies, formulations differ, and even the GE product documentation discussed earlier contains conflicting water-exposure statements. Use the current cartridge label and technical data for the exact product; if those sources disagree in a way that affects scheduling, contact the manufacturer or follow the more conservative applicable direction.
Keep the joint dry and undisturbed throughout the full stated interval. Avoid shower spray, bathwater, wet cleaning, and deliberate pressing or poking. General guidance may mention a particular waiting period, but the individual product label should determine when the tub returns to service; The DIY Playbook’s recaulking guide illustrates why generic DIY timing should be treated as secondary to product-specific instructions.
Conditions and material characteristics that may affect handling or curing include:
- temperature;
- humidity;
- bead thickness;
- airflow;
- product age;
- storage history;
- contaminated surfaces;
- application outside the listed conditions.
Do not invent a numerical adjustment for those variables. Consult the product documentation for permitted conditions and any stated changes to the cure schedule.
Before returning the tub to service, inspect the bead without disturbing it. Stop and consult the product instructions if it:
- remains soft or smears;
- sags out of the joint;
- contains cured lumps;
- emerged stringy or inconsistent from the cartridge;
- has developed voids;
- has already pulled away;
- never appeared to cure normally.
Water exposure is unlikely to correct them.
Prevent recurring mold, peeling, and separation
Even mold-resistant silicone needs moisture control and routine care. Additives do not eliminate the need for sound preparation, ventilation, drying, and leak repair.
Practical maintenance includes:
- running the bathroom exhaust fan during bathing and afterward as appropriate for the room;
- improving general airflow;
- wiping standing water from the tub ledge and joint;
- repairing dripping fittings and other leaks;
- cleaning the bead with non-abrasive products compatible with the silicone and tub finish;
- avoiding tools or pads that cut, gouge, or lift the bead edges;
- inspecting the joint periodically.
Look for cracking, peeling, gaps, discoloration, persistent softness, loss of adhesion, or renewed water penetration. A small detached edge can admit water behind a bead that still looks acceptable from a distance.
Mold-resistant language should be understood narrowly. A formulation may resist stain-causing mold or mildew, but the joint can still collect soap film and remain damp. Ventilation, drying, compatible cleaning, and leak correction remain important. Home Depot’s buying guide similarly treats flexibility, moisture exposure, cure time, cleanup, color, and paintability as separate selection factors rather than implying that one promotional claim resolves every requirement; see its overview of caulk and sealant types.
| Symptom | Areas to check | Appropriate response |
|---|---|---|
| Peeling or detached edges | Residual silicone, dirt, oil, cleaner residue, trapped moisture, incompatible substrate, inadequate contact | Remove the failed continuous run, correct the preparation or compatibility problem, and reseal |
| Splitting or recurring gaps | Joint movement, loose fixture, inadequate support, bead geometry, sealant movement limits | Investigate movement before applying another bead |
| Sagging bead | Excess material, unsupported depth, oversized joint, unsuitable application conditions | Check joint limits and whether backing or joint correction is required |
| Pinholes or voids | Interrupted application, bubbles, incomplete filling, rushed tooling | Safest default: remove and reseal the continuous run between natural termination points; use a sectional repair only if the manufacturer provides an approved method |
| Recurring mold or discoloration | Persistent moisture, soap residue, poor airflow, leakage, contamination under or around the bead | Improve moisture control and cleaning; replace the bead if contamination persists or adhesion is compromised |
| Soft or uncured material | Product age, storage, contamination, cure conditions, early water exposure | Keep the joint out of service and consult the manufacturer; removal may be necessary |
| Failure in the same location | Movement, missing backing, leakage, loose finishes, concealed damage | Investigate the assembly rather than adding another surface layer |
Do not rely on a fixed service-life promise. Useful life depends on the formulation, joint design, preparation, movement, cleaning, ventilation, water exposure, and maintenance. A carefully installed bead can still fail early if the tub moves, while an older bead may remain serviceable if it is bonded, intact, and kept reasonably dry.
Repeated failure in one location is useful evidence. Treat it as a reason to check support, backing, fixture movement, plumbing, and adjacent materials—not as a cue to make the next silicone layer thicker.
Frequently asked questions
Can I put new silicone tub caulk over old silicone?
Generally, no. Fresh silicone does not adhere reliably to cured silicone or its residue. A surface bead may temporarily conceal cracks or discoloration without creating a dependable bond to the tub and wall.
Remove the old bead and remaining film, clean away dust and oils, eliminate cleaner or remover residue, and let the entire joint dry. Then apply the new sealant directly to compatible, sound surfaces.
If a manufacturer publishes a specific repair method for its product, follow that procedure. Otherwise, the safest default is to remove and reseal the full continuous run between natural stopping points rather than patching against cured silicone.
Is silicone tub caulk safe for a fiberglass or acrylic bathtub?
It can be, but compatibility must be confirmed for the exact sealant and fixture finish. A product that lists fiberglass may not necessarily be suitable for every fiberglass repair, gelcoat, refinishing coating, acrylic formulation, or surface treatment.
Preparation creates a separate risk. Begin with a plastic scraper and gentle pressure. Use blades, abrasives, heat, and chemical removers only when the relevant product and fixture-care instructions permit them.
Can silicone tub caulk be painted?
Most 100% silicone tub caulk is non-paintable. If the finished seam must accept paint, consider a compatible acrylic latex, siliconized acrylic, or specialty tub-and-tile product whose label approves the exact application.
Do not assume paint will adhere because the silicone feels cured. Confirm paintability before buying. If you need sustained water exposure and a specific color, select a bathroom-approved sealant supplied in that color instead of planning to cover ordinary silicone with paint.
How long should silicone caulk cure before the tub gets wet?
Use the water-ready interval on the current cartridge label and technical data for the exact product. Working time, skin-over time, dry-to-touch time, water-ready time, and full cure are different milestones.
Keep the bead dry and undisturbed for the full specified interval. If the cartridge and online documentation conflict, contact the manufacturer or follow the more conservative applicable instruction rather than guessing. Do not use the tub if the bead remains soft, stringy, lumpy, detached, or easily smeared.
Should I fill the bathtub with water before caulking it?
Not as a universal rule. Filling the tub is sometimes suggested as a way to load it before sealing, but the available evidence does not establish which tub constructions or support systems benefit from that practice.
Follow the instructions from the tub manufacturer, installation system, and sealant manufacturer. If normal loading repeatedly opens the joint, investigate the tub’s support and attachment first.
The essential workflow is concise:
- Remove the old bead and residual silicone.
- Clean away dirt, oils, contamination, and remover residue.
- Dry the full depth of the joint.
- Apply a compatible continuous bead that contacts both surfaces.
- Tool it promptly into a smooth profile without voids or thin edges.
- Cure it for the exact label-directed interval before water exposure.
The best silicone tub caulk is not automatically the product with the longest mold-protection language, highest review count, or most premium name. It is a compatible kitchen-and-bath sealant whose substrate list, joint limits, color, cleanup method, working time, and return-to-service schedule fit the job. If gaps recur, the tub moves, surrounding material feels soft, or leakage continues, investigate the underlying assembly instead of adding another layer of silicone.