
Exterior Epoxy Resin: How to Choose
Match clear coatings, repairs, floors and immersed parts to UV, water and substrate limits; compare prep, layer thickness and cure requirements.
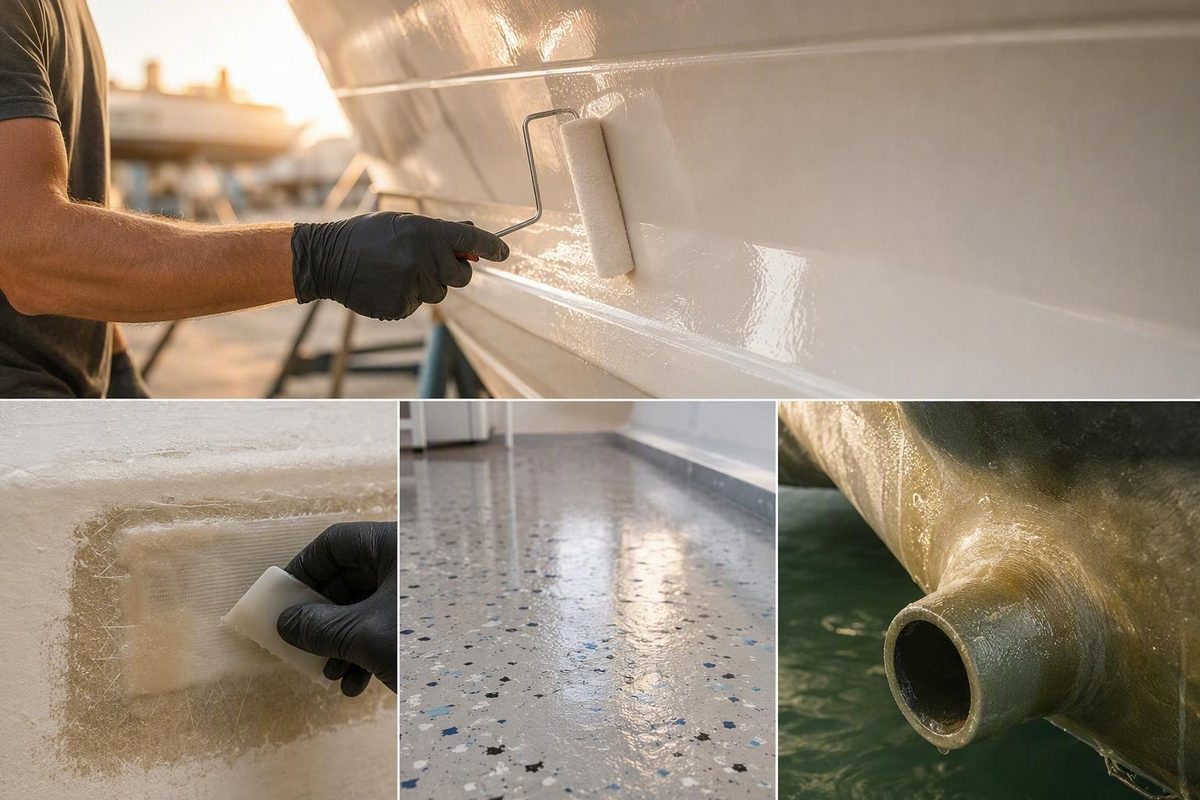
Start with the job rather than the word epoxy. A clear tabletop, hull repair, adhesive bond, patio coating, and continuously immersed part require different properties.
The short answer: epoxy can go outside, but not every epoxy should
First ask: “What must this epoxy do after it cures?”
- Clear decorative coating in sunlight: Choose a complete clear-coating system explicitly documented for exterior exposure. Check its yellowing disclosure, layer limits, application conditions, cure before outdoor use, and maintenance requirements.
- Fiberglass or structural repair: Use a bonding or laminating epoxy approved for the substrate, reinforcement, loads, and water exposure. Add a documented UV-protective finish wherever the repair remains exposed.
- Adhesive bond: Check both materials being joined, joint movement, service temperature, moisture, gap limits, and load direction.
- Moisture barrier beneath another finish: Select an epoxy system that can receive the specified paint, varnish, or other protective coating.
- Floor, patio, or walking surface: Use a documented flooring system rated for the substrate, abrasion, slip requirements, UV exposure, thermal cycling, and moisture transmission—not a decorative casting resin.
- Immersion or standing water: Require explicit approval for the actual exposure. “Waterproof” does not automatically mean suitable for ponding, continuous immersion, below-grade use, or potable-water contact.
A laminating epoxy may provide a strong repair or moisture barrier without being intended as a bare, sunlight-exposed clear finish.
There is no defensible universal winner or fixed outdoor lifespan. Durability changes with formulation, climate, shade, film thickness, substrate movement, installation quality, and maintenance. Without comparable independent weathering tests, product-page claims cannot establish which system will last longest.
UV-resistant is not UV-proof
Sunlight can cause epoxy to yellow, lose gloss, chalk, become brittle, or crack.
“UV-resistant” generally means a formulation is intended to slow visible or physical degradation—not prevent it indefinitely. Alumilite states that its Amazing Clear Cast Outdoor Epoxy will eventually yellow after extended exposure and that coating thickness affects when yellowing becomes visible. Its instructions also prohibit direct-sun application and require the specified cure before outdoor exposure, showing that exterior service and application conditions are separate questions. See the manufacturer’s Amazing Clear Cast Outdoor Epoxy instructions.
| Exterior system | Likely role | Main limitation | What to verify |
|---|---|---|---|
| Ordinary epoxy left bare | Bonding, filling, or coating with limited sunlight | Appearance and surface properties may deteriorate | Exterior exposure approval and whether a topcoat is mandatory |
| Exterior or UV-stabilized clear epoxy | Decorative exposed coating | UV degradation may be delayed, not eliminated | Yellowing disclosure, layer limit, weather limits, cure, and maintenance |
| Epoxy under a UV-resistant finish | Structural bond or moisture barrier beneath paint, varnish, or another finish | Performance depends on intercoat compatibility and maintenance | Full cure, blush removal, sanding, recoat window, and approved finish |
WEST SYSTEM documents its 105-based systems for bonding, coating, filling, fiberglass work, and moisture-barrier applications. Its manual describes multiple coats as a stable base for paint or varnish, but it does not establish bare 105-based epoxy as a UV-resistant exposed finish. Resin, hardener, additives, preparation, and outer coating must be treated as one system, as outlined in the WEST SYSTEM User Manual and Product Guide.
Do not assume that a particular polyurethane, varnish, acrylic, or paint will adhere to every cured epoxy. Verify the current instructions for both products, including full-cure requirements, amine-blush removal, abrasion, and recoat windows.
Match the epoxy type to the actual outdoor job
Compare systems by application and exposure—not package price or the broadest marketing claim.
| Outdoor job | Suitable system category | Documentation to require | Common reason to reject |
|---|---|---|---|
| Furniture or counters | Exterior clear or protected coating | Exterior approval, UV behavior, heat and water limits, abrasion, layer thickness | Decorative approval does not cover ponding, high heat, or heavy wear |
| Signs and décor | Exterior clear or pigmented coating | Substrate compatibility, color stability, sun limits, movement, cure | Indoor casting resin or unacceptable yellowing |
| Fiberglass repair | Laminating or repair epoxy | Laminate compatibility, reinforcement wet-out, loads, water exposure, finish | Clear-cast product lacks structural documentation |
| Structural bonding | Structural adhesive system | Approved substrates, joint design, gap limits, loads, temperature, moisture | General “strong” claim without use-specific data |
| Moisture barrier | Coating epoxy beneath a finish | Film build, porosity, water limits, recoat procedure, compatible topcoat | Waterproof claim does not address the actual exposure |
| Floors or patios | Exterior flooring system | Concrete moisture testing, primer, abrasion, slip, UV, thermal cycling | Casting resin lacks walking-surface approval |
| Continuous immersion | Immersion-approved system | Water type, duration, temperature, substrate, cure, finish requirements | Exterior or water-resistant wording does not approve immersion |
Two clear-cast products show why specifications must remain attached to the exact formula.
MAS markets EnviroTex Lite Outdoor Epoxy for exterior decorative surfaces and claims resistance to UV exposure, water, weather, scratches, and impact. Its product instructions specify a 2:1 resin-to-hardener ratio, approximately 45 minutes of working time, a temperature-dependent 24–72-hour cure, and a 3/8-inch maximum pour depth. These are formula-specific manufacturer specifications; the page does not provide quantitative or independent weathering, scratch, impact, or waterproofing results. See the MAS EnviroTex Lite Outdoor Epoxy specifications.
Alumilite markets Amazing Clear Cast Outdoor Epoxy for exterior furniture, signs, décor, countertops, coasters, and game boards. Its instructions specify a 3/8-inch maximum layer, a 60–80°F application range, a 24–48-hour set, and a 72-hour full cure, with at least 72 hours before outdoor exposure. The manufacturer excludes concrete floors, patio floors, flooring repairs, extreme weather, and similar unsupported applications. An outdoor décor label therefore does not make a product suitable for a patio floor.
For boat work, fiberglass fabrication, structural bonding, and moisture barriers, WEST SYSTEM 105-based combinations belong to a different category. The manufacturer documents uses involving fiberglass, wood, metals, composites, reinforcement, coating, bonding, filling, and moisture exclusion. Selection still extends beyond the base resin: hardener choice changes cure behavior, fillers change consistency and properties, and exposed work needs a documented finish strategy.
Check the documents before you buy
Use each document for its intended purpose:
- Label: Approved uses, basic directions, warnings, and exclusions.
- Technical or product data sheet: Substrates, mixing, application limits, film or layer thickness, cure milestones, coverage, and performance data.
- Safety data sheet (SDS): Hazards, exposure controls, first aid, storage, spills, and disposal.
- Standardized test report: When available and relevant, comparable results for weathering, color change, gloss retention, abrasion, adhesion, or water exposure.
An SDS does not prove UV resistance, weatherability, adhesion, waterproofing, service life, or exterior approval. For example, the SikaBiresin AP861 SDS identifies hazards and controls for one resin component but provides no exterior-performance evidence. It also shows why users need documentation for both the resin and hardener rather than relying on one Part A sheet. Consult technical literature separately from the resin-component safety data sheet.
Before buying, confirm:
- Exact resin-and-hardener combination
- Approval for the substrate and application
- UV data or a clear yellowing disclosure
- Limits for intermittent water, standing water, and immersion
- Service-temperature range
- Primer or seal-coat requirements
- Maximum layer or required wet/dry film thickness
- Pot life, working time, recoat window, and full cure
- Cure before rain, sunlight, water, traffic, loading, or outdoor use
- Coverage at the specified thickness
- Compatible paints, varnishes, or clear topcoats
- Exclusions involving floors, concrete, high heat, extreme weather, or flexible substrates
Treat descriptions such as UV-resistant, weather-resistant, waterproof, scratch-resistant, and impact-resistant as manufacturer claims unless the documentation identifies relevant test methods and quantitative results. If the intended use—such as standing water, immersion, a walking surface, freeze-thaw exposure, or high heat—is not addressed, ask the manufacturer about that exact application.
Prepare the substrate: clean, dry, sound, and abraded
Use this sequence: remove contamination, dry the substrate, remove unsound material, abrade as directed, and remove sanding debris.
Cleaning comes before sanding because abrasion can drive oil, grease, wax, silicone, or mold release into the surface. Remove flaking paint, chalking, blisters, corrosion, weak laminate, and poorly bonded coatings rather than asking new epoxy to hold unstable material in place.
Preparation then varies by substrate:
- Cured epoxy: Amine blush can appear as a wax-like film, especially in cool or moist conditions. Wash it with clean water and an abrasive pad, dry the surface, and then sand remaining glossy areas. Do not use solvent to remove blush.
- Polyester or fiberglass laminates: Remove silicone, wax, mold release, and other contamination, then sand sound laminate to a dull finish.
- Steel or lead: Clean and abrade to bright metal, then coat within the selected system’s preparation window.
- Aluminum: Follow the chosen system’s instructions; WEST SYSTEM’s general guidance calls for dry-sanding with 80-grit abrasive.
- Wood: Dry, porous wood may need little beyond specified abrasion. Burnished wood needs its pores reopened, while oily wood requires the manufacturer’s exact cleaning method and timing.
- Plastics: Identify the polymer where possible. Adhesion varies widely, so test a small prepared area before committing.
These substrate-specific procedures are detailed in WEST SYSTEM’s surface-preparation guidance.
Remove dust with a vacuum, clean brush, or approved washing method. Avoid compressed air when a compressor may discharge oil or water, and be cautious with tack rags that can leave adhesion-inhibiting residue.
Pre-coating check
- [ ] The substrate is structurally sound.
- [ ] Moisture has been addressed and the surface is dry.
- [ ] Oil, wax, silicone, grease, mold release, and weak coatings are gone.
- [ ] The specified abrasion profile has been created.
- [ ] Amine blush has been removed where applicable.
- [ ] Dust removal has not introduced contamination.
- [ ] An adhesion or compatibility test has passed where material identity is uncertain.
Plan the weather, mix, layers, and cure
Use the selected product’s limits rather than applying a universal temperature or humidity rule. Cure behavior can change with temperature, humidity, mixed mass, and layer thickness.
Plan for:
- [ ] Air and surface temperatures within the documented range
- [ ] No condensation or dew
- [ ] A dry substrate before mixing
- [ ] No direct-sun application when prohibited
- [ ] Protection from rain, insects, leaves, dust, and debris
- [ ] Enough sheltered cure time before exterior exposure
- [ ] Stable conditions throughout the critical cure period
Keep cure milestones separate:
- Pot life: How long mixed material remains usable in its container under stated test conditions.
- Working time: Practical time available to spread, wet out, shape, or finish it.
- Set or tack-free time: An early-cure surface condition.
- Recoat window: Period when another coat may be applied using the stated preparation.
- Full cure: The manufacturer’s later cure milestone for defined purposes.
- Service time: When exposure to rain, water, sunlight, traffic, or loading is allowed.
A firm, tack-free, or sandable surface is not necessarily fully cured.
For an outdoor wood tabletop using Amazing Clear Cast Outdoor Epoxy, the manufacturer instructs users to prepare a clean, dry surface; work within 60–80°F; avoid direct-sun application; mix for 3–5 minutes; keep each layer at or below 3/8 inch; and protect the work for at least 72 hours before outdoor exposure. Temperature and humidity can still change curing behavior, so these are product instructions rather than universal guarantees. See the current Alumilite application limits.
Controlled heat may help release bubbles from that clear-cast formula, but overheating can damage the finish and accelerate curing. Reduce bubbles first through careful mixing, controlled conditions, and sealing porous substrates when directed. Use only the bubble-removal method approved for the product rather than aggressive torching.
Diagnose yellowing, tackiness, bubbles, peeling, and cracks
Do not coat over a failure until its cause is understood.
| Symptom | Likely cause | Immediate response | Prevention next time |
|---|---|---|---|
| Yellowing, chalking, or gloss loss | UV exposure or unsuitable bare finish | Determine whether sound material can be recoated or damaged material must be removed | Use an exterior-documented system and compatible UV-protective finish |
| Peeling or delamination | Moisture, condensation, contamination, blush, weak coating, poor abrasion | Remove loose material and inspect the bond line | Clean before sanding; dry, abrade, test, and prime as directed |
| Fisheyes | Silicone, grease, tack-rag residue, or other contamination | Stop and follow the product’s correction procedure | Remove contamination sources and use clean tools |
| Tackiness or incomplete cure | Wrong ratio, incomplete mixing, unsuitable conditions, excessive thickness, insufficient time | Compare conditions and measurements with the instructions before heating or recoating | Measure accurately, mix thoroughly, and observe layer and weather limits |
| Bubbles | Mixing air, porous-substrate outgassing, or excessive heat | Use only the approved bubble-removal method | Mix carefully, seal when directed, and avoid overheating |
| Cracks | Movement, thermal cycling, unsupported flex, excessive build, or unsuitable exposure | Check substrate movement and adhesion | Use a system documented for the substrate, temperature, and movement |
Uncured, contaminated, or poorly bonded epoxy may need to be removed according to the product instructions before cleaning and recoating.
Handle uncured epoxy and sanding dust safely
Uncured resin, hardener, and mixed epoxy can irritate or sensitize skin; formulation and application method also affect eye and airway risks. EU-OSHA identifies skin contact as a major concern and notes that volatile hardeners or spray application can create airway irritation or occupational-asthma risks. Read the current SDS for both components before opening them. See the EU-OSHA overview of epoxy exposure.
At minimum, use product-appropriate chemical-resistant gloves, eye protection, protective clothing, and adequate ventilation. Upgrade protection whenever the SDS, workspace, or application method requires it. Low odor or low VOC does not establish low overall health risk.
Treat sanding as a separate exposure task. Epoxy may become firm enough to sand before completing its cure, and partially cured dust may retain reactive components. Use effective dust extraction and respiratory protection selected for the product and task. Do not clean epoxy from skin with solvents; follow the SDS cleanup procedure instead. Manufacturer epoxy safety guidance also warns that concentrated mixed epoxy can generate enough exothermic heat to burn skin, melt containers, release hazardous fumes, or ignite nearby material.
Spraying is not a routine DIY substitute for brushing or rolling. Fine mist can reach the lungs, eyes, and skin. Depending on the formulation, professional spraying may require isolation or enclosure, filtered exhaust, supplied-air respiratory protection, and full-body protective clothing, as illustrated by the controls in this industrial epoxy-coating SDS.
Clean spills promptly using the product-specified method. Contain liquid material, keep it out of drains, soil, and waterways, and dispose of resin, hardener, contaminated absorbents, and cured waste according to the SDS and local rules. Do not leave a large mass of mixed epoxy in a cup or bin; manage it only as the manufacturer directs.
Treat inspection and recoating as part of the exterior system
Check periodically for:
- Yellowing, chalking, cloudiness, or gloss loss
- Scratches and worn topcoat
- Chips and impact damage
- Hairline or larger cracks
- Edge lifting or localized delamination
- Water entry around penetrations, seams, and exposed edges
Repair damage before moisture migrates beneath the coating, using the product-specific procedure. A shallow topcoat scratch requires a different response from a crack caused by substrate movement or a blister caused by trapped moisture.
Before applying a non-epoxy finish over cured epoxy, observe the required full-cure period, remove amine blush where applicable, sand to the specified profile, remove debris, and verify compatibility and recoat timing. If the existing layer is chalked, cracked, soft, or poorly bonded, determine how much must be removed rather than assuming sanding alone will restore it.
There is no useful universal inspection interval, recoating schedule, or lifespan. Full sun, shade, salt water, freeze-thaw cycling, dark colors, horizontal exposure, substrate movement, film thickness, formulation, and maintenance all affect performance.
Choose from the project backward: define the substrate and exposure, verify explicit exterior approval and exclusions, prepare a clean and dry surface, follow the exact mix and cure schedule, and plan UV protection and maintenance from the start. If the manufacturer does not document sunlight, water, temperature, movement, or topcoat compatibility for the intended use, do not treat broad terms such as waterproof or marine-grade as proof that the system belongs outdoors.