
How to Interpret a Boston Whaler Stencil Number
Document the complete mark and establish the hull family. For an authenticated manufacturer HIN matched to the hull, use its date as primary age evidence.
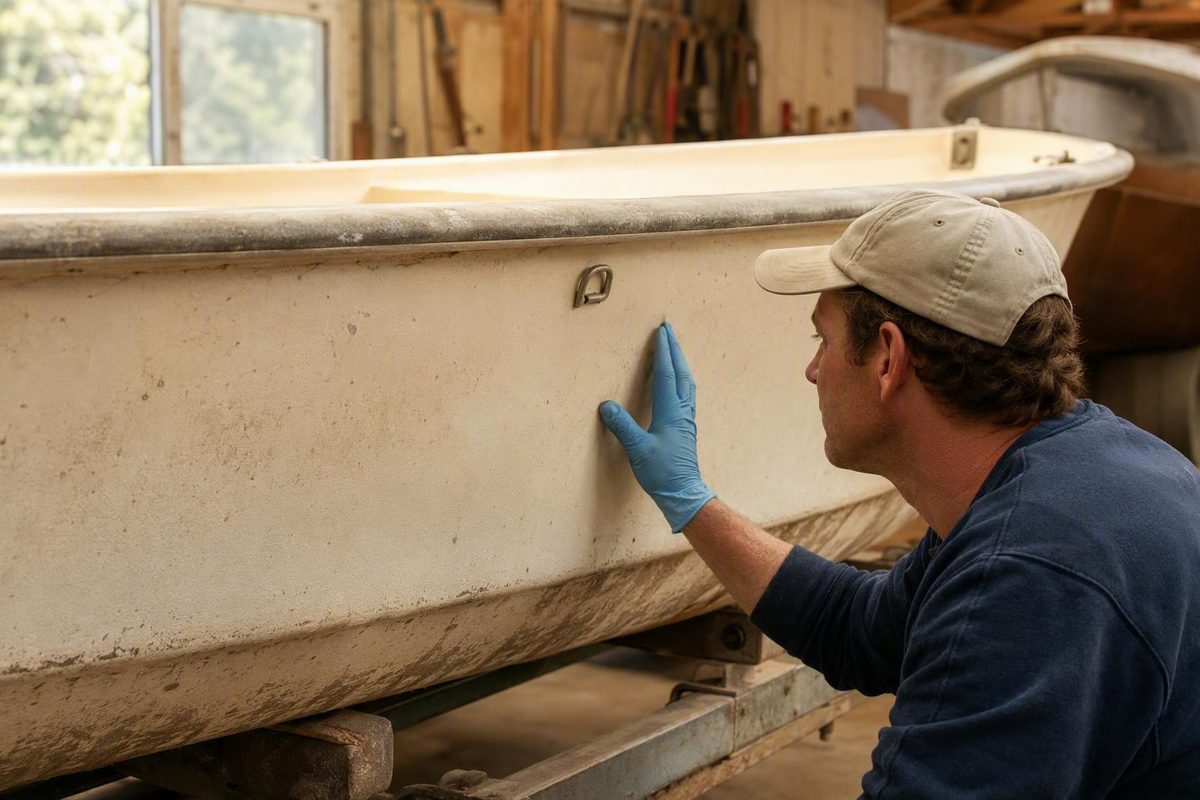
A Boston Whaler stencil number can help establish the identity and approximate production period of a vintage hull, especially when the boat predates conventional Hull Identification Numbers. It is not a universal date code, however, and it does not necessarily prove the boat’s original retail model.
The most defensible approach is to document the complete mark, establish the hull family, search for a separate HIN, consult the appropriate historical reference, and reconcile the result with physical features and surviving paperwork. Treat the process as historical research rather than an exact decoder.
What a Boston Whaler stencil number is—and what it can tell you
Third-party historical references describe the stencil as contrasting gel coat molded into the cockpit liner. It differs from a registration number painted or applied to the hull and from a mechanically attached HIN tag.
The stencil identifies the molded hull-and-liner assembly. Before federally required HINs appeared after November 1972, it was the principal factory number associated with the hull. Most reported stencils are black, although white characters may appear on some older boats with blue interiors. Early marks may be numeric; later examples can include letters and model-related prefixes. ContinuousWave’s Boston Whaler reference FAQ explains these forms, colors, locations, and historical distinctions.
A stencil may help you:
- Recognize a likely factory hull identifier.
- Associate the boat with a broad hull family.
- Compare an eligible early hull with specialist production-year ranges.
- Reconcile the hull with a separate HIN, title, registration, or bill of sale.
- Provide a useful identifier when consulting a vintage-boat community.
It does not necessarily establish:
- The exact date the hull was molded or completed.
- The shipment, dealer-delivery, or first-sale date.
- The year later entered on a title.
- The original finished model when several configurations shared one molded assembly.
- Whether the boat’s current furniture, rails, hardware, or engine are original.
The assumption that every stencil has four numerals is particularly misleading. A four-digit number can be plausible on an early hull, but alphanumeric sequences are also reported.
Online reference coverage is uneven. The strongest readily available historical ranges cover early 13-foot and 16–17-foot hulls through 1972. The supplied evidence does not support a comprehensive online table for every Boston Whaler size, model, and production year.
Confidence key
- Documented: Supported by a surviving factory, dealer, or other contemporaneous record convincingly tied to the boat.
- Range-based: The complete stencil falls within a published historical range for the appropriate hull family.
- Interpolated: The production period is estimated by placing the stencil between known or reported ranges.
- Photo-based: The conclusion is inferred from visible hull, furniture, hardware, or mounting features.
More than one label may apply. A hull can have a range-based production estimate and a separate photo-based model hypothesis.
Using explicit labels prevents “probably from the early 1960s” from gradually becoming “factory-confirmed 1962” as the claim passes between advertisements, forums, and title applications.
Where to look for the stencil on a classic hull
Placement varies by hull size and production period. No one location applies to every Boston Whaler.
For many smaller classic hulls, begin at the centerline of the inboard transom face in the splashwell or motor-well area. The commonly reported inspection band is approximately 3–5 inches below the top of the transom. On some larger hulls, reported alternatives include the starboard bow locker and the center anchor locker. Vintage-boat discussions also warn that paint or refinishing may conceal the mark. This discussion identifies the inner transom, splashwell, bow locker, and anchor locker as reported inspection areas.
Use this inspection sequence:
-
Establish the approximate hull length. Determine whether you are examining a 13-foot, 16–17-foot, or another hull family before selecting a reference or assuming a location. Measure the boat if its paperwork is doubtful.
-
Inspect the splashwell and inner transom. Look along the centerline and across the inboard transom face. Use light directed across the surface from several angles so that color and texture differences are easier to see.
-
Photograph under different viewing conditions. Take a straight-on image and additional photographs with light arriving from the left, right, above, and below.
-
Inspect the bow and anchor lockers. If the transom search is unsuccessful—particularly on a larger hull—remove loose gear and inspect the locker bottoms and interior faces.
-
Record every candidate mark before cleaning or alteration. Photograph molded characters, attached tags, scratched markings, and painted identifiers separately. A mark that initially appears irrelevant may later explain a title or registration record.
Common inspection-area diagrams
These diagrams show reported inspection areas, not guaranteed locations for every model.
Smaller classic hull: interior view facing aft
| Orientation | Inspection area |
|---|---|
| Outboard side | Exterior transom; inspect separately for a HIN tag or molded HIN |
| Transom top | Use as the upper measurement reference |
| Inboard side | Cockpit-facing transom and splashwell surface |
| Centerline | Begin the stencil search here |
| Approximate band | Inspect roughly 3–5 inches below the transom top |
                 EXTERIOR / OUTBOARD
                         ↑
              top edge of transom
        ┌───────────────────────────┐
        │        engine area        │
        │                           │
        │   3–5 in. inspection      │
        │   band on INBOARD face    │
        │             ↓             │
        │       ● centerline        │
        │         splashwell        │
        └───────────────────────────┘
                         ↓
                  COCKPIT / INBOARD
Larger-hull alternatives: top view
                           BOW
                            ↑
             PORT                         STARBOARD
               ┌──────────────────────────────┐
               │                    ┌───────┐ │
               │                    │ bow   │ │
               │                    │locker │ │
               │                    └───────┘ │
               │                              │
               │        ┌────────────┐        │
               │        │  center    │        │
               │        │  anchor    │        │
               │        │  locker    │        │
               │        └────────────┘        │
               └──────────────────────────────┘
                            ↓
                           STERN
A likely stencil should appear to be within the liner’s gel coat, with a contrasting color forming the characters. That differs from:
- A metal or plastic tag attached to the exterior transom.
- Molded or embossed characters forming a later HIN.
- State registration graphics applied to the outer bow.
- A number scratched into paint by an owner, dealer, marina, or enforcement agency.
- A serial number on an engine, control, trailer, or accessory.
For every candidate stencil, record:
- The complete sequence, including letters and leading zeros.
- Any uncertain characters and possible alternatives.
- Character color.
- Exact location and orientation.
- Hull length and other measured dimensions.
- Interior color.
- Whether a separate transom HIN exists.
- Whether the surrounding surface appears original, painted, repaired, or re-gelcoated.
- Image filenames and inspection date.
Take both close-up and contextual photographs. A close-up preserves the characters; a wider view establishes where the mark was found.
Stencil number vs. HIN, registration number, and title year
A molded stencil and a Hull Identification Number are not interchangeable. The stencil identifies the molded hull-and-liner assembly. According to the supplied third-party historical reference, Boston Whaler commonly used a mechanically attached transom HIN after federal HIN requirements began, and BWC is Boston Whaler’s manufacturer identification code. That reference recommends using the transom HIN, rather than the stencil, as the principal dating evidence for a boat made after November 1972. Its HIN overview also explains why manufacture, model, and sale dates can differ.
These are historical claims from an enthusiast reference, not an official regulatory decoding service. Legal questions about an identifier should be directed to the relevant government authority.
| Identifier | Physical form | Typical location | Primary purpose | Dating value |
|---|---|---|---|---|
| Molded stencil | Contrasting characters within the liner gel coat | Often the inner transom or splashwell on smaller hulls; sometimes a bow or anchor locker | Identifies the molded hull-and-liner assembly | Useful for approximate research, especially on eligible early hulls |
| Manufacturer HIN | Attached tag or molded/embossed characters | Usually on the exterior transom | Identifies the completed hull under the applicable HIN system | Normally the principal dating evidence when an authentic, hull-matched later HIN is present |
| Registration number | Surface-applied letters and numerals | Exterior sides of the bow | Connects the boat with a jurisdiction’s registration record | Usually identifies a registration record, not the molding date |
| Title year | Printed entry on a legal document | Not physically part of the hull | Describes the boat in a jurisdiction’s title record | Supporting evidence, particularly when an older boat has moved between jurisdictions |
| Possible state-assigned identifier | Form and placement vary | Determined by the issuing authority | Supplies an identifier when the original identity is absent or legally insufficient | Must be interpreted through the issuing authority |
The practical decision rule
If a later boat has a plausible BWC-prefixed manufacturer HIN that can be tied to the hull, use the HIN’s date information as the primary evidence of age. Record the stencil separately as the molded-assembly identifier.
If no manufacturer HIN is visible, do not immediately conclude that the boat predates HIN requirements. Look for:
- Filled fastener holes.
- A repaired or refinished tag area.
- Molded characters elsewhere on the transom.
- HIN copies in old titles, registrations, insurance files, or bills of sale.
- Photographs taken before earlier repairs.
Conversely, a newer-looking identifier is not automatically the original manufacturer HIN. It could be associated with later paperwork or a state process. Do not rely on informal claims that all state-assigned identifiers follow one prefix or format; verify the identifier with the authority that issued it.
Why several “years” may appear
A vintage boat can accumulate several legitimate dates:
- Manufacture date: When the hull or completed boat was built.
- Model year: The commercial year assigned to the product.
- Shipment date: When it left the manufacturer or another facility.
- Dealer receipt date: When a dealer received it.
- Retail sale date: When the first customer purchased it.
- Title year: The year entered in a jurisdiction’s title record.
- Registration year: The year associated with a particular registration.
These dates may differ because model-year transitions do not always align with calendar years, a boat may remain in dealer inventory, and an older hull may be sold, titled, transferred, or retitled later.
Record a title saying “1968” as title evidence, not automatically as proof that the hull was manufactured in 1968. If it conflicts with a credible HIN or a well-supported stencil range, preserve the conflict and investigate it.
A cautious stencil-number lookup workflow
A useful lookup begins with classification. Searching only the characters and adopting the first date found online can place the number in the wrong hull-family sequence.
Step 1: Photograph and transcribe the complete number
Take:
- A wide photograph showing the location.
- A straight-on close-up.
- Close-ups under several lighting angles.
- An image with a scale beside, but not covering, the mark.
Create a literal transcription before trying to interpret it. Show uncertainty rather than silently resolving it:
Observed: 62?3
Possibilities: 6273 / 62Z3
Do not alter a character to make the sequence fit a reference table.
Step 2: Establish the hull family
Determine whether the boat is an early 13-foot hull, an early 16–17-foot hull, or another size. The strongest available pre-1972 online range coverage applies to the first two families.
Use measured dimensions and hull form, not only the seller’s description. Titles, advertisements, and family recollections may round a length or apply a later model name to an earlier hull.
Step 3: Search for a separate HIN
Inspect the exterior transom before deciding that the stencil is the boat’s only identifier. Review old titles, registrations, insurance records, bills of sale, and pre-restoration photographs as well.
For a boat within the later HIN era, prioritize a plausible manufacturer HIN that can be authenticated and matched to the hull. Keep the stencil in the research file, but do not use it to displace stronger date-bearing evidence.
Step 4: Use the correct specialist reference
Compare an eligible early stencil only with the production-year material for its hull family. Keep the 13-foot and 16–17-foot sequences separate.
The evidence supplied for this article does not reproduce complete range tables, so exact endpoints should not be reconstructed from memory. The underlying specialist pages must be consulted directly. A ContinuousWave discussion of an early 13-foot stencil points readers to the site’s historical references and demonstrates how a table may support an approximate period. Review that discussion and its linked early-hull material before assigning a year.
If the hull falls outside the documented online coverage, say so. Do not stretch a sequence from another hull family merely to produce an answer.
Step 5: Assign an honest confidence label
Use range-based when the complete stencil fits a published range for the correct hull family. Use interpolated when the number is placed approximately between reported ranges. Reserve documented for a specific surviving record convincingly tied to the boat.
Appropriate wording:
The complete stencil is consistent with an early-1960s period in the 13-foot reference sequence. The estimate is range-based, not a factory-confirmed build date.
Overstated wording:
The stencil proves this is a 1962 model.
Step 6: Reconcile the result with the boat
Compare the estimate with:
- HIN, if present.
- Hull dimensions and form.
- Interior color.
- Console and seating evidence.
- Rail and hardware holes.
- Transom alterations.
- Title and registration records.
- Bills of sale and dated photographs.
- Owner recollections, clearly labeled as recollections.
Do not force every piece of evidence into one year. A conflict is itself a research result.
Record the possibilities without selecting one until the evidence supports it.
Stencil-research worksheet
| Field | Entry |
|---|---|
| Hull length | |
| Beam or other dimensions | |
| Complete stencil | |
| Uncertain characters | |
| Stencil color | |
| Exact stencil location | |
| Separate HIN | |
| HIN location and physical form | |
| Interior color | |
| Title year | |
| Registration year | |
| Console or furniture footprints | |
| Rail and stern-seat mounting evidence | |
| Surviving original hardware | |
| Paint or repairs over identifier areas | |
| Historical source consulted | |
| Estimated production period | |
| Confidence label | |
| Conflicts requiring follow-up |
Keep the original photographs with the worksheet. A transcription alone cannot show how faint a character was or whether the mark appeared to be molded into the liner.
Worked example: what stencil 6273 suggests
An owner reported the original four-digit stencil 6273 still visible on a 13-foot Boston Whaler hull. A ContinuousWave forum participant compared the number with published ranges covering 1961 through 1963 and estimated that the hull was probably from around 1962. The estimate was explicitly based on interpolation, not a surviving factory record. The original discussion documents the owner’s report and the community-derived estimate.
The useful part of the example is the reasoning:
- Confirm the 13-foot hull family.
- Record the complete stencil as
6273. - Consult the early 13-foot material, not a 16–17-foot sequence.
- Compare the number with the relevant published ranges.
- Place it approximately between the reported ranges.
- Label the conclusion interpolated and community-derived.
Reusable wording:
Stencil 6273 on this 13-foot hull is consistent with a probable circa-1962 production period according to a community reference-table interpolation.
“Circa” matters. The conclusion does not establish:
- An exact molding or completion date.
- A confirmed shipment date.
- A dealer receipt or retail-sale date.
- The title year.
- The original furniture package or finished model.
- Whether later modifications changed the boat’s appearance.
Community references also associate 2A, 2B, and 2C prefixes with 13-foot hulls and 3A, 3B, and 3C with 16-foot hulls. These associations may help with classification, but parts of the chronology are described as community-derived and partly anecdotal. They should not be represented as a complete factory-documented prefix system.
Do not transfer the 6273 conclusion to another hull size. Similar-looking numbers do not necessarily belong to the same production sequence.
Why the stencil may not prove the original model
The stencil identifies the molded hull-and-liner assembly, not necessarily the complete retail configuration with its original console, seats, rails, and fittings.
This matters when researching Nauset, Eastport, and Sakonnet configurations. In a discussion of a stripped 16-foot-7-inch hull, forum participants described those names as configurations that shared a classic hull while differing in interior layout and seating. They used console position, seat evidence, rail holes, and stern mounting marks to develop qualified opinions. A circa-1970 date and probable Nauset identity remained photo-based hypotheses rather than manufacturer findings. The discussion illustrates why a shared bare hull cannot conclusively establish the finished configuration.
A stripped hull may have lost much of the evidence that once distinguished one model from another.
Physical-evidence checklist
Before filling holes or installing a replacement interior, inspect and map:
- Console position: Measure its current location and look for unused mounting points elsewhere.
- Console footprint: Record filled holes, compression marks, discoloration, and interruptions in the nonskid.
- Seat footprints: Document holes and wear patterns associated with thwart seats, pilot seats, benches, or other furniture.
- Bow-rail holes: Note spacing, symmetry, backing evidence, and filled penetrations.
- Stern-seat mounts: Look for brackets, plugs, repaired holes, or reinforcement.
- Hull dimensions: Verify length, beam, and transom form.
- Surviving hardware: Photograph cleats, chocks, rails, hinges, steering parts, and mounting plates.
- Original interior components: Record construction, dimensions, finish, fasteners, and provenance.
- Color transitions: Look for protected areas that retain an earlier finish.
- Repair boundaries: Identify fairing or laminate work that may have erased mounting evidence.
Create a scaled sketch of every hole pattern. Number each location and connect it to a photograph. Distinguish open holes, filled holes, surface dimples, and suspected repairs.
Responsible wording separates observation from inference:
- Strong: “The dimensions and molded assembly are consistent with the classic 16–17-foot hull family.”
- Qualified: “The surviving console and seating footprints are consistent with a Nauset-type configuration.”
- Overstated: “The stencil proves the boat was originally a Nauset.”
A photo-based model opinion can still be useful. It may direct research toward appropriate furniture layouts, hardware catalogs, and dimensions. It becomes misleading only when the qualification is removed.
How to document and preserve the number during restoration
Treat the stencil as fragile historical evidence even though its contrasting characters are part of the gel-coat construction. Paint may conceal it, and recovery is not guaranteed.
Before cleaning, stripping, fairing, or refinishing the area:
- Photograph the entire splashwell, transom face, or locker.
- Take close-ups under more than one lighting angle.
- Transcribe every visible character without guessing.
- Measure the mark from fixed reference points.
- Record the character and surrounding interior colors.
- Note paint, repairs, abrasion, cracks, and exposed gel coat.
- Preserve duplicate copies of the photographs and notes.
- Mask and clearly identify a visible stencil before nearby work begins.
A contextual image should show the mark’s position relative to stable references such as the centerline, transom top, locker edge, or drain opening.
If the stencil is painted over
Begin by determining, as far as possible, what covers the suspected stencil.
The supplied evidence does not establish a universal solvent, scraper, abrasive, or chemical process that is safe for every coating and gel-coat system. Do not prescribe or apply a generic removal method directly over the mark. Document the untouched area, identify the covering material if possible, and obtain coating-specific guidance before attempting exposure.
Recovery may be impossible. If earlier sanding removed the contrasting gel coat or a repair replaced that portion of the liner, no stencil may remain beneath the current surface.
If fiberglass repair is unavoidable
Preserve the historical record even if necessary work will alter the area. Keep:
- Original high-resolution photographs.
- A written transcription with uncertain characters noted.
- Location measurements.
- Notes describing the mark’s physical appearance.
- Photographs made before and during the repair.
- A final record explaining why the original area changed.
Masking can help preserve a visible stencil during adjacent work, but everyone working on the boat should also be told where the exclusion area is and why it matters.
Editorial note: This identification and restoration guidance is general information. Coatings, substrates, tools, and repair conditions vary, and readers are responsible for how they apply the information, consistent with Fiberglass Guide’s terms of use.
Records searches, conflicting evidence, and next steps
Specialist historical tables and owner communities can help estimate a production period, recognize a hull family, and interpret mounting evidence. Unless a surviving manufacturer, dealer, or other contemporaneous record supports the result, describe it as community research rather than official confirmation.
In one forum discussion, a participant suggested submitting a stencil inquiry in search of shipment date, receiving dealer, or original configuration information. The thread does not demonstrate a successful lookup, so the suggestion should be treated as a possible research avenue rather than a promised service. The underlying discussion presents the records search as qualified owner advice.
There is also a current limitation. Boston Whaler’s registration page states that its supported system cannot provide boat details or documentation for models older than 1997 because those HINs predate what the system allows. Boston Whaler states that pre-1997 limitation on its registration page.
That limitation does not prove that no historical material exists anywhere. Relevant information could survive in owner files, dealer paperwork, private collections, historical publications, or other archives. It does mean that a successful manufacturer lookup should not be promised.
Inquiry template
Subject: Request for help identifying vintage Boston Whaler hull
I am researching an older Boston Whaler hull and would appreciate any available guidance.
- Complete stencil:
- Uncertain characters:
- Stencil color:
- Exact stencil location:
- HIN, if present:
- HIN location and physical form:
- Measured hull length:
- Interior color:
- Title and registration information:
- Surviving original features:
- Known repairs or refinishing:
I have attached clear close-up and location photographs. Please indicate whether any conclusion is based on a surviving record, a production range, interpolation, or visual comparison.
Do not submit only a number.
Match the evidence to the question
Avoid a universal hierarchy in which one source automatically outranks every other source for every purpose. Instead, ask what event or characteristic you are trying to establish:
- Dating a later hull: Use an authentic manufacturer HIN that can be matched to the boat as the primary standardized dating evidence.
- Dating an eligible early hull: Use the correct hull-family stencil range for an approximate period.
- Establishing shipment, dealer receipt, or sale: Use a contemporaneous record that specifically documents that event.
- Assessing original configuration: Use surviving furniture, mounting patterns, hardware, dated photographs, and any configuration-specific records.
- Understanding title or registration history: Use the issuing jurisdiction’s records while recognizing that its recorded year may not be the manufacture year.
- Developing research leads: Use forum opinions and owner recollections as context, not automatic proof.
For every source, confirm that the identifier actually belongs to the hull.
Legal questions involving titling, registration, a missing HIN, or a state-assigned identifier must be resolved with the relevant government authority.
If the stencil is missing or unreadable
Document the suspected locations anyway. Photograph evidence of:
- Paint layers.
- Sanding or gel-coat replacement.
- Filled tag holes.
- Transom reconstruction.
- Locker repairs.
- Faint contrasting marks.
- Areas hidden by engines, brackets, or accessories.
Then research the boat through its dimensions, any surviving HIN, old photographs, mounting patterns, title history, and specialist communities. A missing stencil reduces confidence but does not eliminate every route to identifying the hull family.
One-page action list
- Document: Photograph the boat and every candidate identifier.
- Classify: Decide whether each mark is a stencil, manufacturer HIN, registration graphic, document number, or possible later identifier.
- Check for a HIN: Inspect the exterior transom and historical paperwork.
- Establish the hull family: Measure the boat rather than relying only on its advertised model.
- Select the correct reference: Keep early 13-foot and 16–17-foot sequences separate.
- Estimate cautiously: Use documented, range-based, interpolated, or photo-based labels.
- Compare physical evidence: Map console, seat, rail, and stern-mount patterns.
- Preserve: Protect the stencil and retain photographs before restoration.
- Record conflicts: Do not alter a date or character merely to make the evidence agree.
- Escalate legal questions: Ask the relevant authority about titles, registrations, and assigned identifiers.
- Retain the file: Keep images, measurements, correspondence, and notes with the boat’s paperwork.
The essential takeaway is restrained: record and preserve the complete stencil before altering the hull. Use an applicable later HIN as the primary dating evidence when one exists, and treat early stencil-table results as approximate unless a documented record supports a specific date. The most defensible identification combines the stencil with hull size, number format and location, physical configuration clues, paperwork, and an explicit confidence level.
Frequently asked questions
Is a Boston Whaler stencil number the same as the HIN?
No. The stencil is a contrasting-gel-coat identifier associated with the molded hull-and-liner assembly. A manufacturer HIN is a separate identifier generally associated with later boats and commonly found at the exterior transom. When a plausible manufacturer HIN can be authenticated and matched to the hull, use its date information as the primary age evidence and record the stencil separately.
Are all Boston Whaler stencil numbers four digits?
No. Some early examples are numeric, including four-digit marks, while later examples may contain letters and model-related prefixes. Transcribe the entire sequence exactly and mark uncertain characters rather than assuming they are numerals.
Can a stencil number identify the exact year and original model?
Usually not by itself. An eligible early stencil may support a range-based or interpolated production period, but that is not necessarily an exact manufacture date. Because several finished configurations could share a molded hull-and-liner assembly, the stencil may establish a hull family without proving whether the boat was originally a Nauset, Eastport, Sakonnet, or another model.
Can Boston Whaler look up records for an older stencil number?
A successful lookup should not be promised. Enthusiasts have suggested asking about shipment, dealer, or configuration records, but the supplied examples do not demonstrate a completed search. Boston Whaler’s current registration guidance says its supported system cannot provide boat details or documentation for models older than 1997. That system limitation does not establish that no historical material survives elsewhere.
Can a painted-over Boston Whaler stencil be recovered?
Possibly, but not always. Paint may conceal the contrasting characters, while previous sanding or replacement of the underlying gel coat may have destroyed them. Document the area first, identify the covering material if possible, and obtain coating-specific guidance before attempting removal. Avoid aggressive sanding, scraping, or an unverified chemical process directly over the suspected stencil.