
Which 2K Epoxy Primer Fits Your Project?
Five product classes share this name: automotive aerosol, bulk primer-sealer, marine barrier coat, concrete-floor primer and industrial primer.
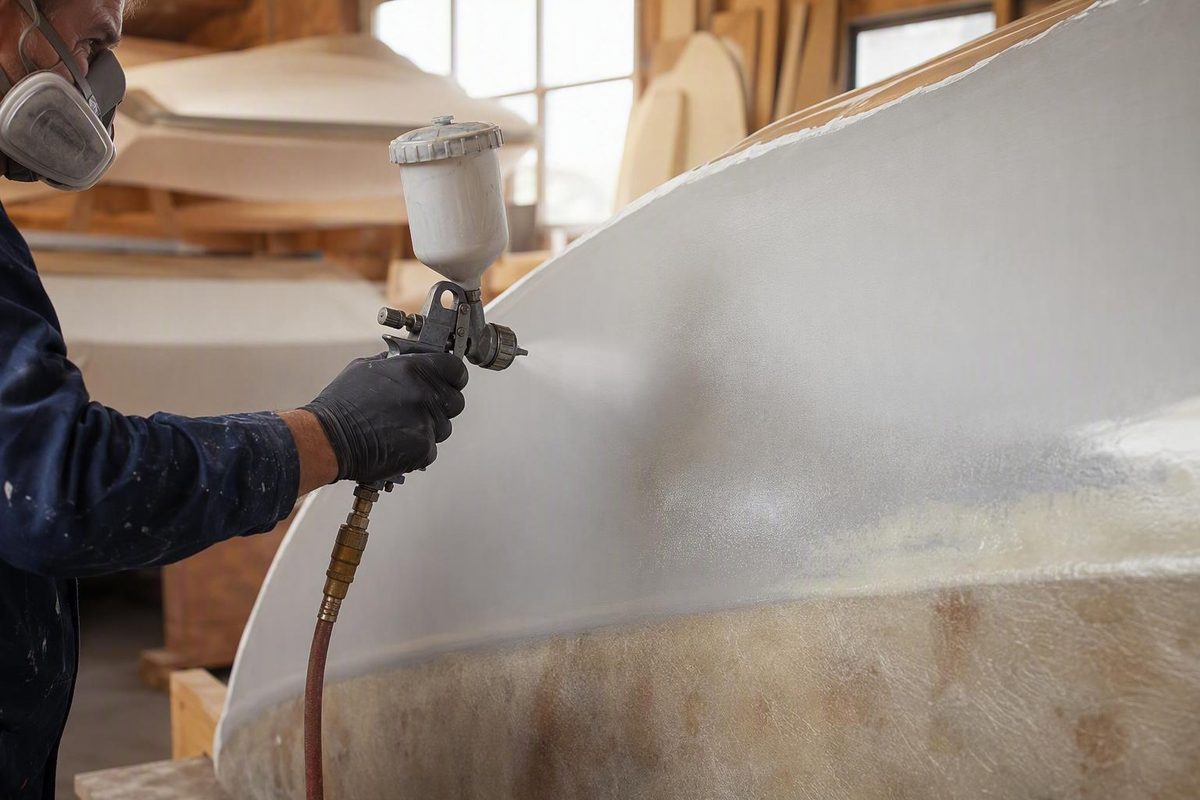
A 2K epoxy primer is generally chosen to provide adhesion, sealing, moisture resistance, or product-specific corrosion control. It is not automatically a high-build filler, and it cannot compensate for an unidentified substrate, inadequate preparation, hidden contamination, unrepaired defects, or an incompatible topcoat.
The term spans several markets. An automotive aerosol, a bulk primer-sealer, a marine barrier coat, a concrete-floor primer, and a chromated industrial primer may all be described as “2K epoxy primer.” Their approved substrates, mixing instructions, film builds, application methods, coating systems, and safety requirements are not interchangeable.
The practical rule is to identify the application class and exact substrate first. Then consult the current product data sheet—often called a PDS or TDS—for preparation, mixing, film thickness, application, and coating compatibility. Use the current safety data sheet, or SDS, to plan handling and exposure controls. If the necessary documents are unavailable, keep the product at the comparison stage rather than treating a sales page as a complete application specification.
What 2K epoxy primer is—and what it is meant to do
“2K” means that two reactive components are kept separate until mixing or activation. One component is the primer; the other is a hardener, activator, or catalyst. They may be supplied in separate containers or in separate chambers of an activated aerosol. By contrast, a 1K product has no separately added curing component.
Two formats are common:
- Bulk systems: Primer and activator are combined before spraying, rolling, or another approved application method. Some products permit a named reducer under specified conditions.
- Activated aerosols: The reactive components are combined inside the can shortly before spraying. These products reduce measuring and spray-gun setup for small jobs, but activation begins a product-specific working period.
Epoxy primer commonly functions as an adhesion-promoting and sealing layer. Particular automotive products are also marketed for corrosion control and resistance to moisture penetration. For example, Transtar describes its primer-sealer as a corrosion-resistant groundcoat that improves adhesion on properly prepared surfaces and resists moisture damage from water permeation. Those are manufacturer claims for that formulation, not proof that every epoxy primer performs identically.
The word following “primer” helps define the intended role:
- Primer-sealer: Promotes adhesion and isolates or seals an approved substrate before later coatings.
- Primer-surfacer: Provides enough build to permit some sanding and correction of minor irregularities.
- High-build surfacer: Supplies more material for leveling and block sanding.
- Marine barrier coat: Forms part of a named marine coating system, often beneath compatible bottom paint.
- Industrial specification primer: Belongs to a controlled system involving specified substrates, catalysts, application conditions, and topcoats.
These roles can overlap within an individual formulation, but the terms are not synonyms. A retailer calling an aerosol a “primer-filler” does not establish that it can replace a dedicated high-build surfacer. Likewise, roller instructions for a floor primer do not apply to an automotive spray product.
Before buying, locate two documents for the exact product, color, catalyst, and regional variant:
- The current PDS or TDS: Look for approved substrates, surface preparation, component ratio, induction time, permitted reducer, equipment, wet- and dry-film thickness, coat count, flash time, recoat procedure, cure conditions, and compatible next coats.
- The current SDS: Review the SDS for the primer, activator, reducer, and cleanup materials when planning handling, ventilation, storage, spill response, and disposal.
Product pages in the examples below sometimes link these documents without exposing their revision dates in the supplied page text. Verify the document revision directly before use.
Start with the application: five product classes that share the same name
Choose by use case before comparing color, package size, or price.
| Product class | Typical task | Documented or listed substrate examples | Format and equipment implications | What remains to be verified |
|---|---|---|---|---|
| Activated automotive aerosol | Small metal repairs, spot priming, or parts | Retail listings name steel, aluminum, non-ferrous metal, galvanized sheet, and anodized aluminum, depending on the listing | Activate, shake, and spray; no mixing cup or spray gun, but masking and spray-exposure controls remain necessary | Manufacturer substrate approval, preparation, activated-can life, coverage at required film build, coat schedule, flash time, recoat procedure, cure time, and disposal |
| Bulk automotive primer-sealer | Sealing approved automotive substrates before filler, surfacer, sealer, or topcoat | Properly prepared surfaces defined by the exact automotive technical sheet | Separate primer and activator; may permit a specified reducer; requires suitable mixing, application, and cleanup equipment | Complete ratio definition, induction, gun setup, film build, timing, substrate list, and compatible adjacent layers |
| Marine fiberglass barrier primer | Barrier or adhesion layer on a hull beneath compatible bottom paint or topcoat | Named procedures may cover fiberglass, gel coat, aluminum, or steel | Usually a mixed system applied in multiple timed coats under a product-specific procedure | Dewaxing, sanding profile, ratio, induction, film build, tack or overcoat test, and bottom-paint compatibility |
| Concrete floor primer | Priming concrete or other vendor-approved flooring substrates | One vendor names concrete, previously painted surfaces, galvanized steel, and aluminum | Mechanical mixing followed by roller or approved spray application; moisture, dew point, profile, and floor area affect planning | Concrete preparation, moisture limits, film build, topcoat approval, yield on the actual profile, and ventilation |
| Specification-grade industrial primer | Controlled industrial metal coating under named systems | Exterior metal, including specified aluminum treatments in some systems | Professional spray equipment, named catalysts, controlled-shop procedures, and potentially additional workplace requirements | Exact specification status, pretreatment, catalyst, application controls, film build, workplace restrictions, and approved topcoat family |
Activated automotive aerosol: SprayMax retail listings illustrate both the convenience and the documentation gap. The listings offer beige, gray, or black versions and name metal, non-ferrous metal, galvanized sheet steel, or anodized aluminum. One summarizes operation as “activate, shake and spray,” but the supplied retail information does not establish coverage, activated-can life, dry-film thickness, cure time, or a complete recoat schedule. The 66 Auto Color listing is therefore a shopping example, not a substitute for manufacturer instructions.
Bulk automotive primer-sealer: Transtar offers white, gray, and black variants in quart and gallon sizes, identifies two activators, allows optional reduction under stated conditions, and links technical and safety documents. That documentation makes the product easier to evaluate, but it does not make it suitable for every substrate or coating stack.
Concrete floor primer: SlipDoctors Base Coat is a light-gray, two-component floor primer. Its vendor names concrete, previously painted surfaces, galvanized steel, and aluminum and describes use beneath certain epoxy, polyurethane, and acrylic topcoats. Its mechanical-mixing, roller, temperature, and coverage instructions belong only to that floor product.
Marine barrier primer: A marine barrier-coat system may place epoxy over prepared fiberglass or gel coat beneath compatible bottom paint. Cleaning, sanding, coat count, tack testing, and overcoat timing remain instructions for the named hull system—not a general recipe for automotive fiberglass.
Specification-grade industrial primer: Sherwin-Williams lists a two-component, high-solids exterior-metal epoxy primer with named catalysts and military topcoat families. The page identifies chromated variants and restricts the product to industrial-shop application. It also shows an unresolved difference between the specification in the title and the approvals listed farther down the page, so exact compliance must be confirmed in the applicable product documents. This is not a casual consumer recommendation. Sherwin-Williams provides the product classification, restriction, variants, catalysts, and listed topcoat families.
The routing rule is simple:
Select the application class, identify the exact substrate and its condition, and find explicit manufacturer approval before comparing price, color, package size, or convenience.
Substrate compatibility: metal, fiberglass, gel coat, SMC, concrete, and old paint
“Suitable for epoxy primer” is too broad to guide a purchase. Compatibility belongs to a particular product, substrate condition, preparation method, and complete coating stack.
| Substrate or surface | Level of support in the available evidence | What must be verified |
|---|---|---|
| Bare steel | Retail automotive listings name steel or general metal; industrial manufacturers approve particular metal systems | Rust removal, cleaning, surface profile, maximum exposure before priming, film build, and topcoat |
| Aluminum | Some retailer and manufacturer pages name aluminum | Bare versus treated aluminum, cleaning, abrasion or conversion treatment, and approved primer variant |
| Galvanized or anodized metal | Certain listings expressly name galvanized sheet or anodized aluminum | Required pretreatment and whether the exact primer accepts that treatment |
| Conventional fiberglass | Forum contributors describe epoxy as a first sealing layer over prepared fiberglass | Current manufacturer approval, laminate condition, contamination removal, sanding profile, and next coat |
| Gel coat | A named marine procedure addresses prepared fiberglass or gel coat | Dewaxing, coating condition, repairs, sanding profile, and approval for the intended automotive or marine stack |
| SMC | Forum discussions treat SMC separately from conventional fiberglass | Explicit bare-SMC approval and any required first coat or adhesion treatment |
| Concrete | A floor-product vendor approves its own primer for concrete | Moisture condition, preparation, profile, dew point, film build, and approved floor topcoat |
| Body filler | Some automotive manufacturers claim improved filler adhesion | Whether filler belongs above or below epoxy, timing, abrasion, cleaning, and system compatibility |
| Previously painted surface | Some floor and automotive products accept specified existing coatings | Coating identity, soundness, solvent resistance, cleaning, featheredge treatment, and test-patch result |
| Unknown coating or treatment | No general compatibility can be inferred | Identify or remove it, then obtain guidance from the selected coating manufacturer |
For steel, aluminum, galvanized metal, and anodized aluminum, the evidence supports only product-specific approval or retailer-listed use.
For conventional fiberglass, experienced forum participants often describe epoxy as a conservative first sealing layer after correct preparation. That is useful shop experience, but it is not current manufacturer approval for an unidentified primer.
Do not confuse fiberglass-reinforced laminate with sheet-molded compound, or SMC. In one older Corvette discussion, a participant reported that a surfacer used over conventional fiberglass was not recommended directly over bare SMC. The recommendation was secondhand and may not reflect current products, but it illustrates the identification problem: approval for “fiberglass” does not automatically include SMC. The CorvetteForum discussion distinguishes the two substrates.
Gel coat introduces another variable. A sound, known gel coat may require a different process from cracked, weathered, wax-contaminated, or partly removed gel coat. Body filler, conversion coating, self-etch primer, rust converter, old paint, and unknown treatments create additional interfaces. The presence of epoxy in the next product does not establish compatibility with any of them.
For concrete, use only the chosen floor primer’s instructions. Do not transfer its roller choice, coverage, environmental limits, or topcoat schedule to an automotive or marine product.
Before purchase:
- Identify the material precisely: steel, aluminum, galvanized metal, anodized aluminum, conventional fiberglass, gel coat, SMC, concrete, or another substrate.
- Record whether it is bare, treated, filled, primed, or painted.
- Identify every resin, filler, cleaner, converter, etch product, primer, or coating already present.
- Find explicit approval for that substrate and condition in the current PDS.
- Verify the layer immediately below and immediately above the epoxy.
- Repeat the compatibility check for every later layer through the final topcoat.
- Request written manufacturer clarification if the proposed stack is not documented.
Fiberglass preparation: repair defects before asking primer to seal them
Fiberglass refinishing begins with diagnosis, not primer selection. Determine whether the part is conventional laminate, SMC, or another composite. Inspect the gel coat or existing finish, remove contamination by an approved method, expose and repair defects, establish the sanding profile required by the selected system, and only then apply primer.
A practical decision sequence is:
- Identify the construction. Determine the laminate, resin, gel coat, previous repair materials, and existing coatings as far as possible.
- Inspect before sanding. Look for cracks, delamination, bubbles, voids, pinholes, exposed reinforcement, weak seams, and old filler.
- Remove contamination correctly. Mold release, wax, silicone, oil, salt, polishing compounds, and moisture can interfere with adhesion. Sanding first can drive contamination into the surface.
- Expose and repair defects. Open damaged areas enough to determine whether the problem is superficial or extends into the laminate.
- Fair the repair. Use repair and surfacing materials approved for the laminate and intended paint system.
- Create the specified profile. Do not borrow a sanding grit from an unrelated product or market.
- Prime as directed. Apply the required film build under acceptable environmental conditions.
- Inspect again. A uniform sealing layer can make remaining pinholes, edges, and waves easier to see.
Visible weave, pinholes, voids, flash seams, waves, deep scratches, and low spots are repair or surfacing defects. Epoxy primer should not be presented as a replacement for laminate repair, filling, or fairing. Even a product advertised as having “fill” or “build” may not provide enough material—or the correct kind of material—to level them.
Use strong side lighting during inspection. During the later surfacing stage, a compatible guide coat can reveal highs, lows, and remaining scratches while block sanding. It does not replace inspection and repair of open defects before coating.
A forum-supported fiberglass workflow is:
- inspect and open defects;
- repair pinholes, bubbles, seams, and low areas;
- apply an approved epoxy sealing layer;
- apply a compatible high-build surfacer where leveling is required;
- guide-coat and block-sand the surfacer;
- continue with the documented sealer and topcoat system.
In a 2005 AutoBody101 discussion, a moderator described epoxy as the sealing layer and a polyurethane high-build surfacer as the leveling layer, with pinhole inspections before coating and again after epoxy. This is dated shop experience, not a current manufacturer schedule, but it illustrates the division of labor between sealing and surfacing. The AutoBody101 discussion describes that workflow.
Once weave is visible, applying more primer by default may hide rather than repair the problem. The correct response depends on how much material was removed and whether resin, cloth, filler, or fairing work is required. Agree on the repair with the paint-system supplier or finishing shop before sealing it.
A named marine hull procedure also emphasizes removing grease, oil, wax, salt, and other foreign material before sanding or priming fiberglass or gel coat. Its specified profile, coat sequence, and tack test apply only to the featured barrier-coat system. Bottom Paint Store describes the system-specific marine procedure.
Unresolved contamination requires more caution, not a stronger solvent selected by guesswork. Obtain instructions from the laminate, resin, filler, and coating manufacturers before sanding or coating.
If patching or laminate work remains, complete it before treating primer as the solution. See this fiberglass repair, resin, layup, and finishing guidance for relevant starting points.
Epoxy versus 2K urethane and polyester primer: choose by function
The useful question is not “Which primer is best?” It is “What must this layer do?”
| Coating type | Principal role | Relative build | Sanding or blocking role | Typical position in a compatible stack | Evidence limits |
|---|---|---|---|---|---|
| 2K epoxy primer or sealer | Adhesion, sealing, isolation, and product-specific moisture or corrosion control | Varies; do not assume high build | Some formulations are sandable; others primarily serve as sealers | Over an approved prepared substrate and beneath an approved filler, surfacer, sealer, or topcoat | Performance and sanding behavior vary substantially |
| 2K urethane primer-surfacer | Filling minor imperfections and supplying material for leveling | Commonly chosen for more build and faster surfacing than epoxy | Frequently guide-coated and block-sanded | Often over approved epoxy or directly over specifically approved substrates | Direct-to-substrate approval and timing are product-specific |
| Polyester filler primer | Heavy filling for extensive bodywork | Generally selected when substantial build is required | Used for aggressive leveling and often described as harder to sand | Used within a documented restoration stack and may require another compatible primer or sealer | Available guidance is product-specific and partly anecdotal |
Epoxy belongs primarily in the adhesion and sealing category. Some epoxy primers build and sand better than others, but neither property should be inferred from the word “epoxy.”
A 2K urethane primer-surfacer is often selected after epoxy when a surface needs faster build, filling, and block sanding. That does not mean every urethane surfacer can be applied directly to fiberglass, SMC, bare metal, or every epoxy. Verify substrate approval and intercoat procedure for both products.
Polyester filler primer is discussed for major bodywork that needs a thick surfacing foundation. Its filling ability comes with tradeoffs: it may be difficult to sand and may require another compatible primer or sealer before paint. One commercial instructional article presents polyester primer as an option for extensive bodywork while noting that it may be unnecessary when the surface is straight enough for a conventional 2K filler primer or sealer. Those recommendations concern a named process, not every polyester product. The comparison describes the heavy-build role and sanding tradeoff.
A function-based sequence is:
- Repair cracks, laminate damage, pinholes, seams, and low areas.
- Prepare the identified substrate to the approved profile.
- Apply an approved epoxy primer or sealer.
- Add a compatible urethane or polyester surfacer only where leveling is required.
- Guide-coat and block-sand the surfacer.
- Apply the specified sealer or continue through the documented topcoat sequence.
Experienced users disagree about whether an epoxy-only process is preferable. Some value a simpler system and accept slower surfacing. Others select urethane for build and speed or polyester for extensive leveling. These are workflow options only when the products and timing are compatible.
The available evidence does not support universal claims about shrinkage, finish quality, exact cure periods, or the corrosion performance of urethane on bare metal. Those results depend on formulation, film thickness, flash and cure conditions, and the complete stack.
Body-filler placement is also a system question. A manufacturer may claim improved filler adhesion without establishing that every polyester filler can be applied over every epoxy at any time. Confirm whether filler belongs above or below the epoxy, along with the allowed timing, abrasion, cleaning, and film build.
Aerosol or bulk: compare convenience, control, coverage, and waste
It avoids measuring components and cleaning a spray gun.
Neither format is universally better.
| Consideration | Activated aerosol | Bulk mixed system |
|---|---|---|
| Setup | Low; activate, shake, and spray as directed | Requires accurate mixing and suitable equipment |
| Job size | Often convenient for small parts or spot work | Better suited to larger areas or repeated applications |
| Mixing control | Components activate within the can | User combines the specified primer, activator, and any allowed reducer |
| Documentation | Retail pages may omit critical application data | Manufacturer pages and technical sheets often provide more detail |
| Waste | Unused activated material has a limited working period | Batch size may be adjustable only if the PDS permits partial mixing |
| Equipment | No spray gun, but masking and exposure controls remain necessary | Mixing tools, application equipment, cleanup, and air management may be required |
| Yield planning | Coverage must be verified at the required film build | Coverage must still be adjusted for film build, profile, loss, and coat count |
Do not activate it until preparation and masking are complete, environmental conditions are acceptable, and the spray plan is ready.
Before activation, answer:
- Is the exact substrate approved?
- Is all cleaning, sanding, repair, and masking complete?
- How much area will the can cover at the required film thickness?
- How many coats are required?
- What is the activated-can life?
- What are the flash and recoat requirements?
- How must unused activated material be handled?
- Do shipping, sales, or return restrictions affect the purchase?
Some aerosol listings classify the product as subject to hazardous-material transportation rules or state that aerosol paint cannot be returned. These are seller- and location-specific policies that can change. One supplied marketplace listing, for example, identifies a 12.7-ounce aerosol as non-returnable because of transportation regulation. The Amazon listing provides that package and return-policy information.
Bulk documentation shows why pot life and theoretical coverage must remain attached to a named formulation. Transtar lists a pot life of 72 hours at 77°F, theoretical coverage of 520 square feet per gallon at 1 mil, and optional reduction of up to 10% with specified reducers. Its product page displays “1:1:10%” without fully defining each element, so the linked technical sheet must govern actual mixing. Transtar publishes these product-specific figures and links its technical and safety documents.
The floor example is very different. SlipDoctors lists a pot life of three hours at 75°F, coverage of up to 300 square feet per gallon on smooth surfaces, and up to 150 square feet per gallon on rough concrete. These numbers illustrate the effect of surface profile; they do not estimate yield for an automotive or fiberglass project. SlipDoctors provides the floor-product figures and application conditions.
Theoretical coverage at an arbitrary thickness is not project yield. Account for:
- required dry-film thickness;
- number of coats;
- transfer and overspray loss;
- surface roughness and porosity;
- mixing and container loss;
- edges, repairs, and test panels;
- material that expires after mixing or activation.
Package price alone cannot establish value. A cheaper container may cost more per usable coated area if it cannot supply the required film build or leaves substantial activated waste.
Mixing, application conditions, pot life, and recoat windows
There is no reliable universal recipe for 2K epoxy primer. Build the workflow from the exact technical sheet.
1. Planning
Confirm the substrate, coating stack, quantity, working time, environmental limits, equipment, and safety controls. Stage all tools and materials before mixing or activation.
2. Surface preparation
Complete the specified cleaning, repairs, abrasion, dust removal, and drying. Avoid recontaminating the surface with bare hands, dirty air lines, unsuitable rags, or unapproved cleaners.
3. Mixing or activation
Use the exact primer, activator, and reducer named by the manufacturer. Follow the specified ratio, mixing method, induction time, straining requirement, and batch-size restrictions. For an aerosol, follow its activation and shaking procedure.
4. Application
Use the specified spray, roller, or other setup. Control coat count, wet-film thickness, flash time, overlap, edges, and difficult geometry.
5. Flash and recoat control
Record when each coat was applied.
6. Sanding and topcoating
Follow the manufacturer-specified interval and procedure for applying the next approved coat. Depending on the system, the process may permit direct overcoating or require sanding and cleaning. Inspect for contamination, defects, and sand-throughs before continuing.
Complete this worksheet before starting:
| Technical-data item | Project entry |
|---|---|
| Product, color, and part number | |
| PDS or TDS revision date | |
| Approved substrate and condition | |
| Required surface preparation | |
| Primer-to-activator ratio | |
| Named activator | |
| Induction time | |
| Allowed reducer and maximum amount | |
| Pot life or activated-can life | |
| Spray, roller, or other setup | |
| Required wet-film thickness | |
| Required dry-film thickness | |
| Number of coats | |
| Flash time between coats | |
| Sanding time and method | |
| Recoat interval and procedure | |
| Minimum and maximum conditions | |
| Cure conditions | |
| Compatible next coat | |
| SDS and exposure controls | |
| Waste-handling method |
Pot life is the usable working period after reactive components have been combined. It is a property of the formulation under stated conditions, not of “2K epoxy” as a category.
For the SlipDoctors floor product only, the vendor instructs users to mechanically combine the complete Part A and Part B containers rather than mix by hand or alter the proportions. It lists an application range of 45–120°F and requires the dry surface to remain at least 5°F above the dew point. Those instructions must not be transferred to another primer.
For Transtar only, the product page displays “1:1:10%,” identifies its specified activators, and permits optional reduction of up to 10% with named reducers. Because the page does not fully define the notation, read the current linked technical sheet before mixing.
A recoat window is the manufacturer-specified interval and procedure for applying a subsequent approved coating. It may include minimum and maximum times, environmental qualifications, and preparation requirements. Once the interval has passed, the instructions may require abrasion, cleaning, and sometimes another epoxy coat.
In one product-oriented forum discussion, quoted instructions distinguished recoating within seven days, between seven and fourteen days, and after fourteen days, with different preparation at each stage. Those intervals illustrate how a schedule can change as primer ages; they are not a universal epoxy timetable. The SPI forum thread reproduces those product-specific distinctions.
Marine systems may use a product-specific tack test instead of the same timing logic. That procedure does not become a rule for automotive, floor, or industrial primers.
Stop and check the exact system instructions when:
- a delay moves the job outside the specified recoat interval;
- the surface becomes contaminated while waiting;
- sanding exposes the substrate;
- the primer remains soft, unusually glossy, or otherwise outside its expected state;
- temperature or humidity leaves the permitted range;
- the next coat must be applied sooner than allowed;
- the proposed next coating is not expressly identified as compatible.
Safety and the final pre-purchase checklist
Obtain the current PDS and SDS for the exact primer, activator, reducer, and cleanup materials before purchase or activation. A product-family page is not enough when colors, catalysts, or regional variants may differ.
General retailer language such as “use ventilation,” “wear PPE,” or “use a respirator” is not sufficient to select respiratory protection. Use the current SDS and a competent exposure assessment rather than relying on generic coating advice.
Plan for:
- respiratory protection selected from the applicable hazard and exposure information;
- suitable ventilation or local exhaust;
- skin and eye protection;
- ignition control where required;
- safe mechanical mixing when specified;
- isolation of the application area from other people;
- spill containment and response;
- compatible storage of unopened components;
- handling of mixed or activated leftovers;
- storage and disposal of contaminated cleanup materials;
- disposal consistent with applicable local requirements.
Spraying introduces different exposure questions, and the correct controls must be determined from the exact SDS, application method, and exposure assessment.
Indoor and confined-area work requires particular attention. SlipDoctors states that good ventilation is necessary when its floor primer is applied indoors or in a confined area. That statement is specific to the named product; another coating may require different or additional controls.
The cited Sherwin-Williams system identifies chromated variants and explicitly limits the product to industrial-shop application. Treat that restriction as a firm routing instruction, not as a process to reproduce in a home workspace.
VOC values also vary by product and variant. Transtar lists different regulatory and actual VOC figures for its white, gray, and black primers, while Sherwin-Williams lists 2.8 lb/gal for its industrial system. These figures show why the exact primer, catalyst, reducer, and location matter; they do not establish compliance everywhere.
Use this go/no-go checklist before buying or mixing:
- [ ] I have selected the correct class: automotive aerosol, bulk automotive, marine, floor, or industrial.
- [ ] The current PDS explicitly approves my exact substrate and its condition.
- [ ] I know whether the material is conventional fiberglass, gel coat, SMC, concrete, or a particular metal.
- [ ] Existing paint, filler, treatment, and contamination have been identified or properly removed.
- [ ] Every layer in the proposed coating stack is documented as compatible.
- [ ] Cracks, pinholes, voids, exposed weave, and low areas will be repaired before priming.
- [ ] I have the current PDS and SDS for the primer, activator, reducer, and cleanup materials.
- [ ] The ratio or aerosol activation procedure is unambiguous.
- [ ] I understand induction time, pot life, coat count, film build, flash time, sanding procedure, and recoat window.
- [ ] Temperature, substrate temperature, humidity, and dew-point conditions are acceptable.
- [ ] Suitable application equipment and exposure controls are available.
- [ ] I have enough material for the specified film build after allowing for profile, loss, and waste.
- [ ] I have an appropriate disposal plan for mixed material, activated cans, solvents, and contaminated supplies.
- [ ] I will stop and obtain manufacturer guidance if actual conditions depart from the documented process.
This guide supports product selection and project planning; it does not replace current manufacturer documents or a competent exposure-control assessment.
Frequently asked questions
Can 2K epoxy primer go directly over bare fiberglass?
Sometimes, but not merely because the coating contains epoxy. Forum contributors commonly describe applying epoxy primer to properly prepared conventional fiberglass, yet that experience is not universal manufacturer approval.
First determine whether the part is conventional fiberglass or SMC. Then confirm that the exact primer’s current PDS approves the bare substrate. Follow its cleaning, drying, abrasion, film-build, and topcoat instructions. If the sheet names fiberglass but not SMC—or names neither—ask the manufacturer rather than inferring compatibility.
Does 2K epoxy primer fill pinholes and exposed fiberglass weave?
Do not rely on it to do so. Pinholes, voids, exposed weave, waves, low spots, and coarse scratches are repair or surfacing problems. Open and repair the defects, fair the area, and restore the appropriate surface before sealing it.
A compatible high-build urethane or polyester surfacer may follow epoxy when leveling is required, but only as part of an approved system. If aggressive sanding has exposed reinforcement, determine whether the laminate needs resin, cloth, filler, or fairing work instead of burying the weave beneath more primer.
Can I apply 2K urethane primer or body filler over epoxy primer?
Only when the technical documents for the specific products approve the combination and sequence. Many refinishing workflows place urethane primer-surfacer over epoxy for build and block sanding, and some epoxy manufacturers market improved body-filler adhesion.
Neither practice creates a universal rule. Confirm whether the next material is applied within the epoxy’s unsanded recoat interval, over fully cured and abraded epoxy, or elsewhere in the stack. Verify timing, cleaning, abrasion, and film-build limits.
How long does 2K epoxy primer remain usable after mixing or activation?
It depends on the formulation and conditions. The documented bulk examples vary from three hours at 75°F for the SlipDoctors floor primer to 72 hours at 77°F for the Transtar automotive primer-sealer. These figures apply only to those named products.
An activated aerosol also has a limited usable period, but the supplied SprayMax retailer pages do not provide a reliable activated-can-life figure. Obtain that value from current manufacturer documentation before activation and prepare the surface and work area first.
What happens if I miss the epoxy primer’s recoat window?
The next coat may no longer be permitted under the original procedure. Depending on the product, the remedy may require specified abrasion, cleaning, and another epoxy coat before continuing.
Do not improvise a sanding grit or assume that wiping the surface and spraying another coat will restore compatibility. Check the exact PDS, inspect for contamination and sand-throughs, and follow the manufacturer’s overdue-recoat procedure.
The final decision sequence is straightforward: identify the project class and exact substrate, then choose a product whose current data sheet expressly approves that use. Repair defects before priming, and treat epoxy primarily as an adhesion or sealing layer rather than an all-purpose leveler.
Before mixing or activation, verify the complete coating stack, environmental limits, pot life, film build, recoat procedure, SDS controls, and disposal plan. For fiberglass, the dependable approach is to coordinate laminate repair, defect filling, epoxy sealing, any required high-build surfacing, and the final topcoat as one documented system.